How to install mods for Car City Driving: Three ways!
Mods for City Car Driving make the gameplay even more interesting and diverse. In the game you can add dozens of new cars, improve the interface, add weather effects and much more.
There are different ways to install mods for this game. Below are three methods: through Steam Workshop, manually and with the help of a special program.
Method 1: Installing mods via Steam Workshop
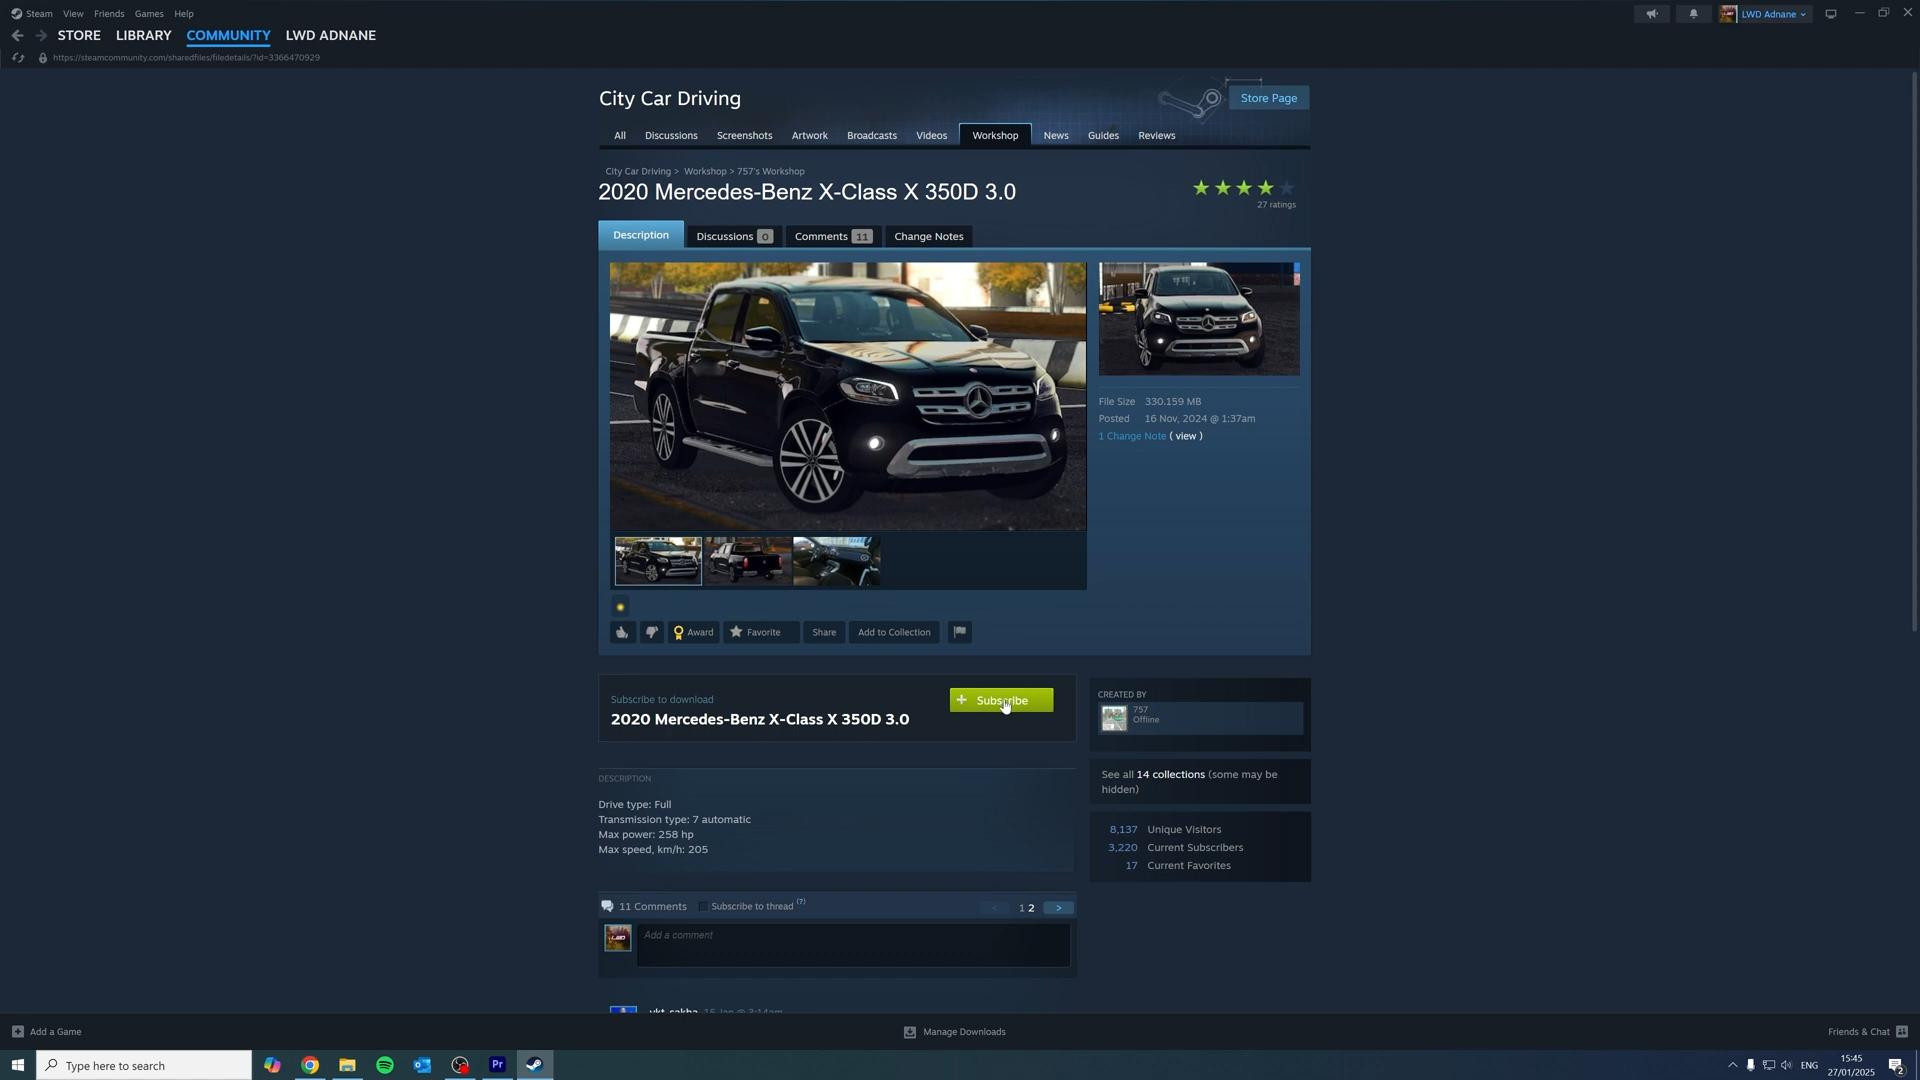
If you have purchased City Car Driving on Steam, the easiest and fastest way to install mods is to use the built-in Workshop system. It contains quite a few mods and it's easy to install them with a single click - without archiving, copying files or editing code.
To install a mod via Workshop:
-
Open the City Car Driving game page in Steam.
-
Click the Workshop tab.
-
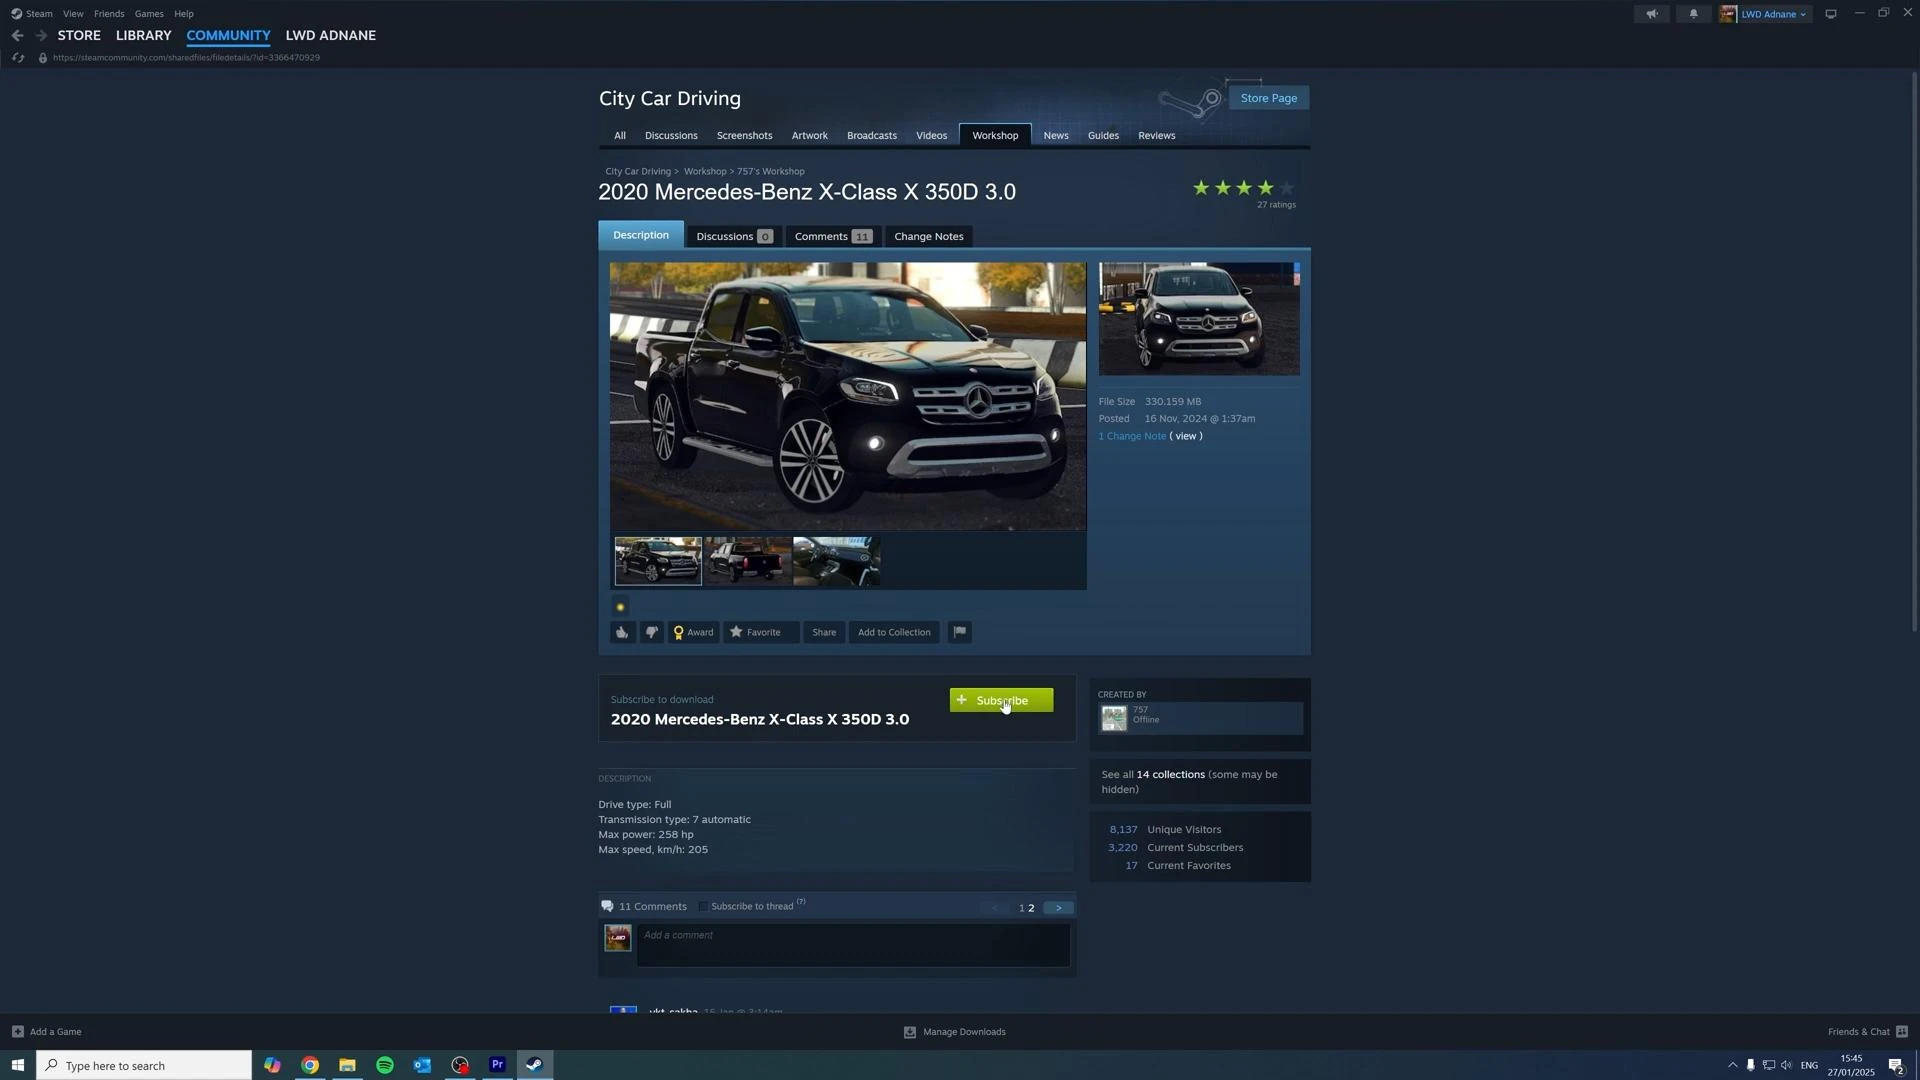
Find the mod you are interested in (e.g. Mercedes-Benz car).
-
Click the Subscribe button. The mod will automatically start downloading.
-
Wait until the download is complete, then start the game.
-
The installed mod will appear in the list of available vehicles in the Custom section when you select a vehicle.
This method only works with mods published in Steam Workshop and is only available for the licensed version of the game in Steam. If you don't use Steam, you can use the methods below.
Method 2: Manual installation of mods (via archive)
For mods downloaded from third-party sites, installation is done manually. This method is a bit more complicated. But it opens access to a much larger number of modifications.
Let's get started:
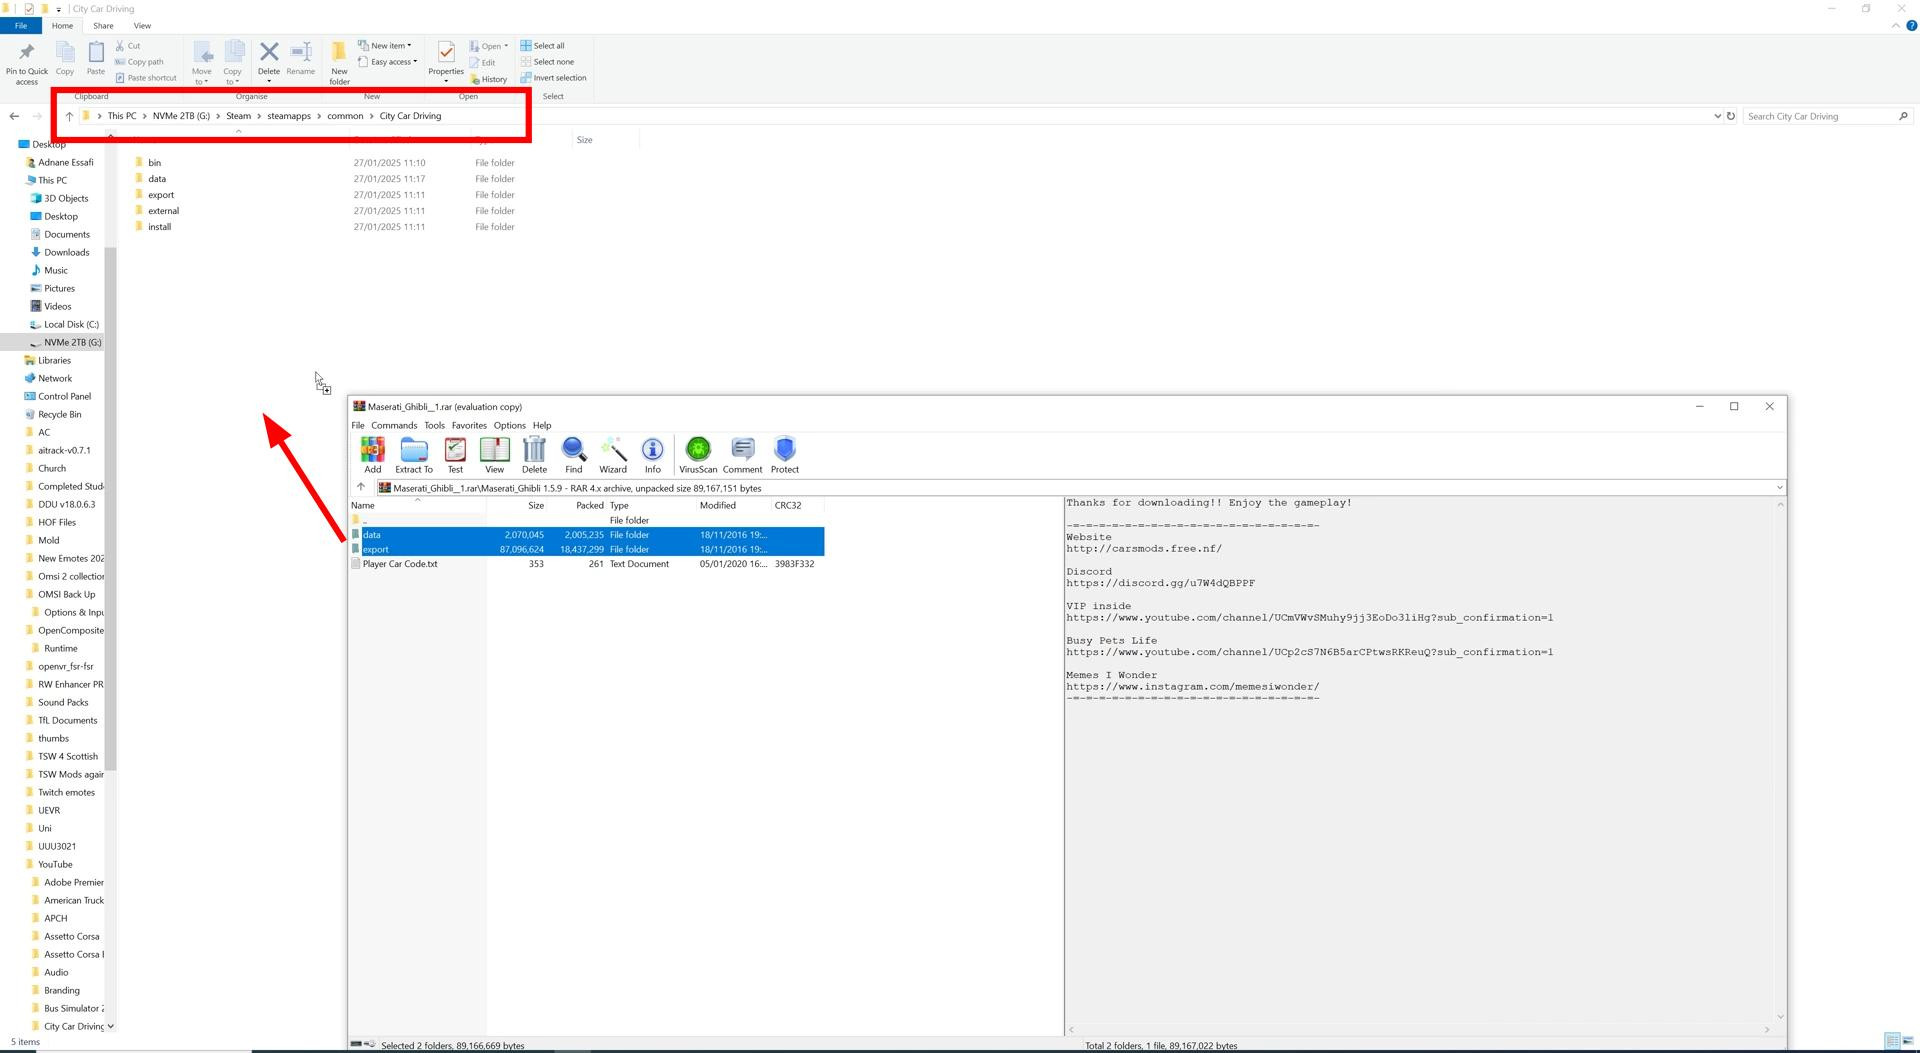
First, download the archive with the mod (usually in .zip or .rar format) and unzip it. In most cases you will get two folders - data and export, as well as a text file with the car code.
Open the folder with the game installed. If you are using Steam, the path will be like this:
C:\Program Files (x86)\Steam\steamapps\common\City Car Driving
Copy the unpacked data and export folders to the root folder of the game with confirmation of replacement.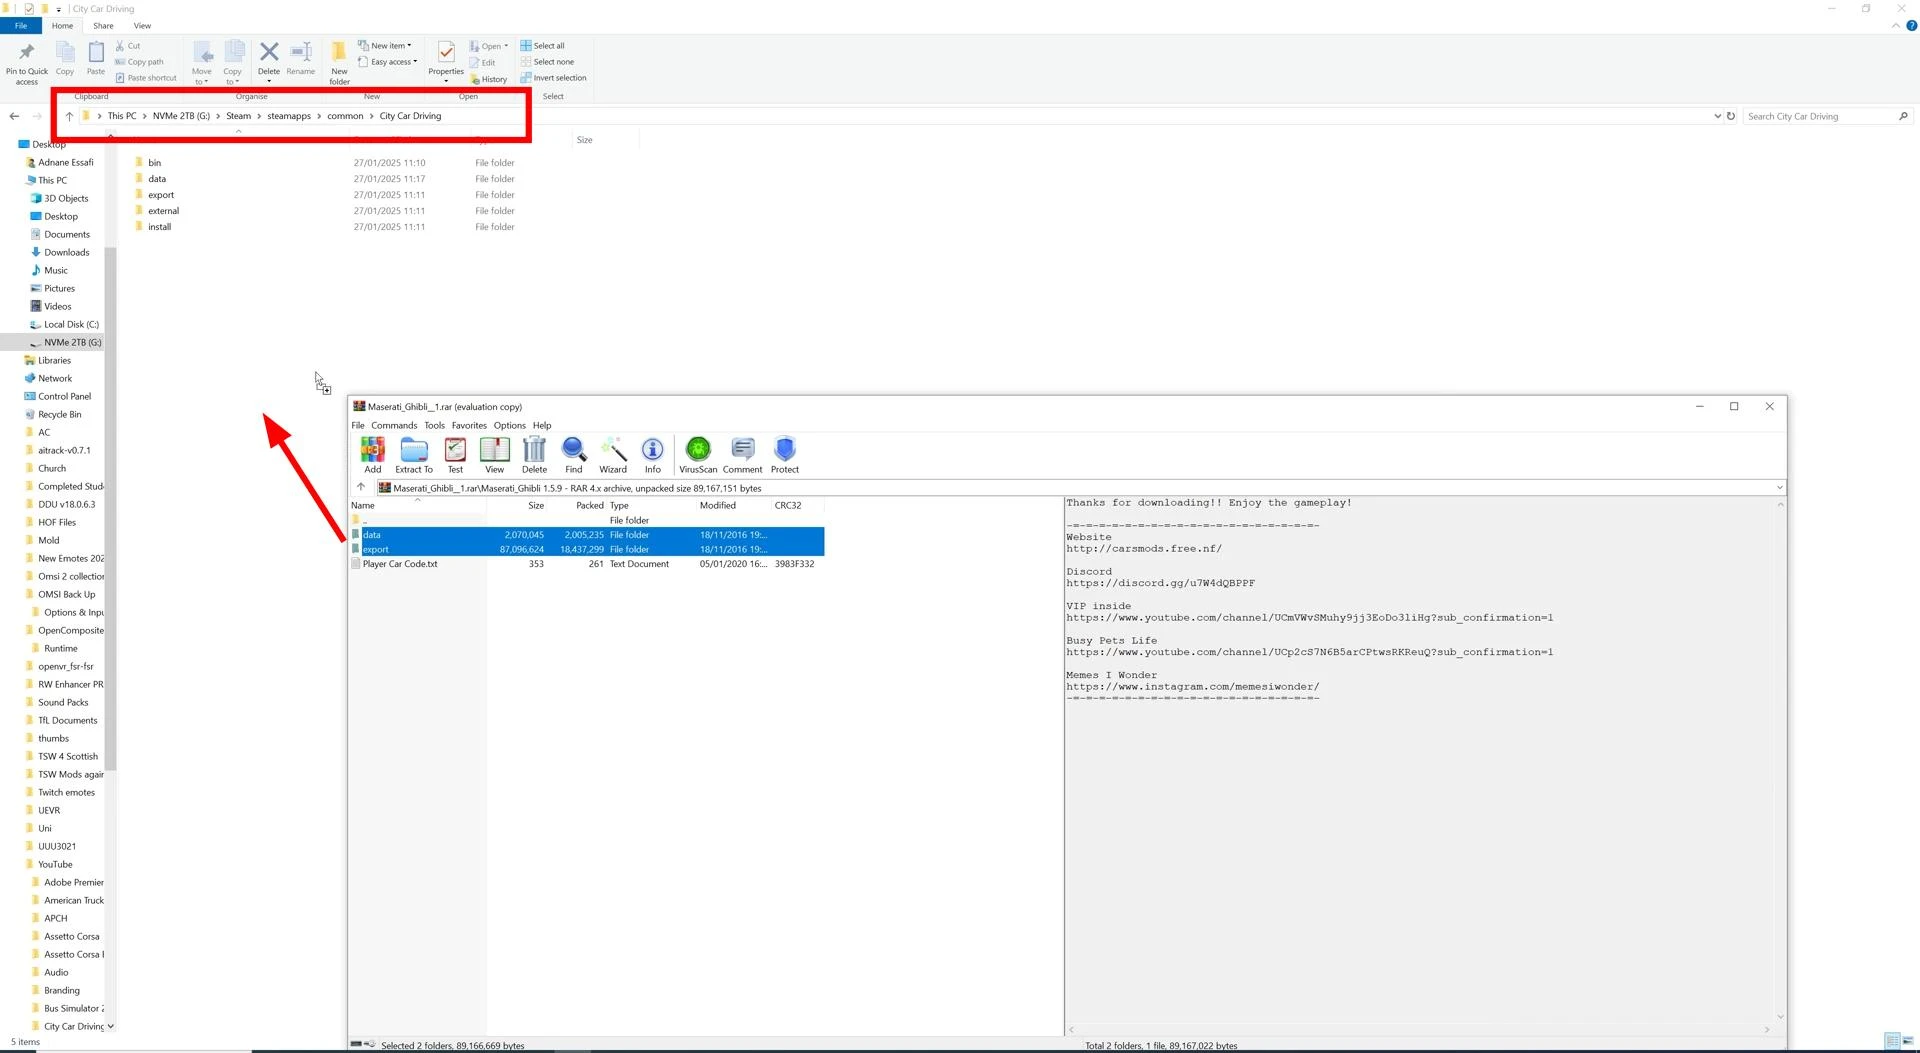
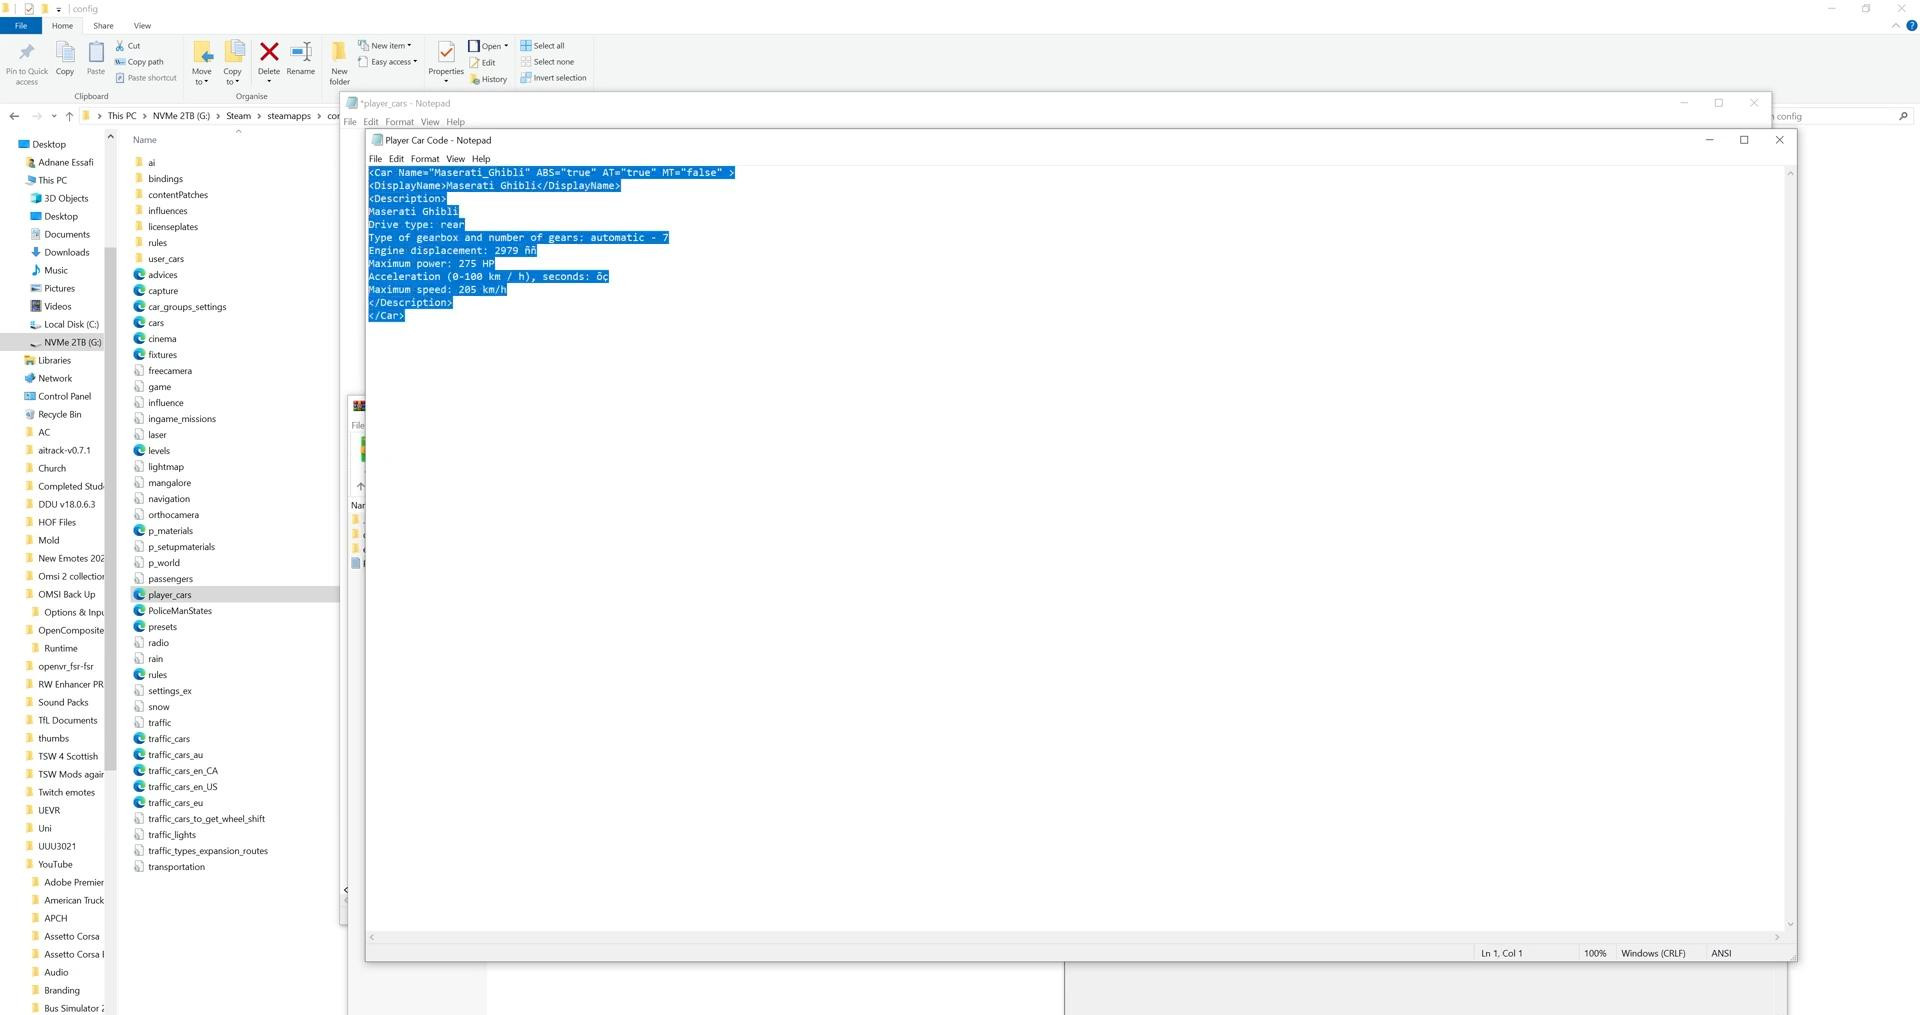
Then open the player_cars.xml file, which is located at the following path:
City Car Driving\data\config
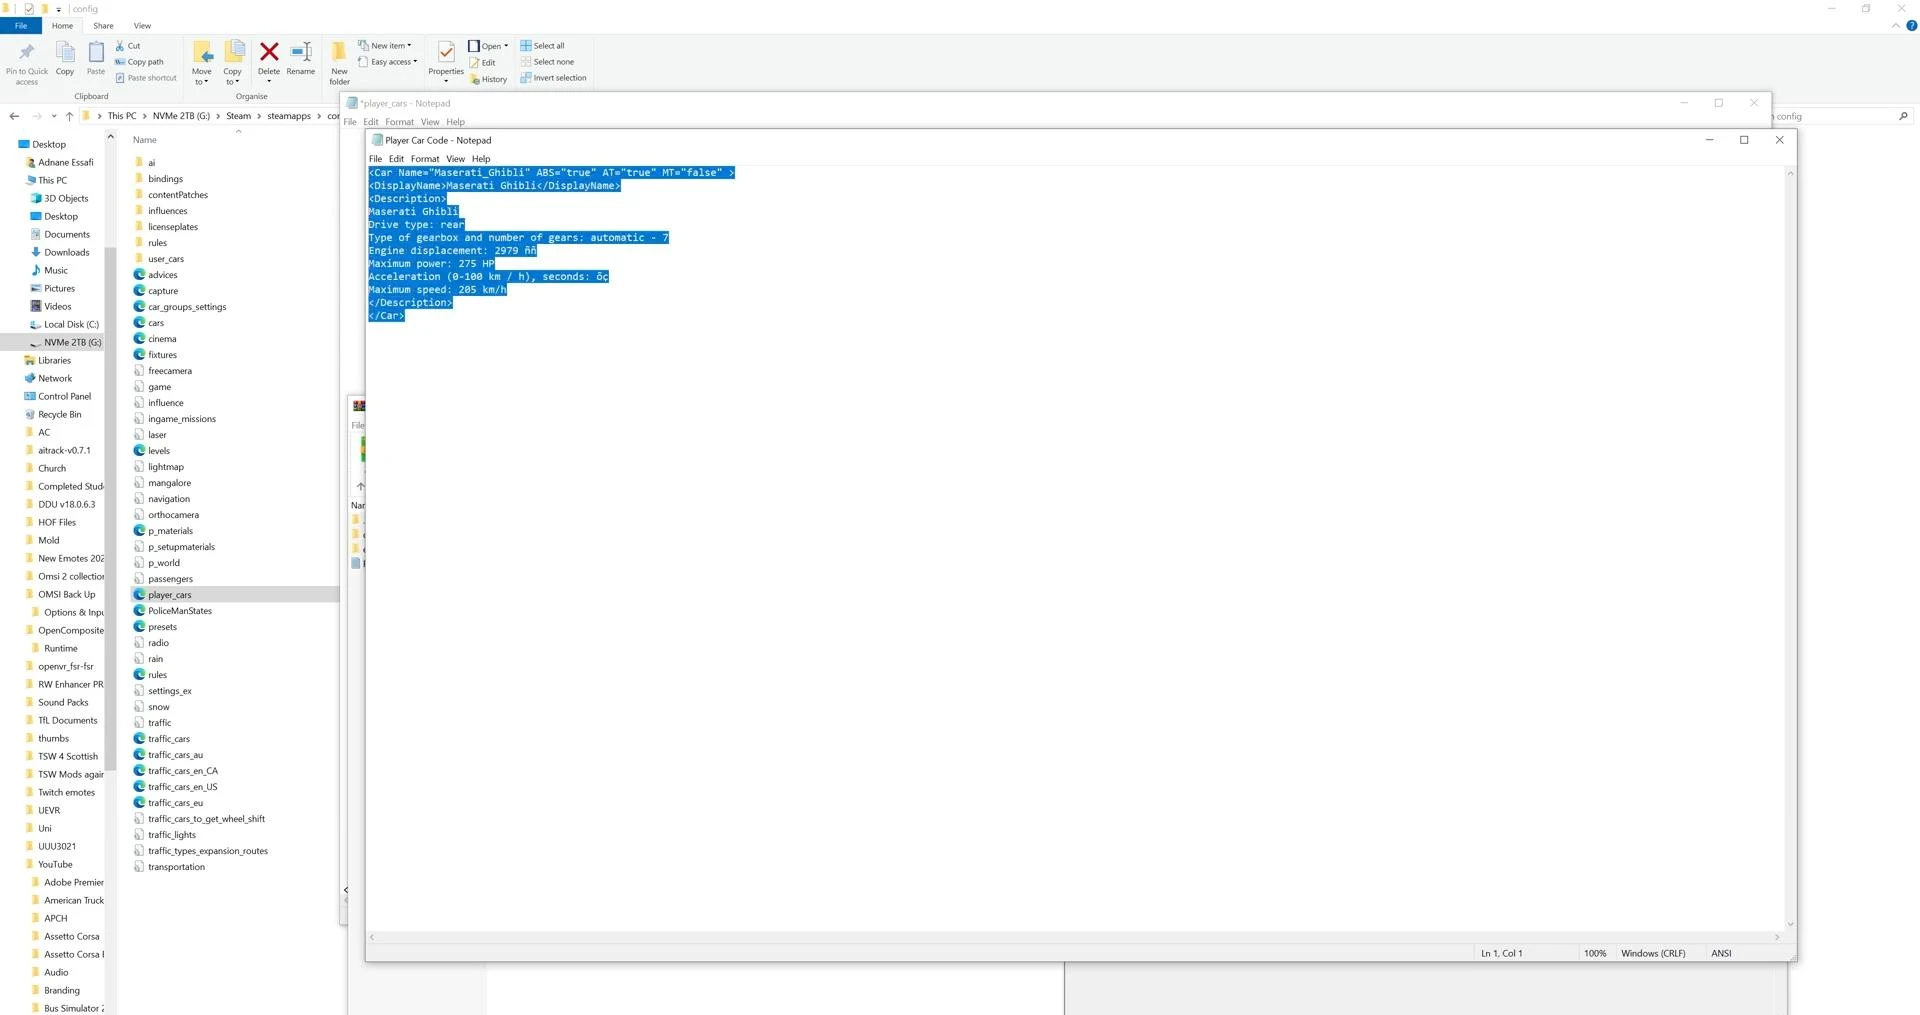
Open it in Notepad and paste the car code from the text file before the closing </cars> tag. Save the changes.
The modification will now be available in the game.
Method 3: Automatic installation via CCD Mod Installer
A very easy and convenient way to install mods in CCD is to use Mod Installer. This is a special program that automatically installs modifications in the game. You just need to select the file and confirm the installation. How to do this read below.
First run the program, specify the path to the mod file and to the installed game, then click Install Mod. If the mod contains additional features (extras), select them before installing.
The mod will be installed automatically. To uninstall it, use the Uninstall Mod button in the same program.
How to check that the mod is installed
After starting the game, open the Free Driving mode or Career mode. Switch to the Custom section in the vehicle selection menu. The installed mod should appear in the list of cars. Sometimes the car image may be missing, but the car will still work. Lack of texture may indicate incompatibility of modification files with the game version, or problems with the mod itself.
Videos
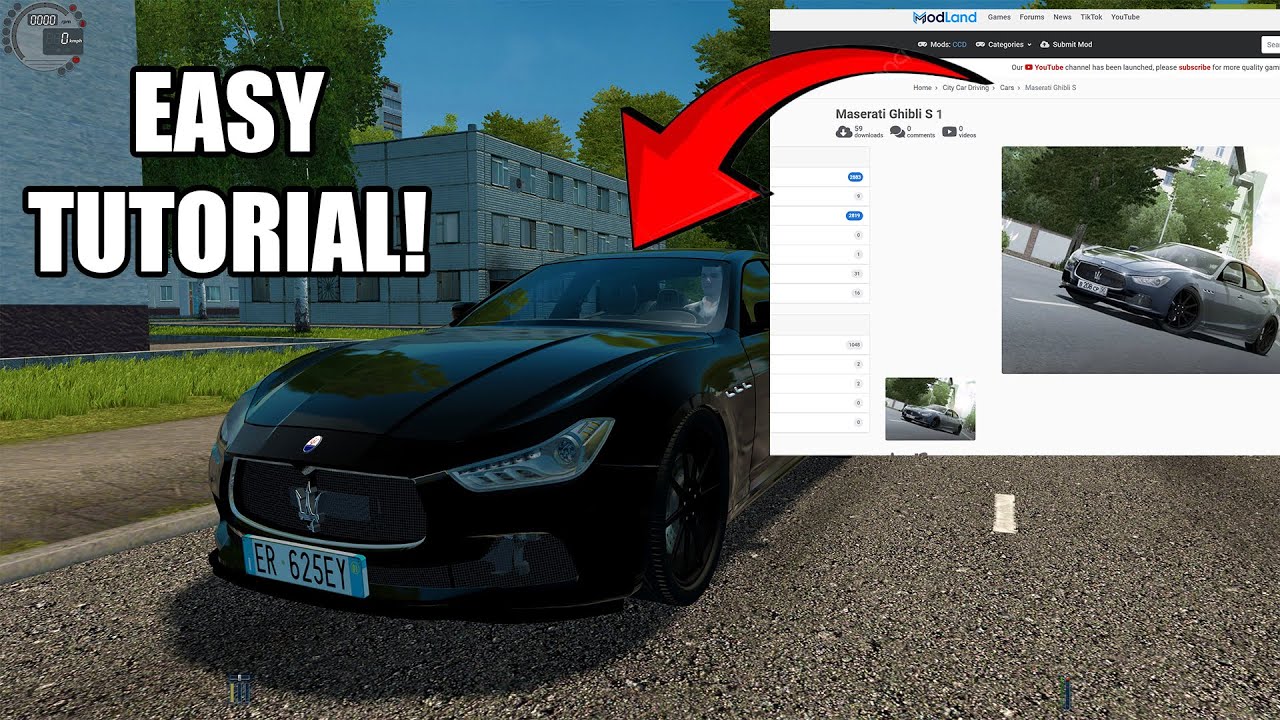
Added by
![BMW M5 E60 V 2 [1.5.9]](https://li1.modland.net/city-car-driving-mods/cars/thumbnail/bmw-m5-e60-v-2-[1.5.9]_ModLandNet-4.jpg)

![Mercedes W210 E270 CDI [1.5.9]](https://li1.modland.net/city-car-driving-mods/cars/thumbnail/mercedes-w210-e270-cdi-[1.5.9]_ModLandNet-3.jpg)