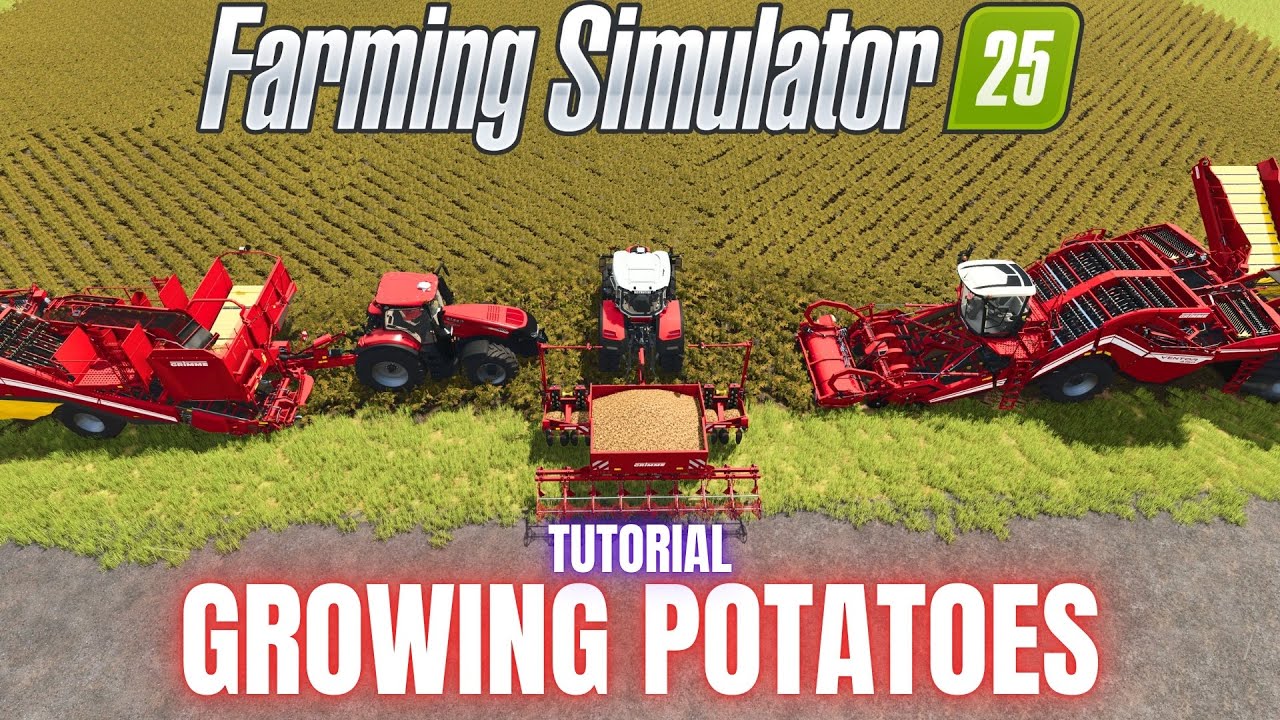
How to Grow Potatoes in FS25: Full Step-by-Step Guide
-lg_modland.jpg)


-lg_modland.jpg)


Potatoes are one of the most resource-intensive and labor-intensive crops in Farming Simulator 25. Growing them requires attention to detail, patience, and a competent approach at every stage. But this crop can bring in a good profit, especially if you use the potatoes you grow in production chains.
This guide is designed to show you the entire potato growing process step by step.
Preparing the field for planting potatoes in Farming Simulator 25
Before you start growing potatoes in Farming Simulator 25, you need to prepare the field properly.
This is not just a recommendation — it is a prerequisite if you want to get a high yield and avoid problems during planting and harvesting.
Preparation includes several important steps: checking the condition of the soil, plowing, removing stones, and, if necessary, adding lime.
Checking the condition of the field
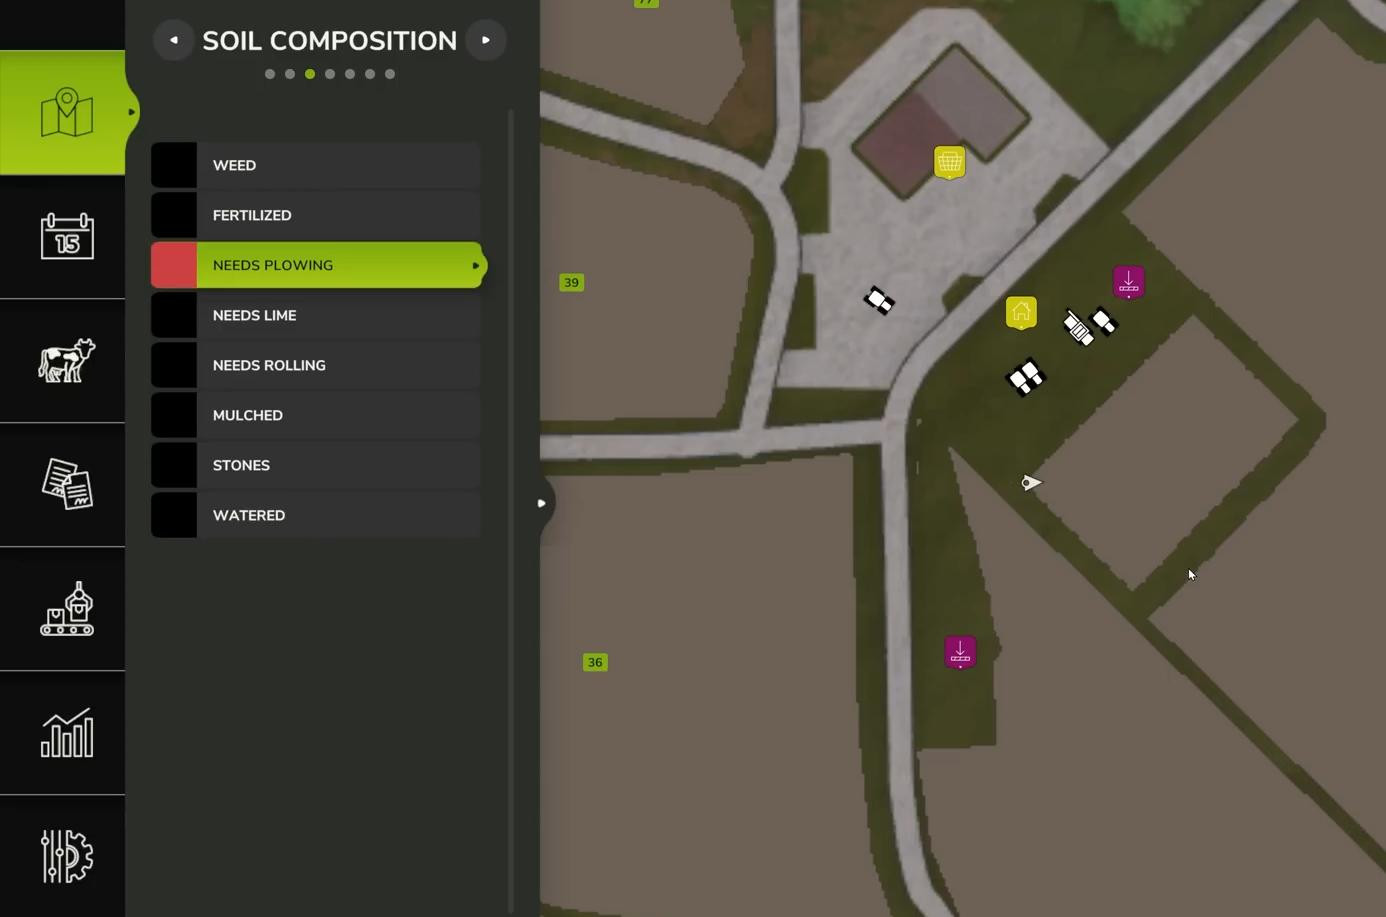
The first thing to do is open the map and go to the “Soil Composition” section.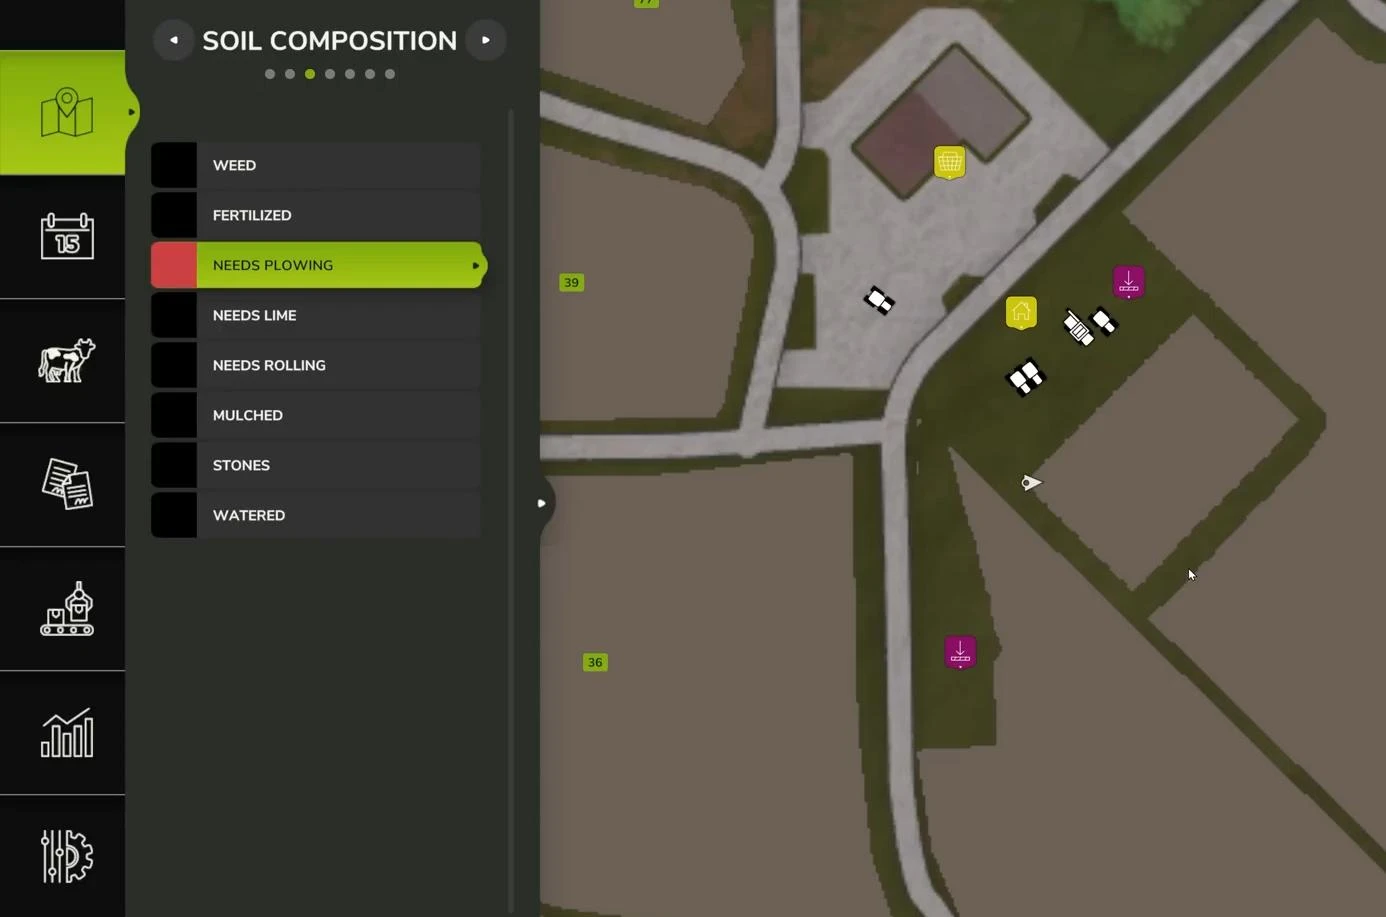
Here you can see the current characteristics of the plot: whether plowing is required, whether there are stones, and whether the field needs liming.
If the plot is highlighted in red, it means that it requires plowing. If the “Periodic Plowing” function is enabled in the settings, you will need to plow the field again before planting. Simple cultivation of the field is not enough.
Plowing and choosing equipment
If the field requires plowing, conventional cultivators, disc harrows, and spring cultivators will not help.
Only three types of equipment are suitable for eliminating the “plowing required” condition: a plow, a subsoiler, and a cutter (Spader).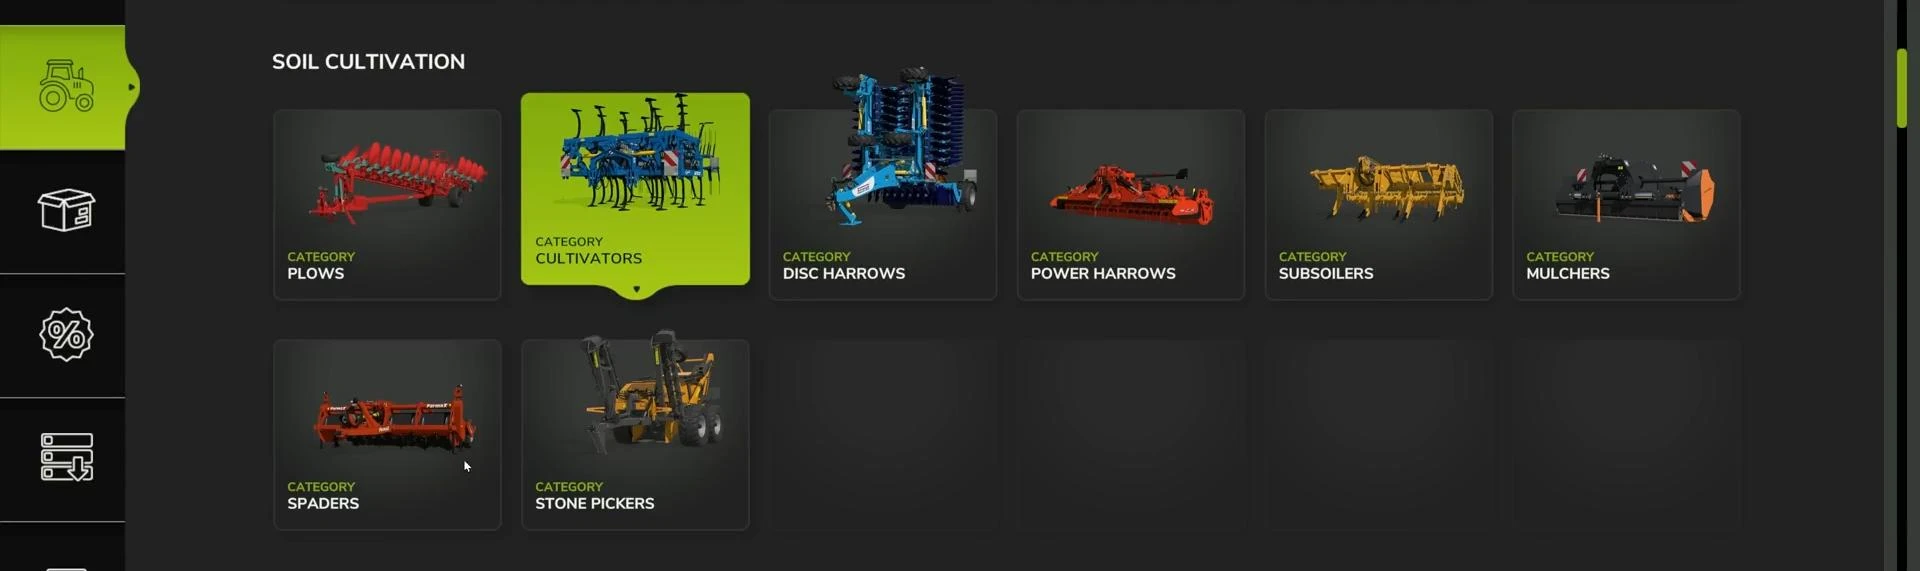
These are the tools that can turn over the top layer of soil and prepare it for planting potatoes.
Choosing the wrong tool will result in the field remaining in an unsuitable condition, and planting simply will not begin.
Stones in the field: should they be removed?
If the stone appearance mechanic is enabled in the settings, stones will appear on the surface of the field after cultivation. Their presence does not affect the yield, but it does significantly increase equipment wear.
Stones are divided into three categories:
- small;
- medium;
- large.
To remove them, you need to use a stone picker. But in the case of small stones, there is a more convenient way. After planting, you can roll over the field with a roller. This will roll the stones back into the soil and at the same time give a small bonus to the yield.
Planting potatoes in Farming Simulator 25
Once the field is fully prepared, you can start planting potatoes. This process differs from planting most other crops in the game, as it requires the use of specialized equipment and certain resources.
Potatoes are root crops, and they cannot be planted using standard seeders. Separate planters are provided for working with this crop, which can be found in the “Potato Planters” section of the in-game store.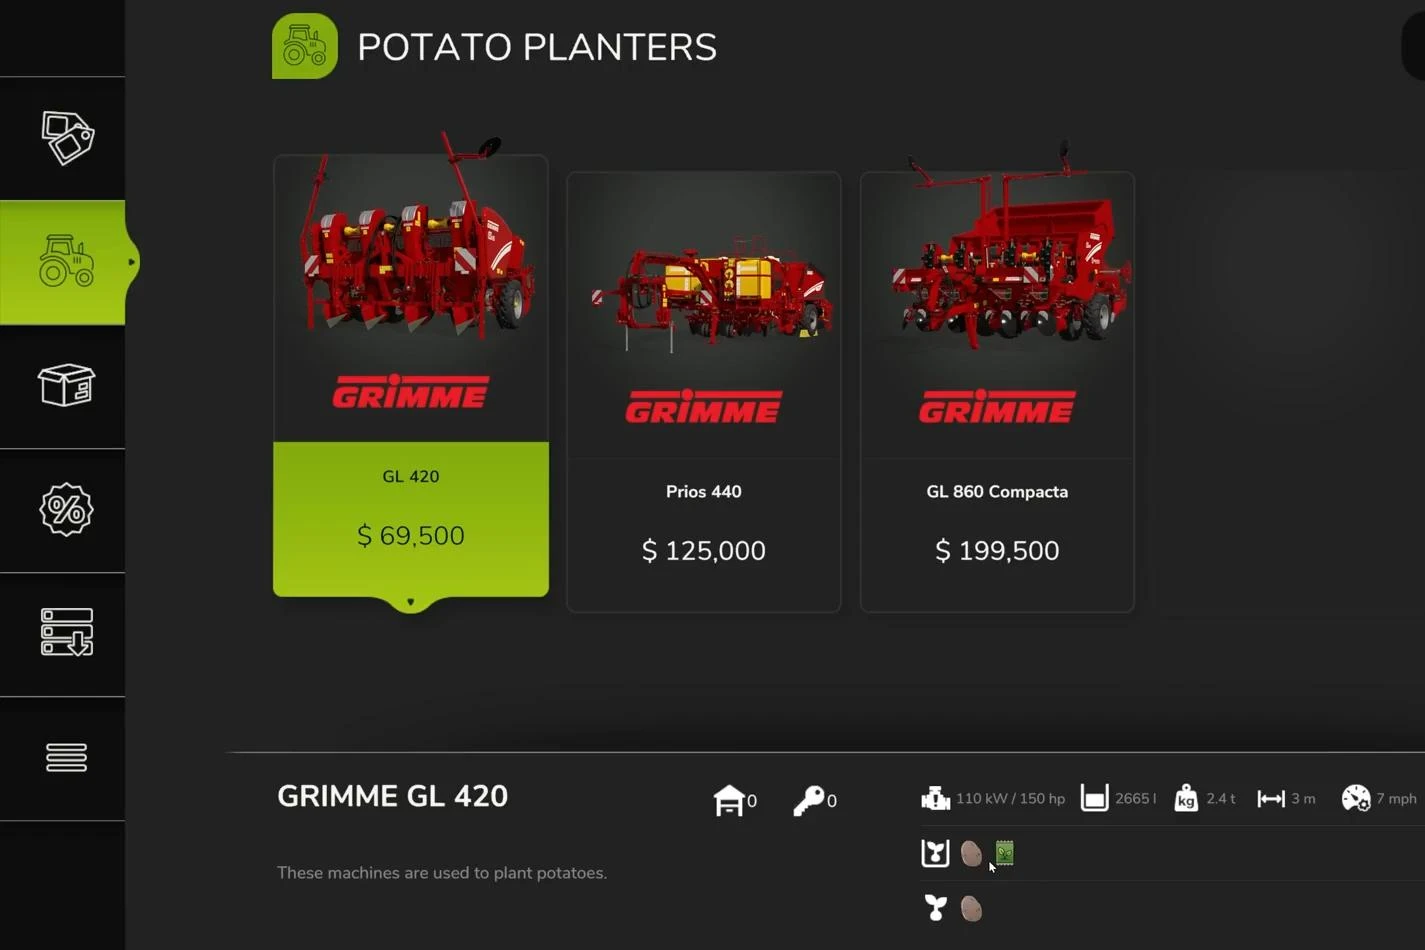
All basic potato planters in Farming Simulator 25 do not support direct sowing. Therefore, the field must be plowed or cultivated beforehand. The choice of a specific planter depends on your preferences and resources. Three planter models are available in the basic version of the game. Two of them have a working width of 3 meters, and the third, more productive one has a width of 6 meters. The latter model can also apply fertilizer during planting. This allows you to save time and resources during the crop care stage. However, this planter requires more tractor power and the availability of solid fertilizer in your inventory.
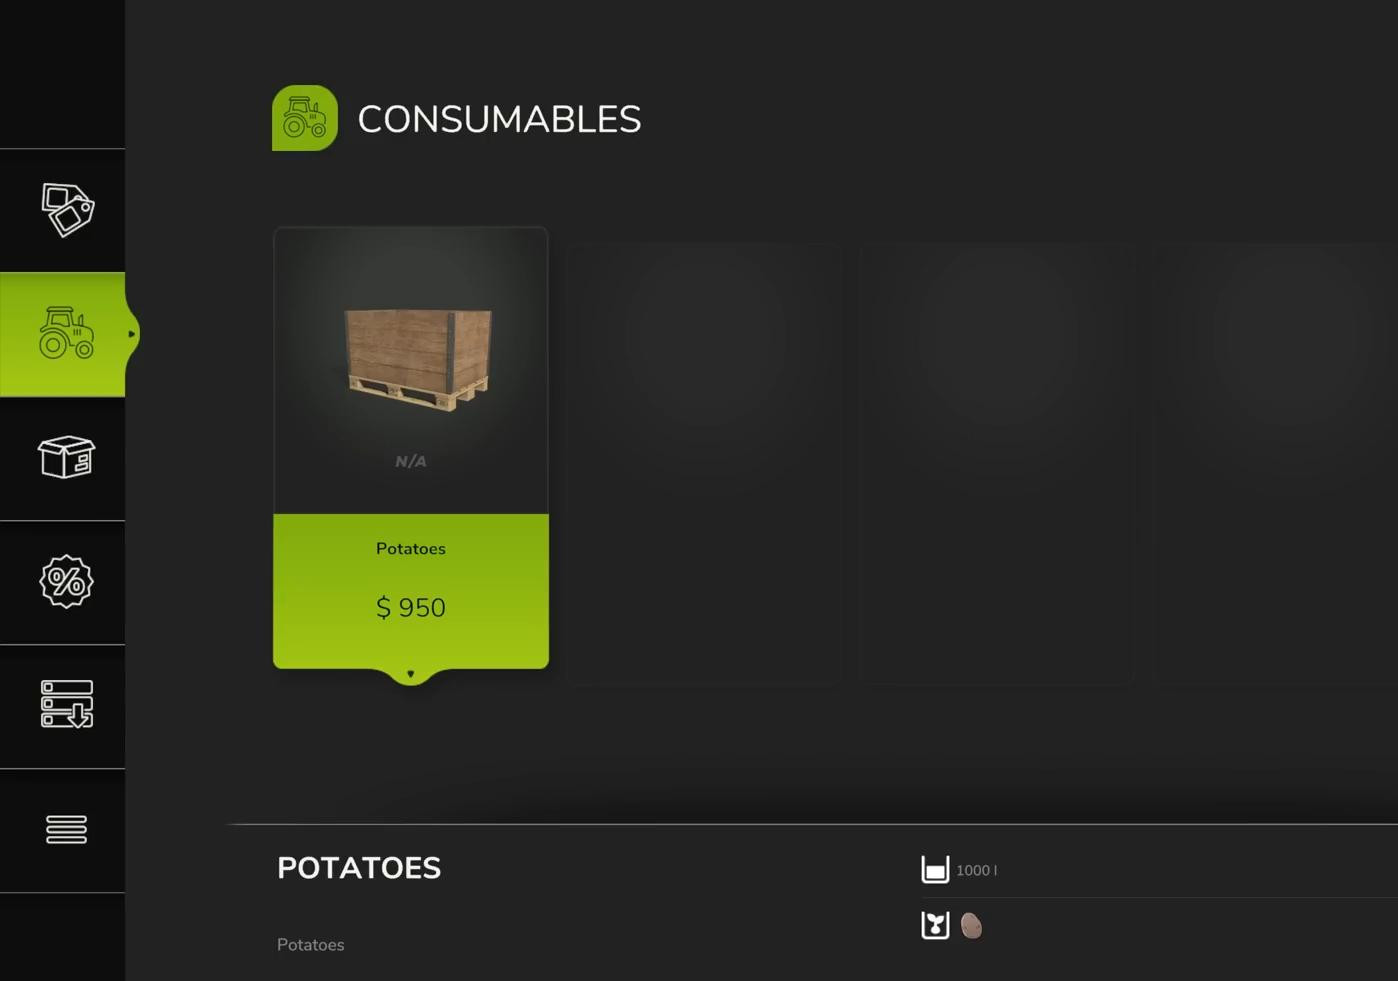
You can buy potatoes for planting in the appropriate section of the store.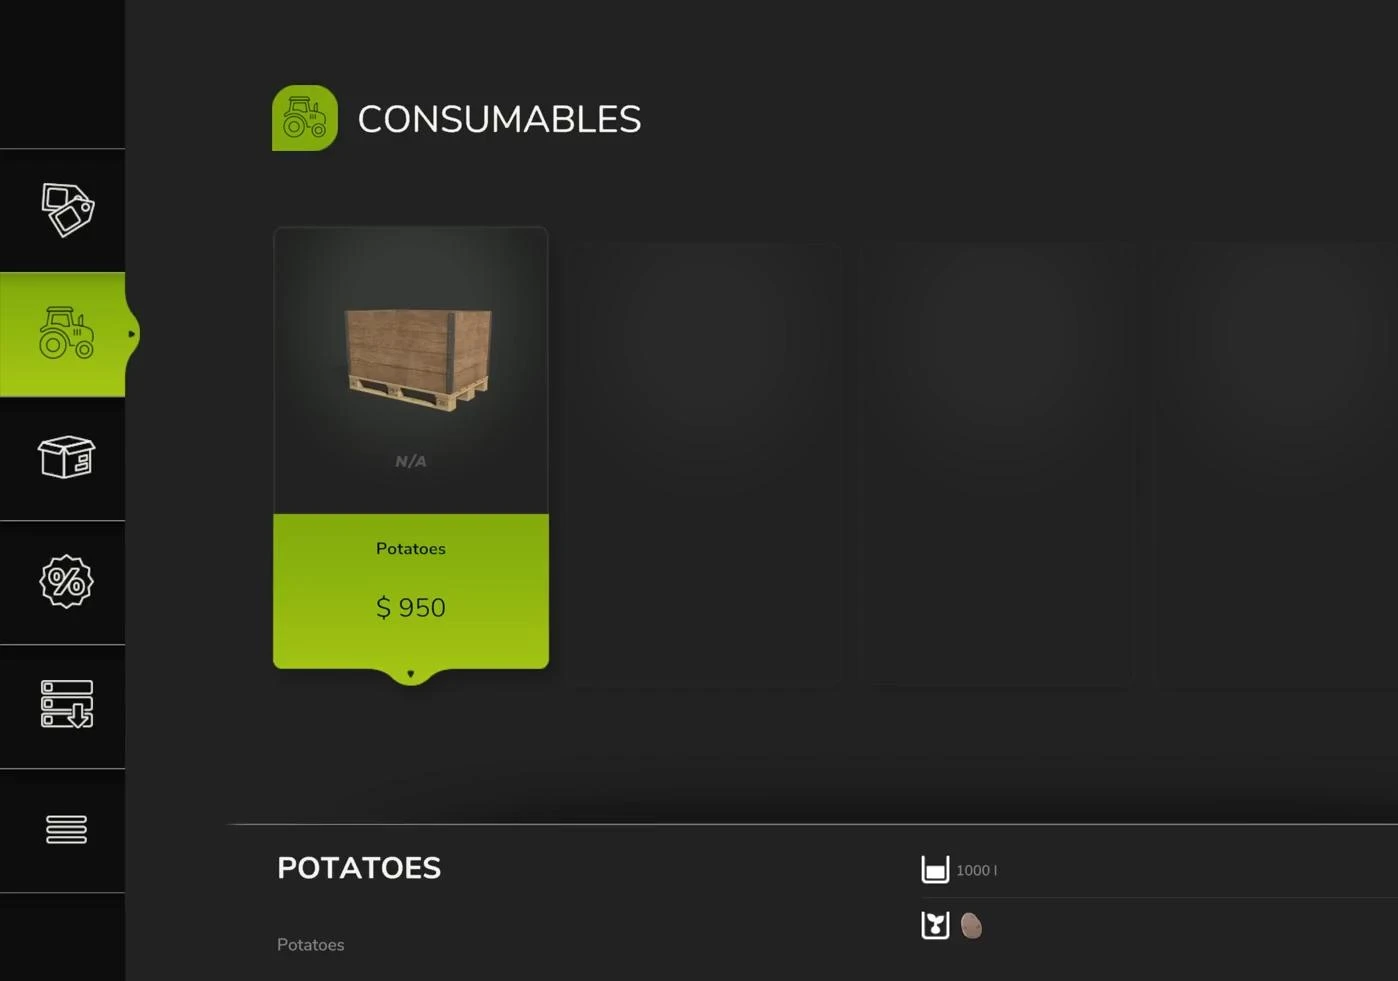
After the first harvest, you can reuse some of the harvested potatoes by simply loading them into the planter using a front loader. The cost of planting in subsequent cycles will be lower.
Second, after the first harvest, you can reuse some of the harvested potatoes by simply loading them into the planter with a front loader. The cost of planting in subsequent cycles will be lower.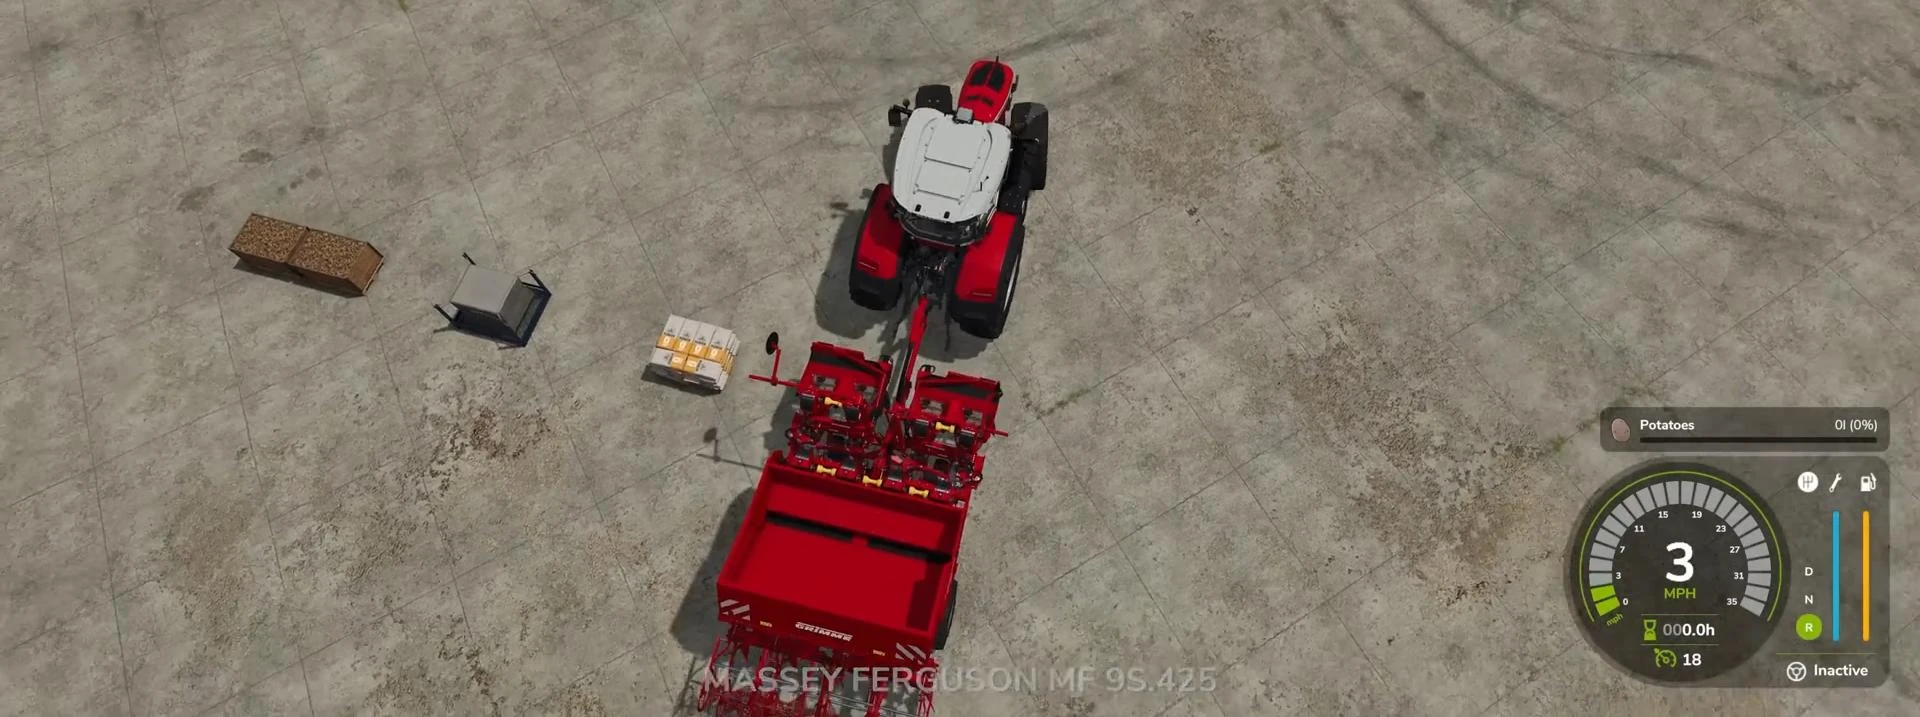
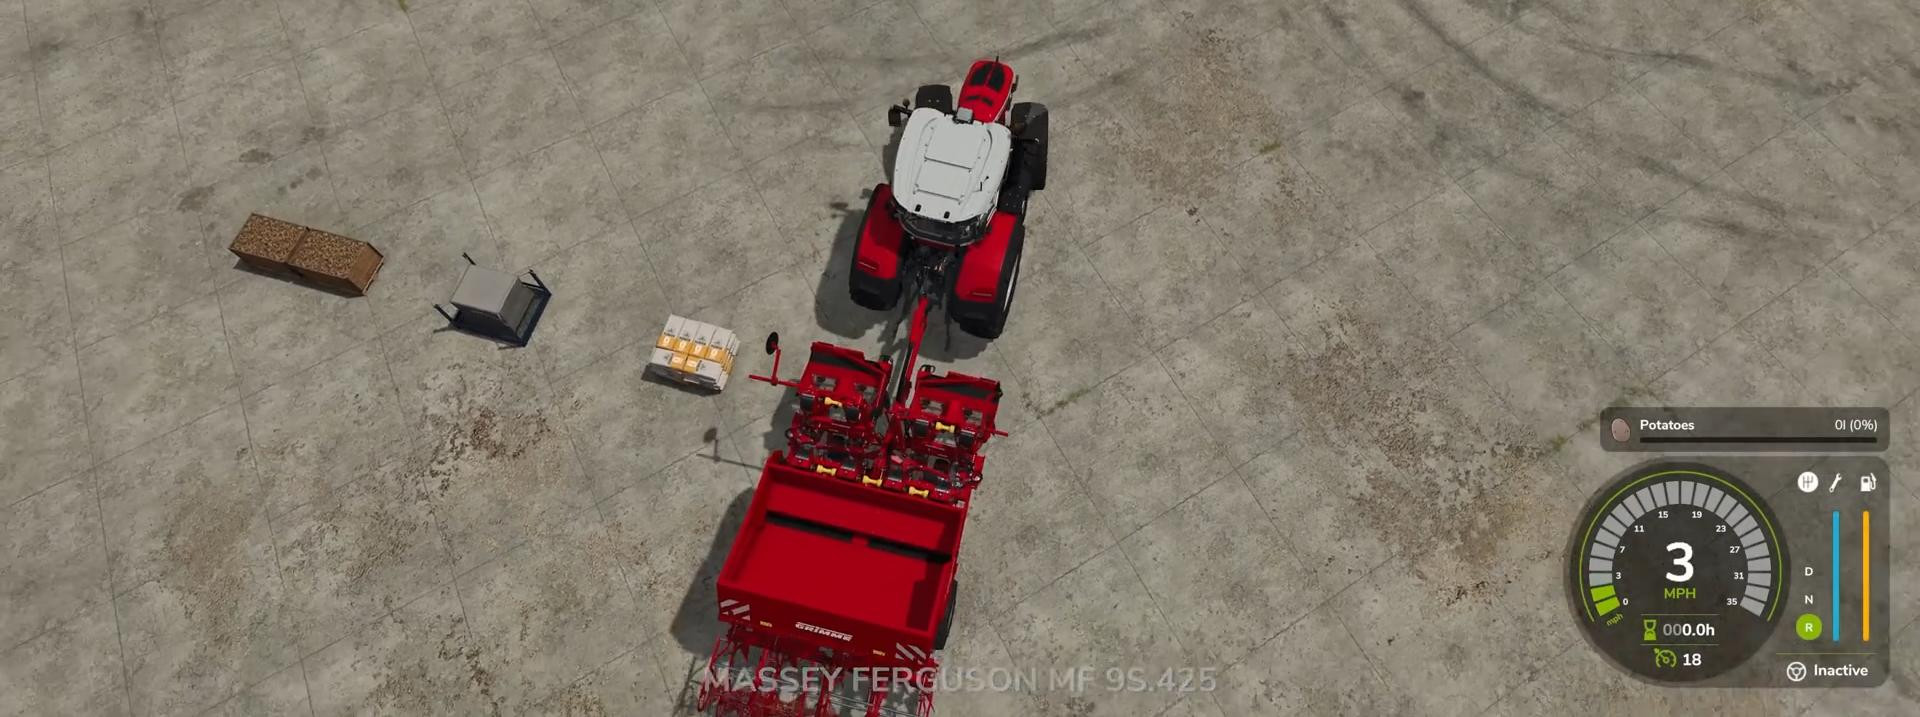
The planting process begins with filling the planter. To do this, simply drive up to the pallets with potatoes or seeds and activate the loading process. After that, you need to unfold the equipment, lower it into the working position, and start moving across the field.
Planting potatoes requires a large amount of planting material. Even a small field can take more than 1,600 liters of potatoes or seeds. In the early stages of the game, this can seriously hit your budget.
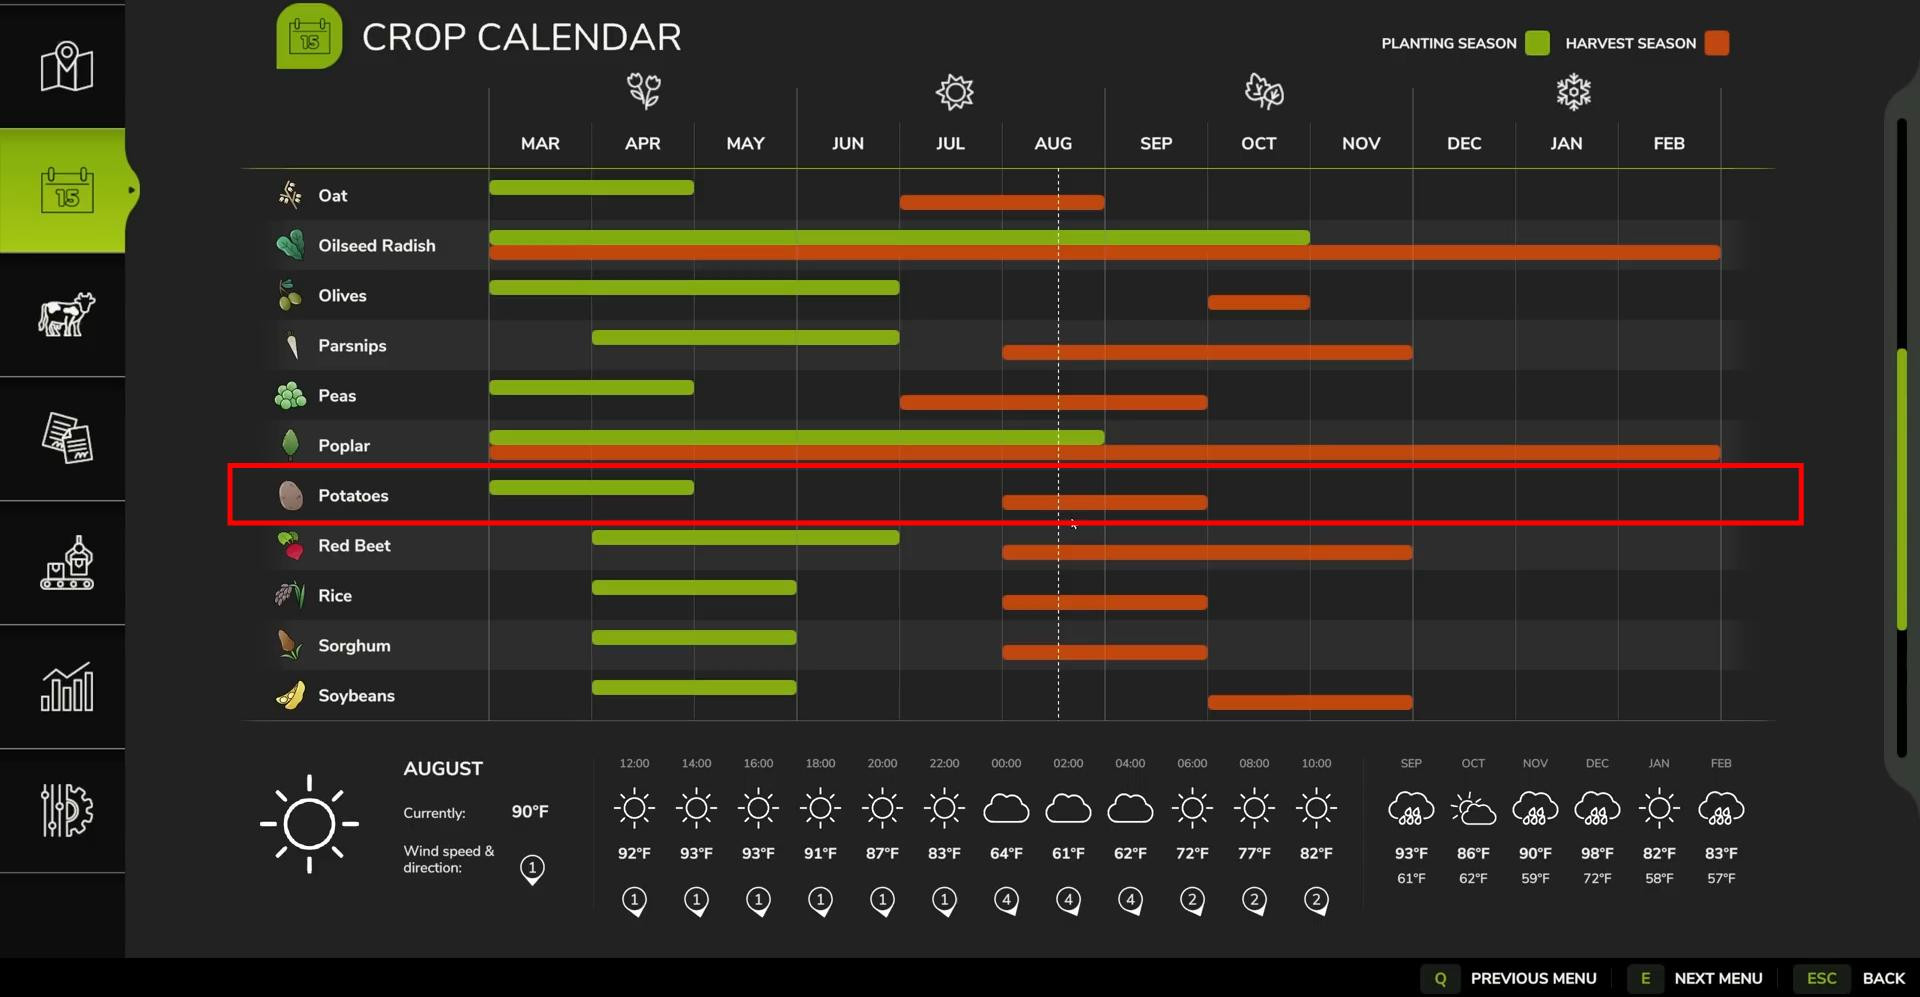
If the seasonal growth feature is activated, you need to keep an eye on the calendar.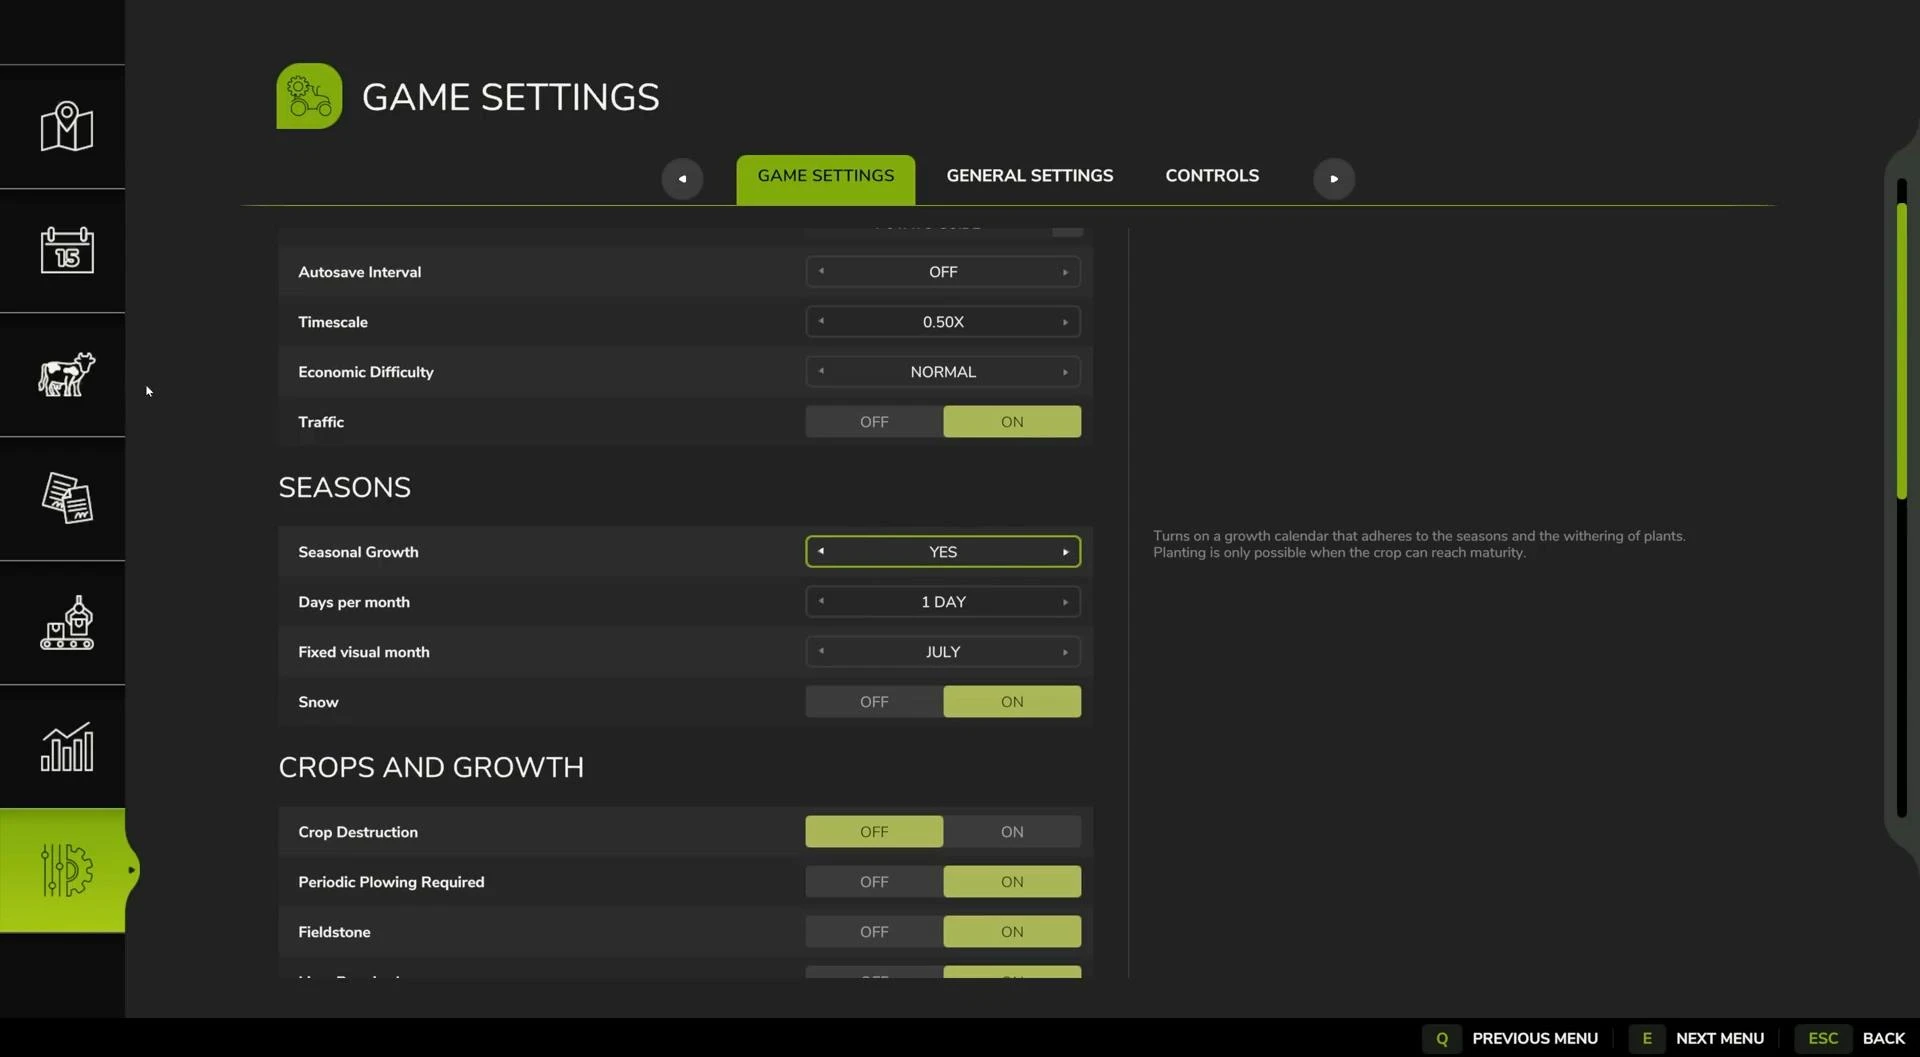
In this mode, potatoes can only be planted in certain months — March and April — and harvested in August and September.
If planting or harvesting is done outside of these time frames, the potatoes will either not grow or die. If seasonal growth is disabled, you can plant and harvest potatoes at any convenient time, without being limited by the calendar.
The field where potatoes are planted will be displayed in light green in the “Growth” section of the game menu.
But over time, it will become darker.
Caring for potatoes in Farming Simulator 25: a detailed guide without rushing
Potatoes, like any other agricultural crop, require proper care. Weeds will grow in the field, so from time to time they will need to be removed using special equipment. The field will also need to be fertilized constantly.
To get a high yield, each step must be performed at the right time and with an understanding of why it is necessary.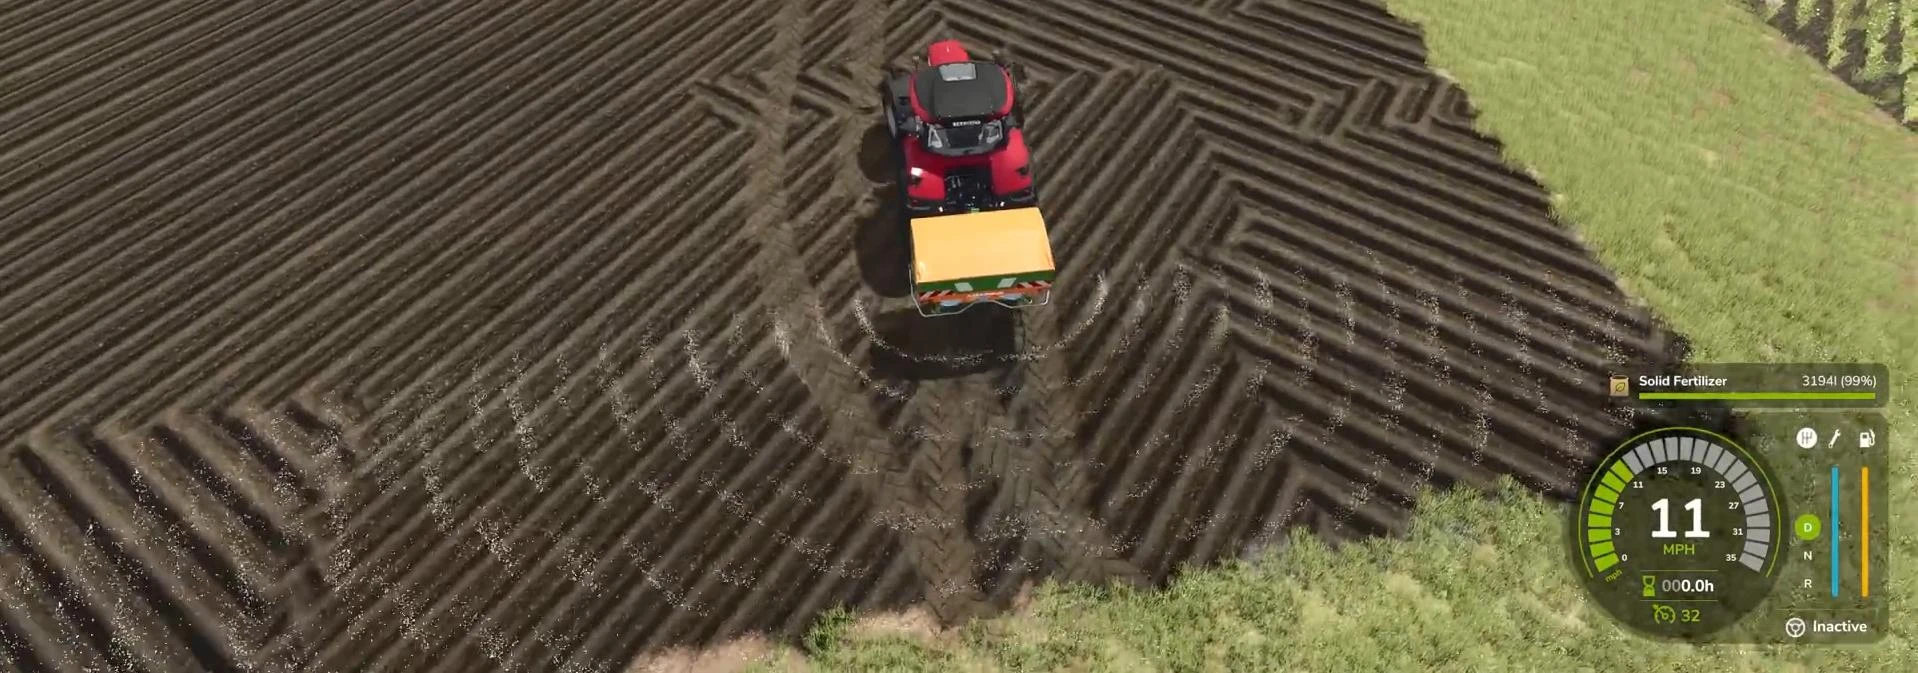
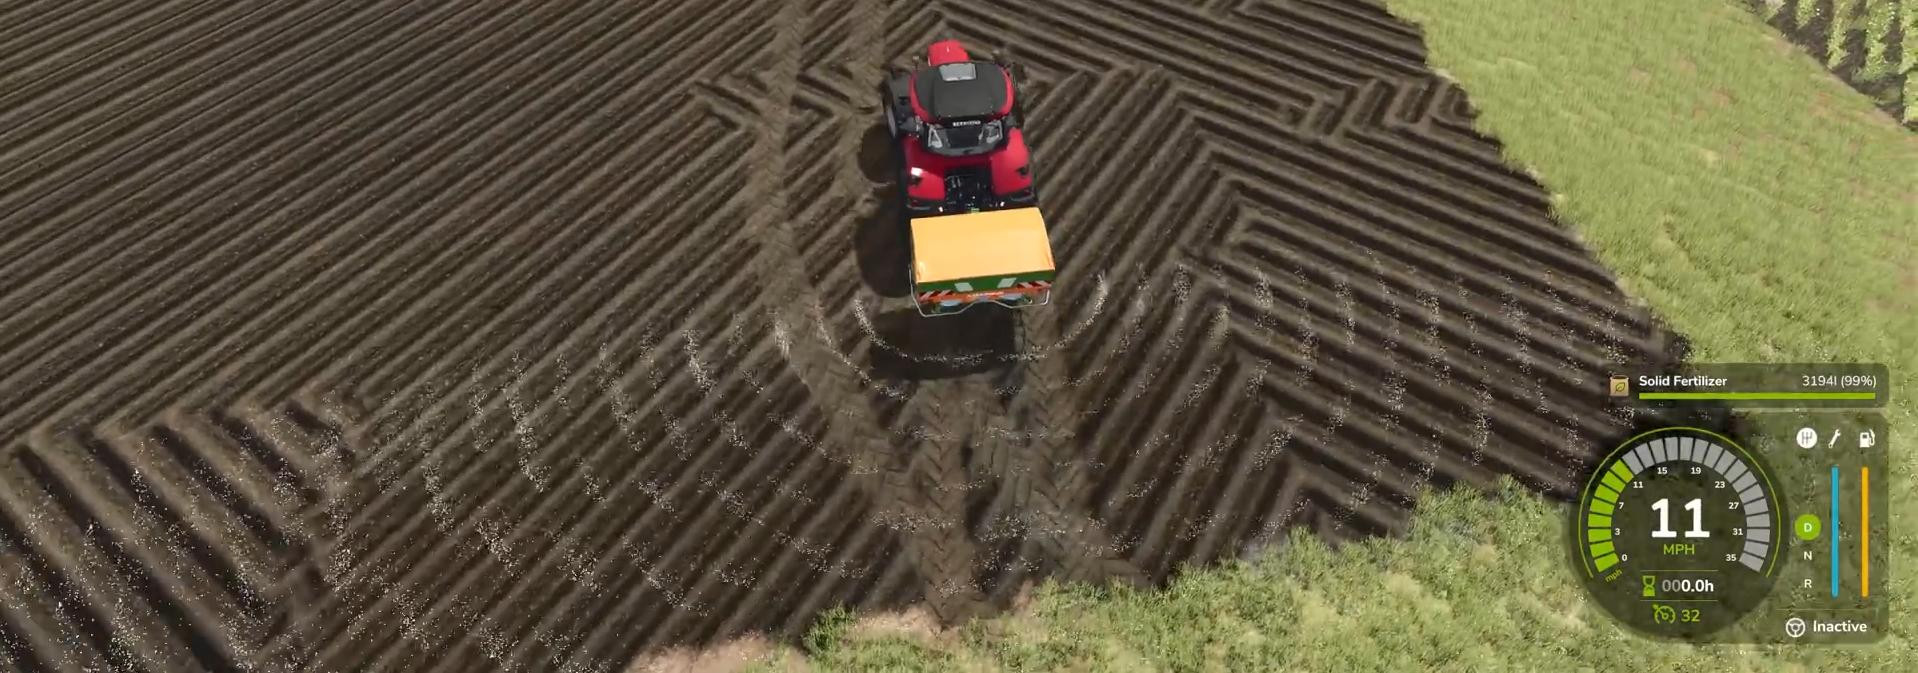
Let's start with fertilizers. When planting potatoes, you can use a planter with a built-in fertilizer application function. But if you did not fertilize the field when planting, then it's time to make up for it. The first layer of fertilizer can be applied immediately. It will give the plants a head start. To do this, use equipment that evenly distributes the fertilizer across the field.
You cannot apply two layers in a row — you will have to wait at least one game month before applying the second layer.
A month after applying the first layer, you can safely fertilize the field a second time. This is a prerequisite if you want to get the maximum yield. Skipping any of the layers will result in a decrease in production. To apply the second layer, simply go over the area again with the appropriate equipment and the game will automatically count this action. The result will be visible on the map. The plot will change color to a more saturated one.
Now let's move on to weeds.-lg_modland.webp)
They start growing almost immediately after planting potatoes. If you go to the game menu and enable the display of weeds, you can see the areas where they are already starting to break through. There, in the lower right corner of the screen, you will find information about their growth stages. There are several stages of weed growth. This determines which method of treatment to choose.
If the weeds have not yet reached maturity, you can use mechanical treatment with weeders. This is a safe and inexpensive way to get rid of unwanted vegetation without destroying the crop.
Some models of weeders allow you to work with medium-sized weeds. However, if the weeds have grown to a large size, mechanical methods will no longer help — chemicals will be needed.
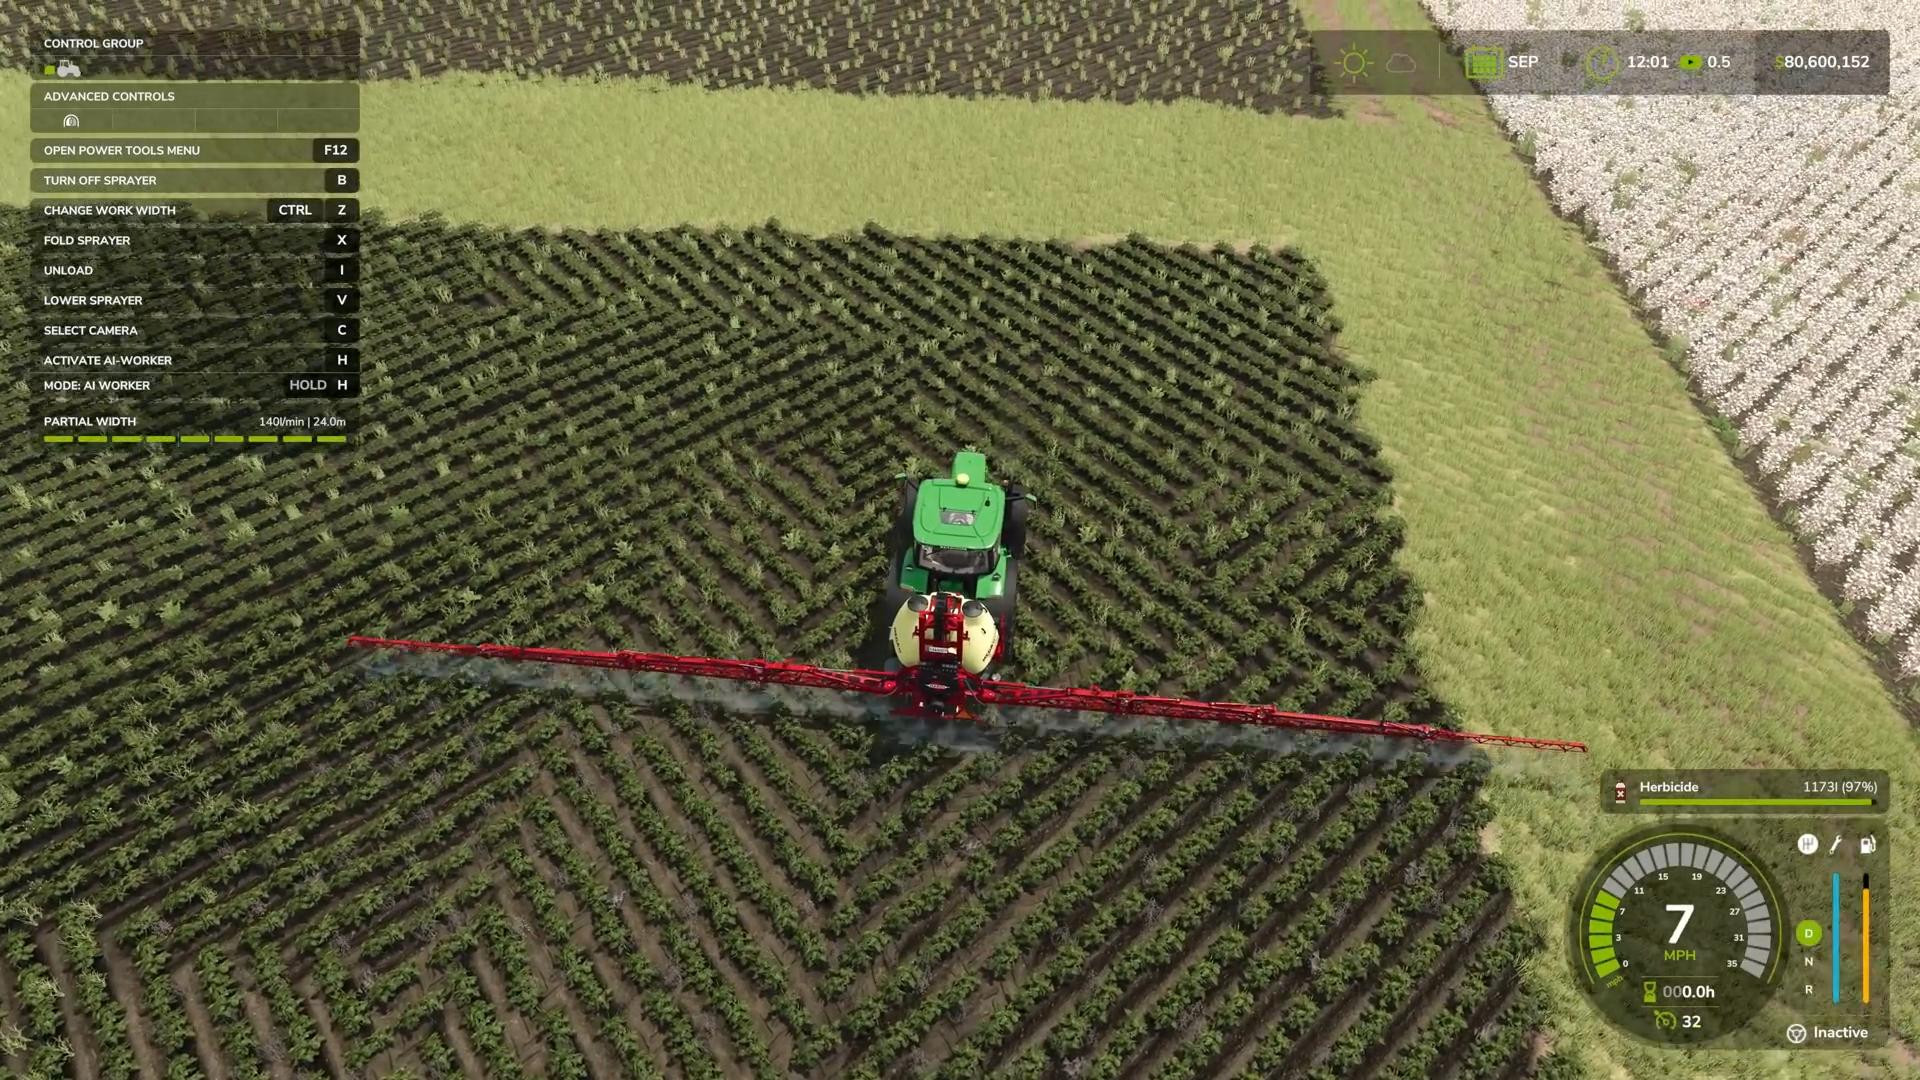
A sprayer with herbicide is used to destroy weeds of any size.
The process is simple: you refuel the equipment, drive out to the field, and start processing. After you treat the soil with the sprayer, it will change color. Brownish stripes will appear. This is a sign that the weeds have been destroyed.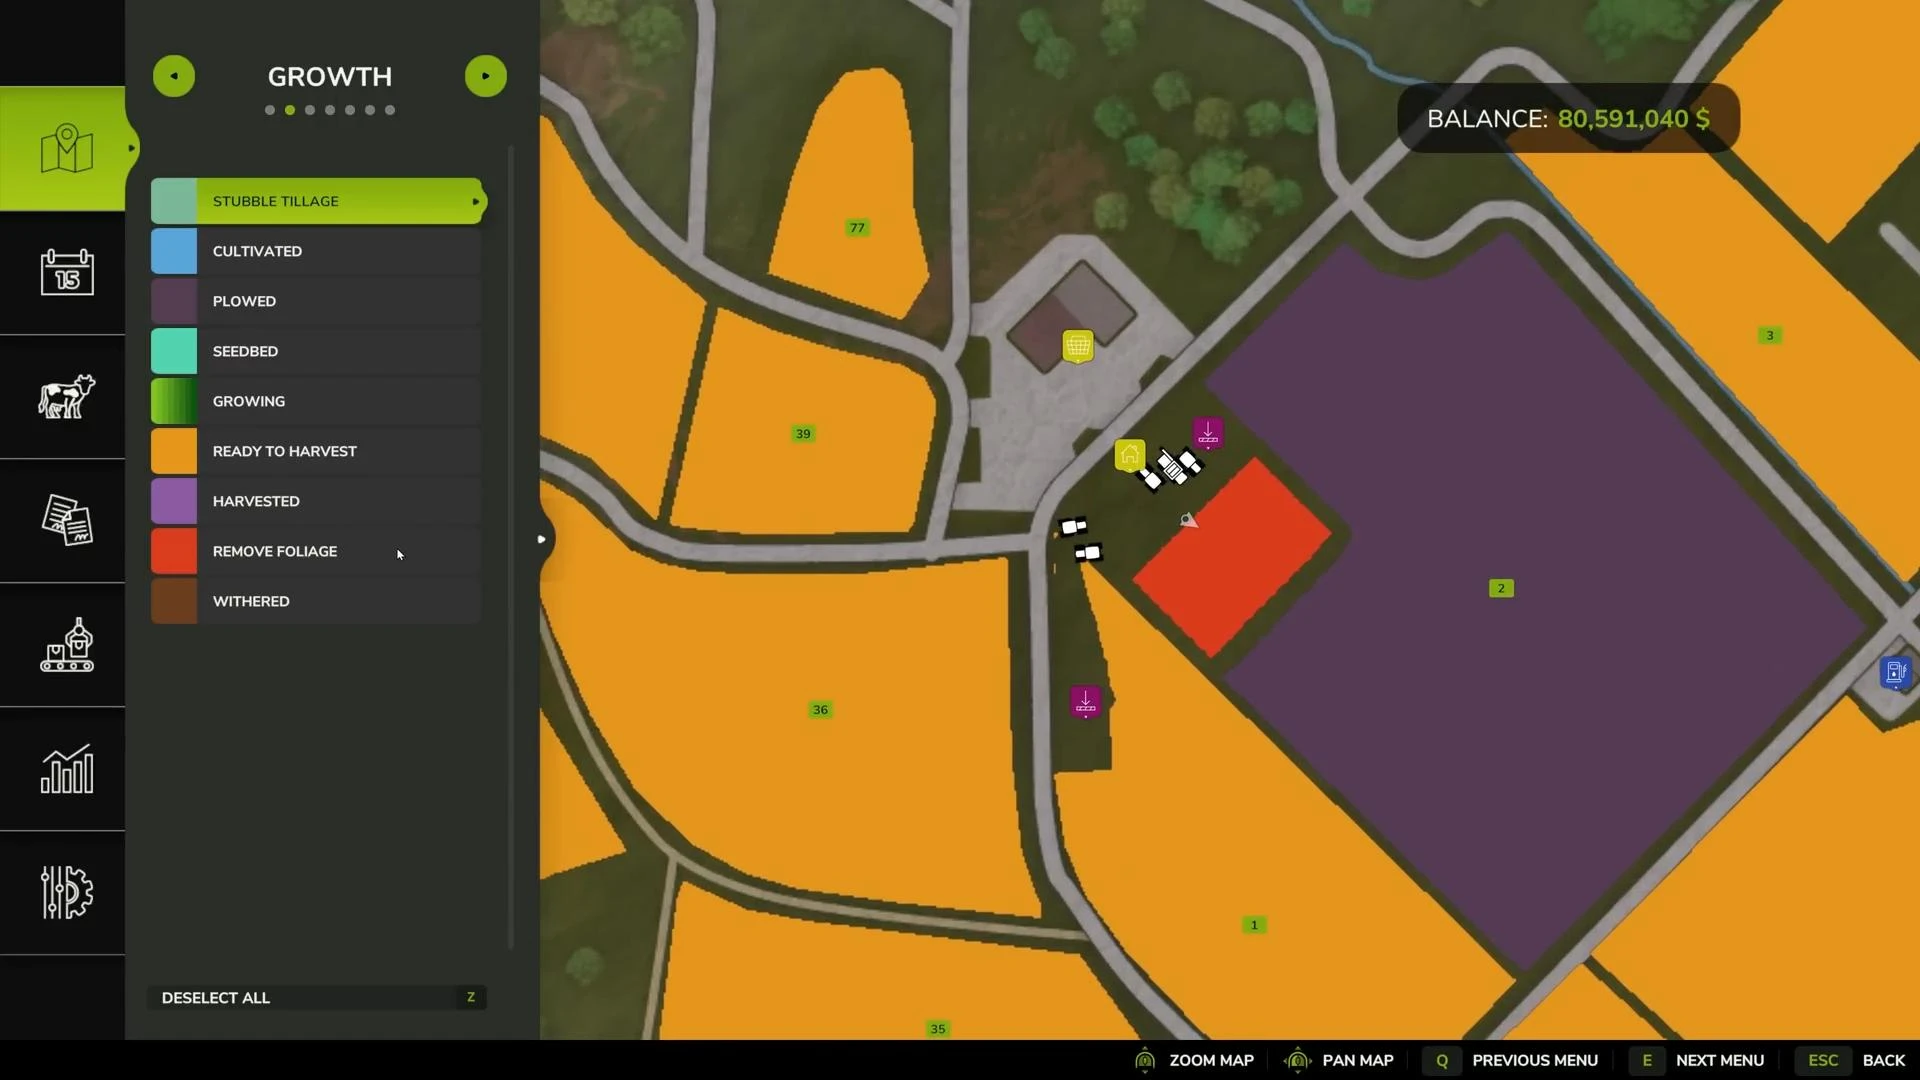
List of equipment that can be used for maintenance:
- For applying solid fertilizer — spreaders from the Yield Improvements section.
- For liquid fertilizers — standard sprayers.
- For manure or slurry — barrels and organic spreaders.
- For weed control — weeders (for small and medium weeds) or sprayers with herbicide (for all stages).
And finally, if you have enabled mandatory plowing in the game settings and use a plow after each potato harvest, you can forget about weeds altogether. Plowing completely prevents their appearance. If potatoes are grown on the same plot, this trick will help you avoid extra work and save money.
If everything is done correctly — two layers of fertilizer have been applied and there are no weeds — you can calmly wait for the crop to ripen.
Harvesting potatoes in Farming Simulator 25: how to do it right and without losses

When the potatoes are fully ripe, the final and perhaps most enjoyable stage begins—harvesting. However, there are some nuances that are important to consider in order not to lose a single gram of the harvest and not to waste equipment and time.
The first thing to check is whether the potatoes are ready for harvesting. To do this, open the map and enable the crop growth stage display. When the potato field is colored dark green and the information says “ready for harvest,” you can start. Sometimes the game displays a message saying “remove the tops,” but this can be ignored. Unlike sugar beets, where the tops really get in the way, potatoes can be harvested right along with the leaves, and the game lets you do this without any extra prep.
If you have seasons enabled, pay attention to the calendar. Potatoes can only be harvested during a specific period: from August to September. If you are late, they will wither and it will be impossible to harvest them. Therefore, do not delay.
Next, you need to choose the equipment. For harvesting potatoes, you can use trailed and self-propelled potato harvesters.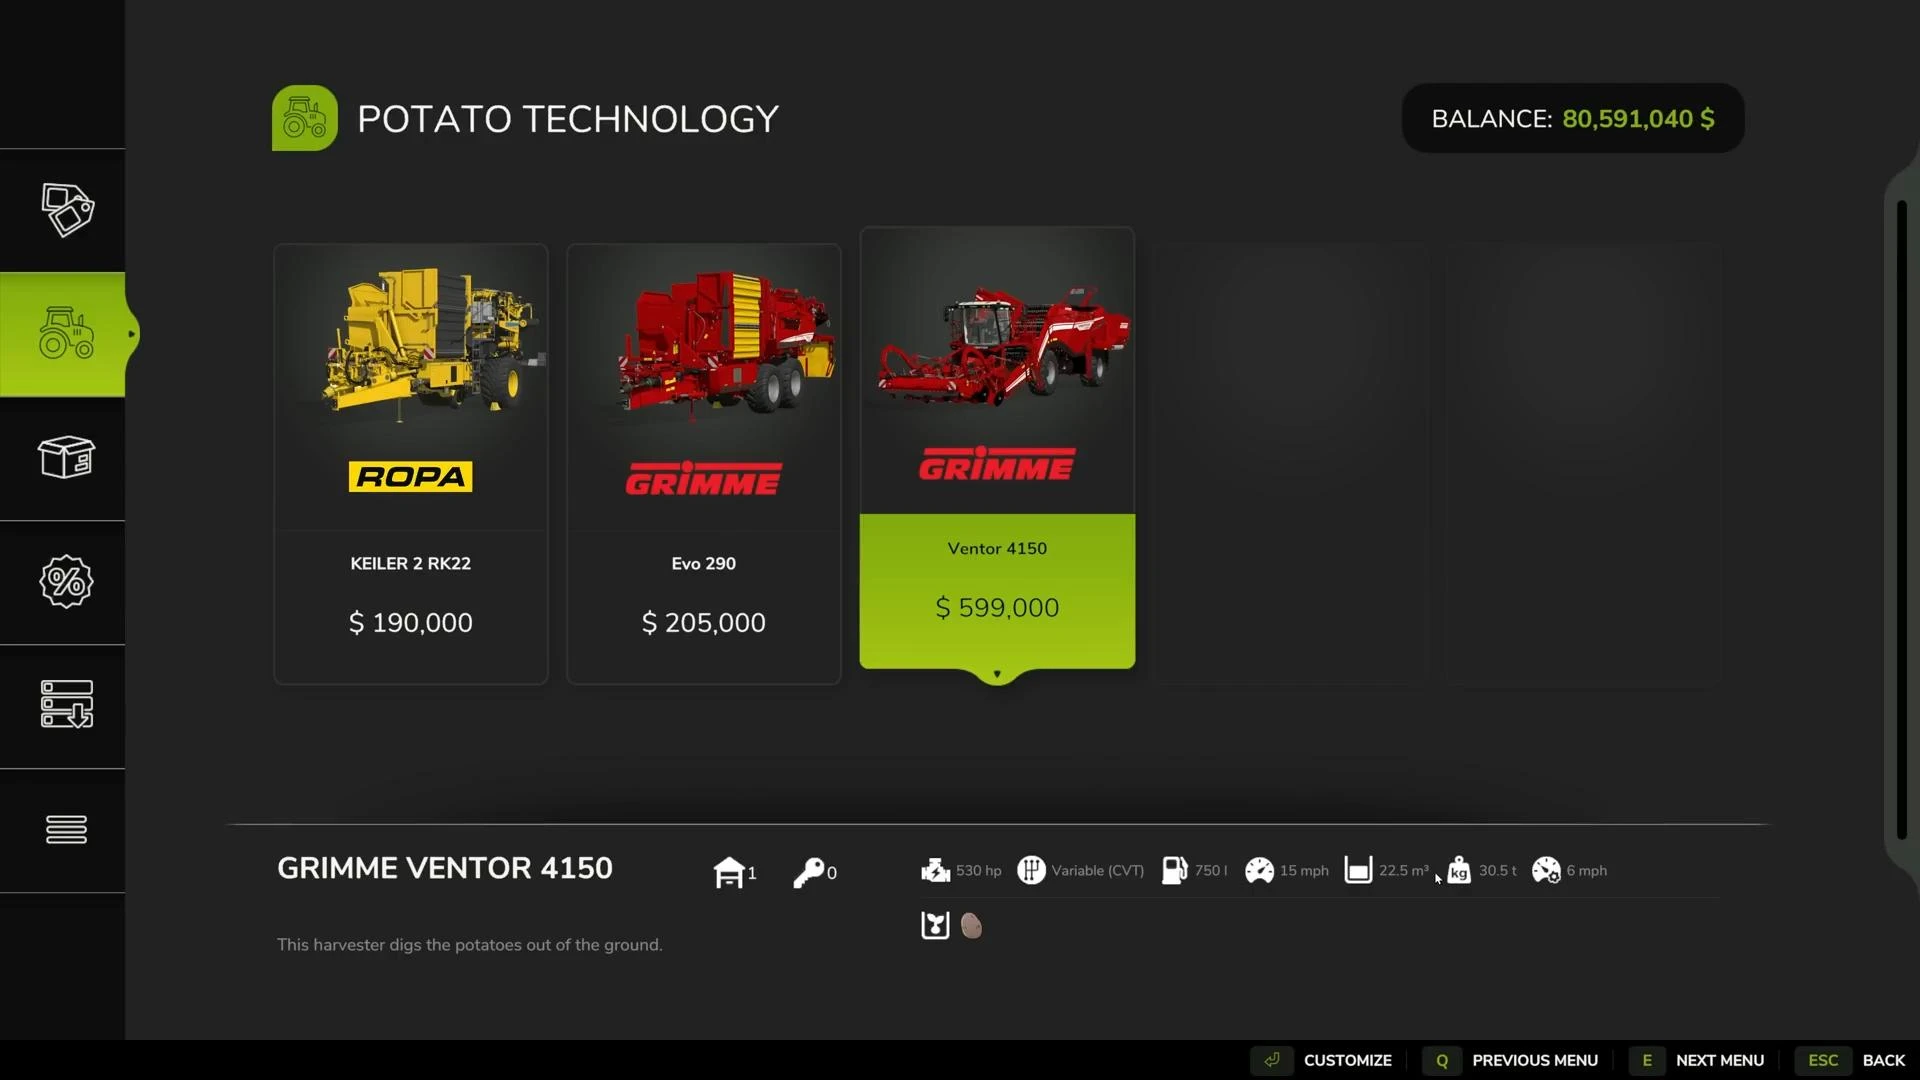
Trailed machines are the classic option, cheaper and simpler. They can be attached to a tractor, but the working width of such devices is quite small. Therefore, harvesting will take a long time.
Self-propelled harvesters are expensive, but better suited for harvesting potatoes. They have a wider working area and a larger hopper volume.
To get started, deploy the equipment, lower the harvester, and turn it on. Self-propelled harvesters have a feed system that fills up gradually, so at first you won't see the potatoes going into the hopper. Wait a couple of seconds, and you'll start to see the numbers in the lower right corner of the screen start to grow. This is the volume of potatoes harvested.
Even if the machine does not have narrow tires and is not designed for working on crops, the potatoes will remain intact.
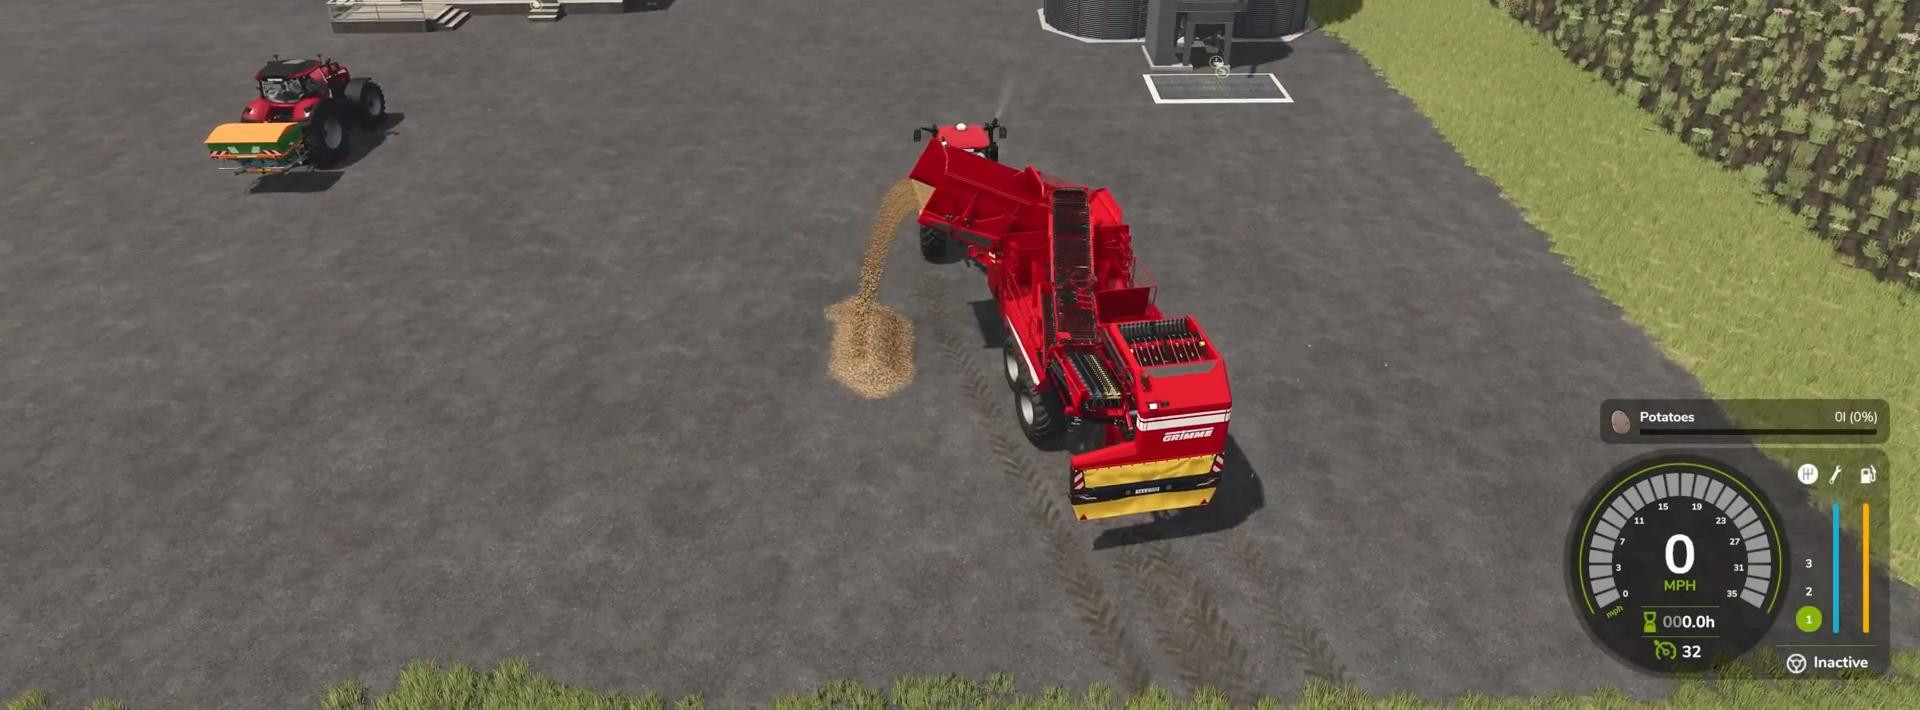
When the machine's hopper is full, it needs to be emptied. This is usually done automatically. Just drive up to the trailer, unfold the pipe, and turn on the unloading. The potatoes will begin to flow into the storage facility or transport vehicle.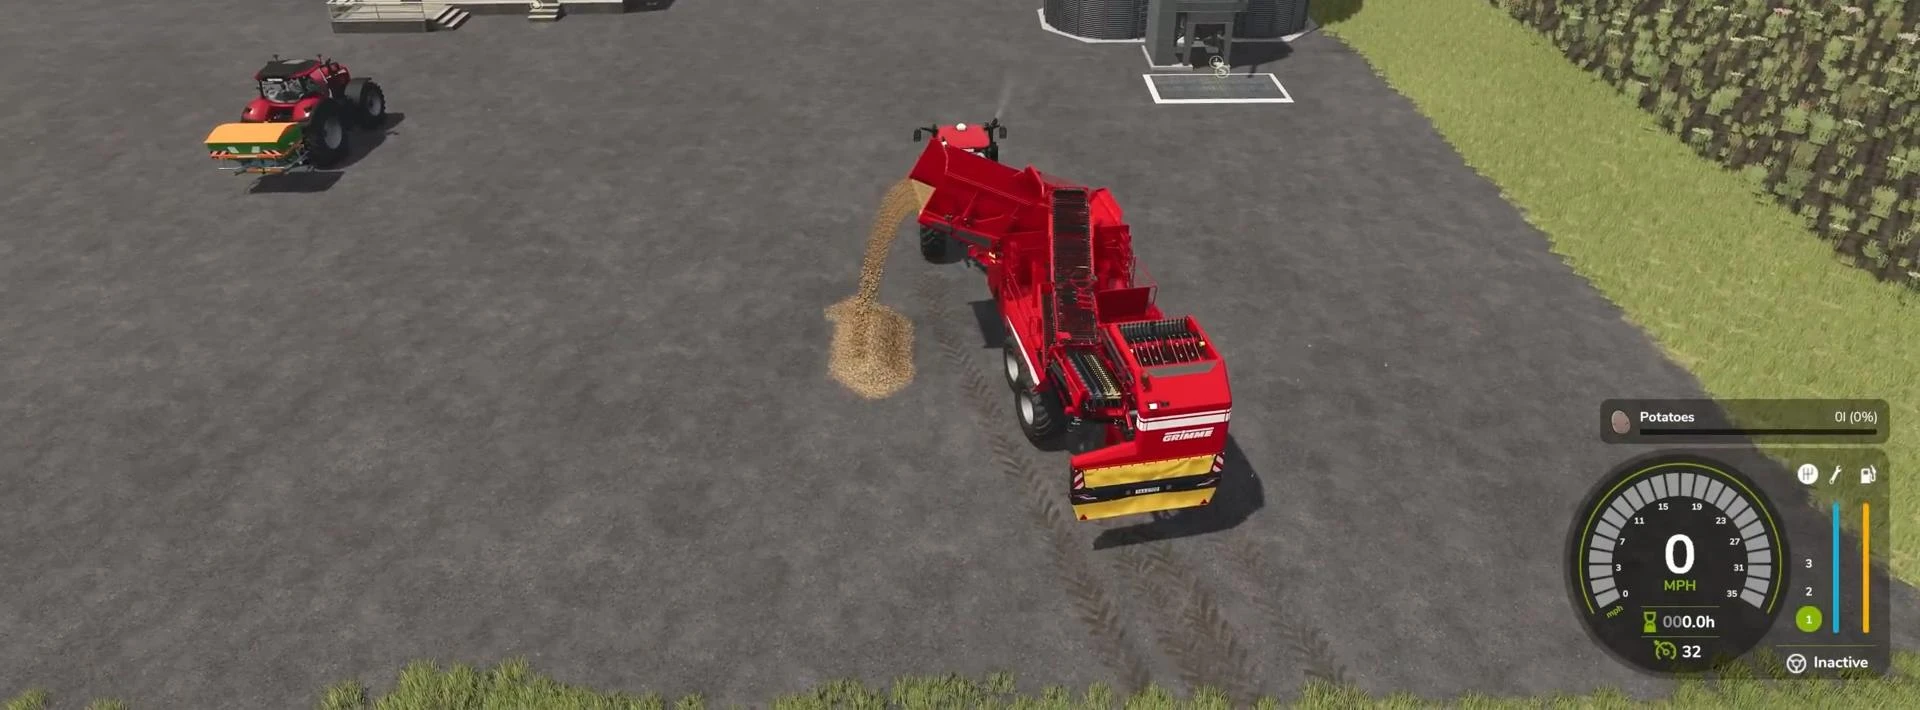
Potatoes can also be unloaded directly onto the ground. But then they will have to be collected with a front loader bucket.
What to do with potatoes after harvesting: storage, sale, and processing
Now the logical question arises: what to do with all these potatoes? There are several options, and the choice depends on the strategy you have chosen: quick sale, storage until prices improve, use in production, or replanting. You can sell them immediately or store them until prices for the crop are higher. Alternatively, you can use them in production or for replanting.
The first option is direct sale. Open the game menu and go to the prices section. Find the “potatoes” item and compare offers from different sales outlets.
The price varies depending on the season, demand, and other factors. Select the highest price, plan a route to the desired point, load the potatoes into the trailer, and take them to be sold. The money will be credited to your account immediately after unloading.
If the market is currently offering a low price, you can temporarily send the potatoes to storage. One option is a railway elevator. It is marked with a special icon on the map and in the list of storage points. However, it can only store a maximum of 300,000 liters. This is enough for small farms, but if you have extensive plantings, the storage facility will fill up quickly.
If the railway elevator is already full, you can use a simple method — unload the potatoes directly onto the ground. To do this, drive the equipment to the desired area, extend the unloading pipe, and press the corresponding button. The potatoes will fall out in a neat pile. To reuse them later, you will need a front loader with a bucket — it will allow you to collect the tubers and pour them back into the planter, for example.
Another way to dispose of the harvest is processing. There are several factories in the game where you can deliver potatoes. For example, you can send them to a factory that produces potato soup or chips. The profit will be greater, but the investment will also be much higher. You will need to purchase the factory itself or rent the land where it is located. After that, the process will become passive — the potatoes are loaded, production starts, and the result is a product with high added value.
Potatoes are also great for feeding animals. Pigs love them and get good nutrition from them.
If you plan to grow potatoes on a regular basis, it is advisable to save part of the harvest for the next planting. In this case, you will not need to buy them for planting in a store.
Videos
Hinzugefügt von