How to Create Screenshots in BeamNG.Drive + PhotoMode Settings
-lg_modland.jpg)


Want to take a screenshot in BeamNG but don't know how? Then this guide will help you figure it out. In it, you will find hotkeys for taking screenshots in the game, as well as learn about useful settings that will make your screenshots better.
How to take a screenshot in BeamNG.Drive

First, decide what type of screenshot you want to take — quick, high resolution, or detailed.
Standard keys:
- Ctrl+P — regular screenshot of the current screen.
- Alt+P — 4K screenshot, increased resolution (×4).
- Alt+O — screenshot sent to the BeamNG server (with a link). Search in: Steam -> View -> Screenshot
- F12 — save to Steam gallery.
Huge screenshot (×8) — assigned manually in the control settings (be prepared for a short “freeze” of the game).
Settings for getting a beautiful shot
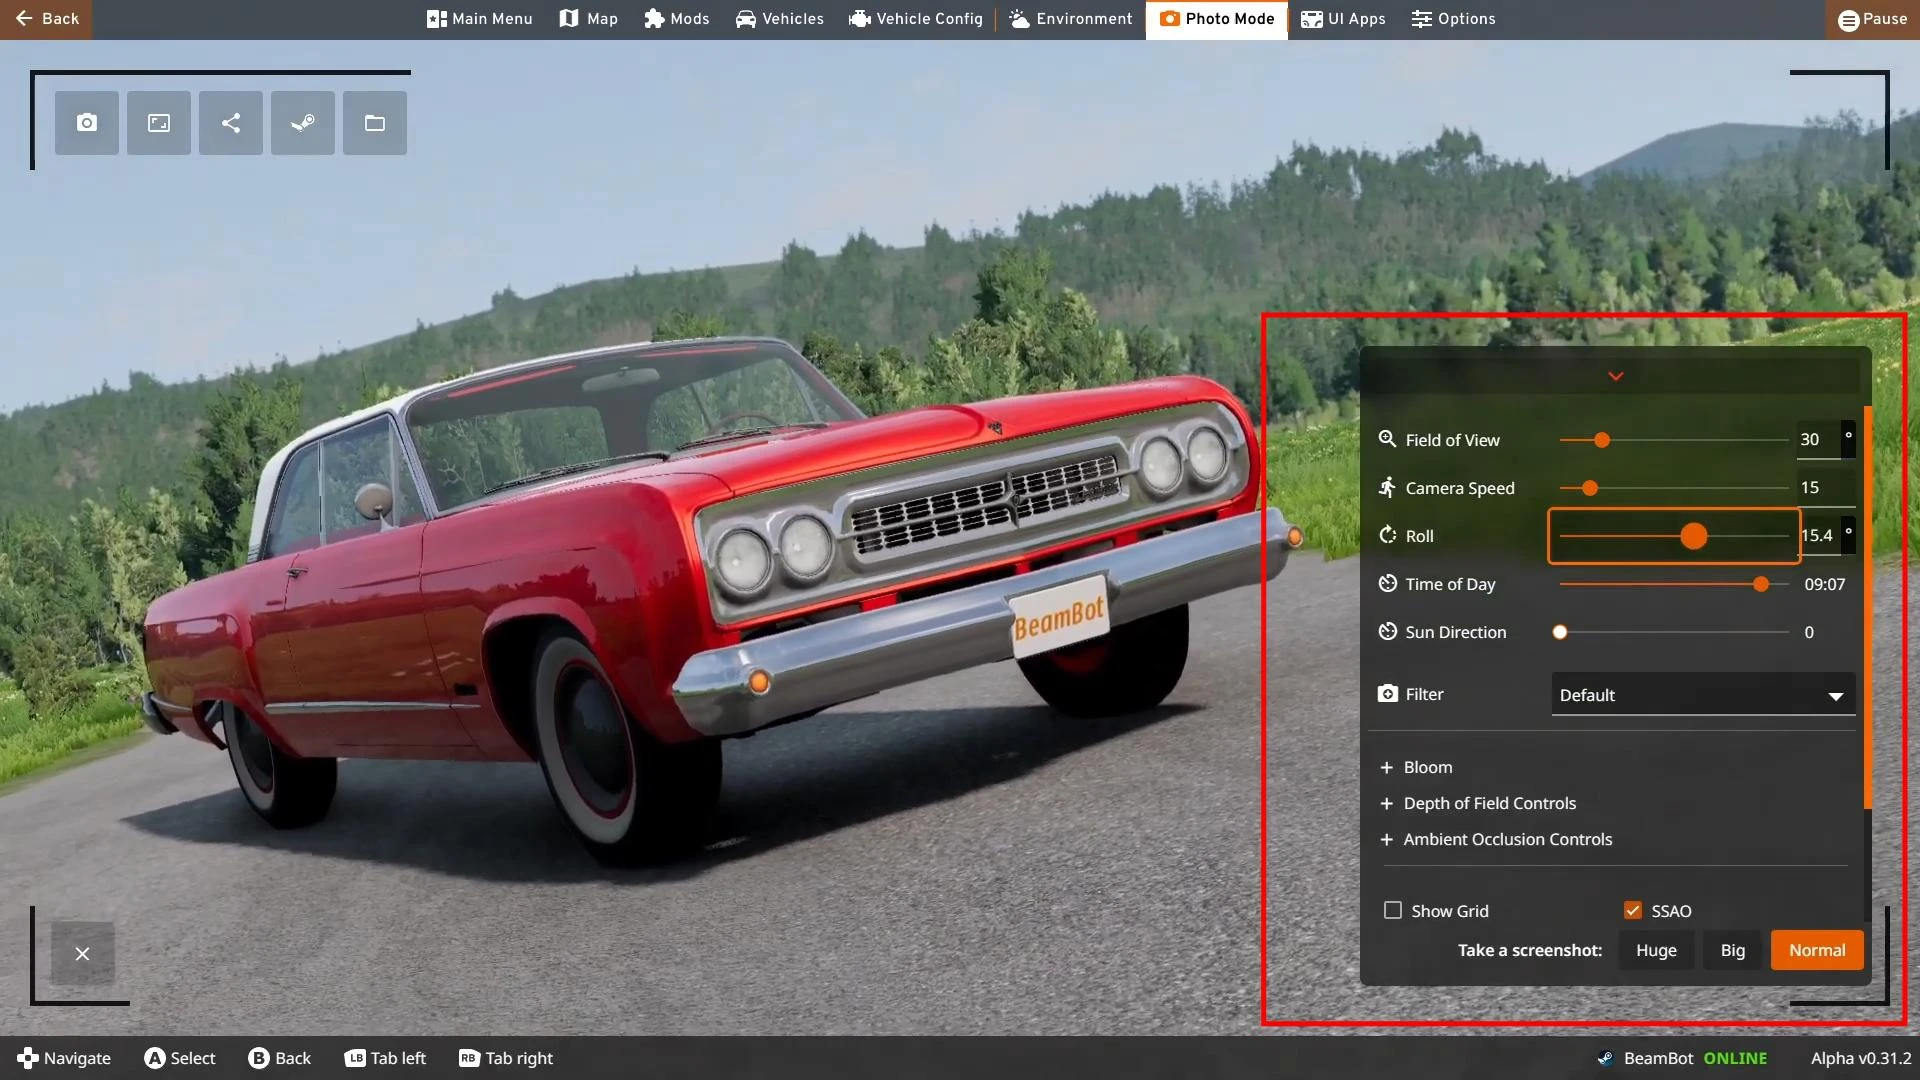
First of all, you need to enter photo mode. To do this, press the Escape key, open the pause menu, and select Photo Mode.
You can also assign a hotkey for quick access to it in the control settings (for example, the P key).
Once in photo mode, you will see a panel of settings that change the angle, lighting, focus, and more.
-
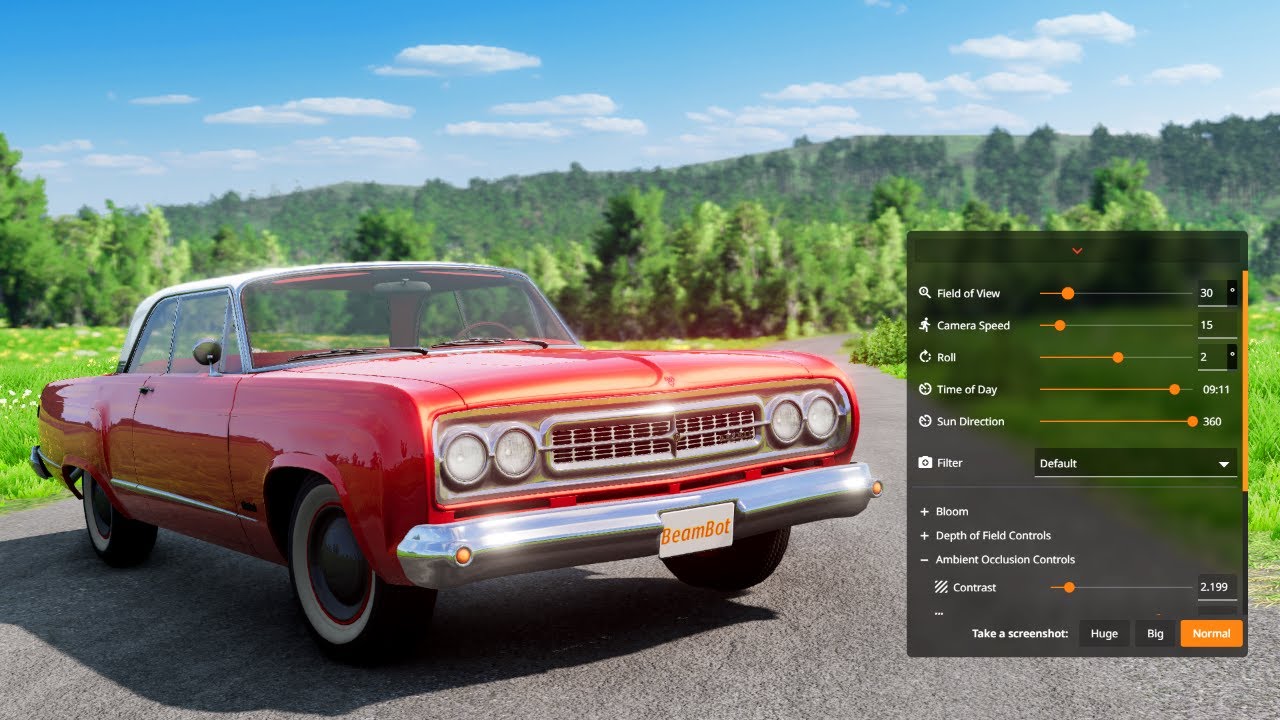
Field of View is responsible for scale and perspective. The recommended value is 30–40, which preserves the proportions of the car and makes the frame look like a movie shot. Values above 60 distort the geometry and give a “fish-eye” effect.
-
Roll — used for dynamics, helps to place a large car in a limited frame or add “action” to the composition. Use with caution.
-
Time of Day — adjusts the position of the sun. Sunrise and sunset provide soft light and long shadows, which look especially good on chrome or wet car bodies.
-
Sun Direction determines the direction in which the sunlight is shining — rotate it until the shadows are favorable for the shape of the body.
-
Bloom — makes light reflections soft and realistic. Avoid excessive brightness. At high values, the sky and paint may “burn out.”
-
Depth of Field — adds blur to the background or foreground. Use Aperture to enhance the effect, Focus Distance to focus on the desired point. Do not make the blur too strong, as “ghosts” may appear around the contours of the car.
-
Ambient Occlusion (AO) — adds soft shadows under the car and around details. It is important to set the quality to High (in the Quality section), otherwise the shadows will be pixelated.
-
Contrast and Radius control the depth of shadows and overall contrast. Contrast increases saturation, while radius makes shadow transitions softer.
-
Filters stylize the image, but are rarely used for photorealism. It is better to keep the original color and adjust it manually.
CK Graphics mod
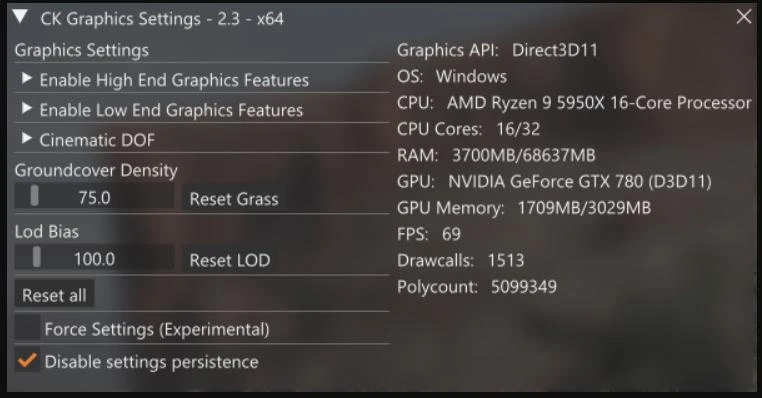
There is also a wonderful mod that allows you to fine-tune the graphics quality in BeamNG.Drive even further. The better the graphics, the more beautiful the screenshots. The mod is called CK Graphics and is available for free in the BeamNG repository.
Here are some of the features of this mod:
For weak PCs:
- Maximum load reduction: reduced shadow resolution, simplified shaders and textures.
- Ability to disable detailed rendering and simplify the landscape.
- Optimization of soil coverage display and LOD control slider.
- Improved quality of reflections and mirrors.
- Shadow resolution up to 4K, improved surface detail.
- Full depth of field with autofocus and player tracking — ideal for photo mode.
- Additional features that make a difference
- Intuitive interface with tooltips: each parameter is accompanied by an explanation so you know exactly what it does.
- Live performance statistics: visually track how FPS changes when switching options.
- Save and load settings profiles — no more manually adjusting settings every time.
- Unlimited photo mode: built-in workarounds allow you to take screenshots at maximum quality, even if the standard Photo Mode refuses to cooperate.
Videos
Added by
![Tesla Model 3 [PACK]](https://temp2.modland.net/i/69da3a9c66653/0_modland.webp)
![Maserati Levante [PACK]](https://temp2.modland.net/i/6a1a0a7a74583/0_modland.webp)

Map name ? in first pictrue ?
@XONSOE It's Italy, Vanilla map btw