How to Install Mods in Euro Truck Simulator 2 (ETS2)?


Installing mods in ETS2 is a fairly simple process, however, if you have just started playing this game, you may need some help. Not everyone knows how to install them correctly. Therefore, below is a detailed instruction on how to install mods in Euro Trick Simulator 2.
Manual installation of mods
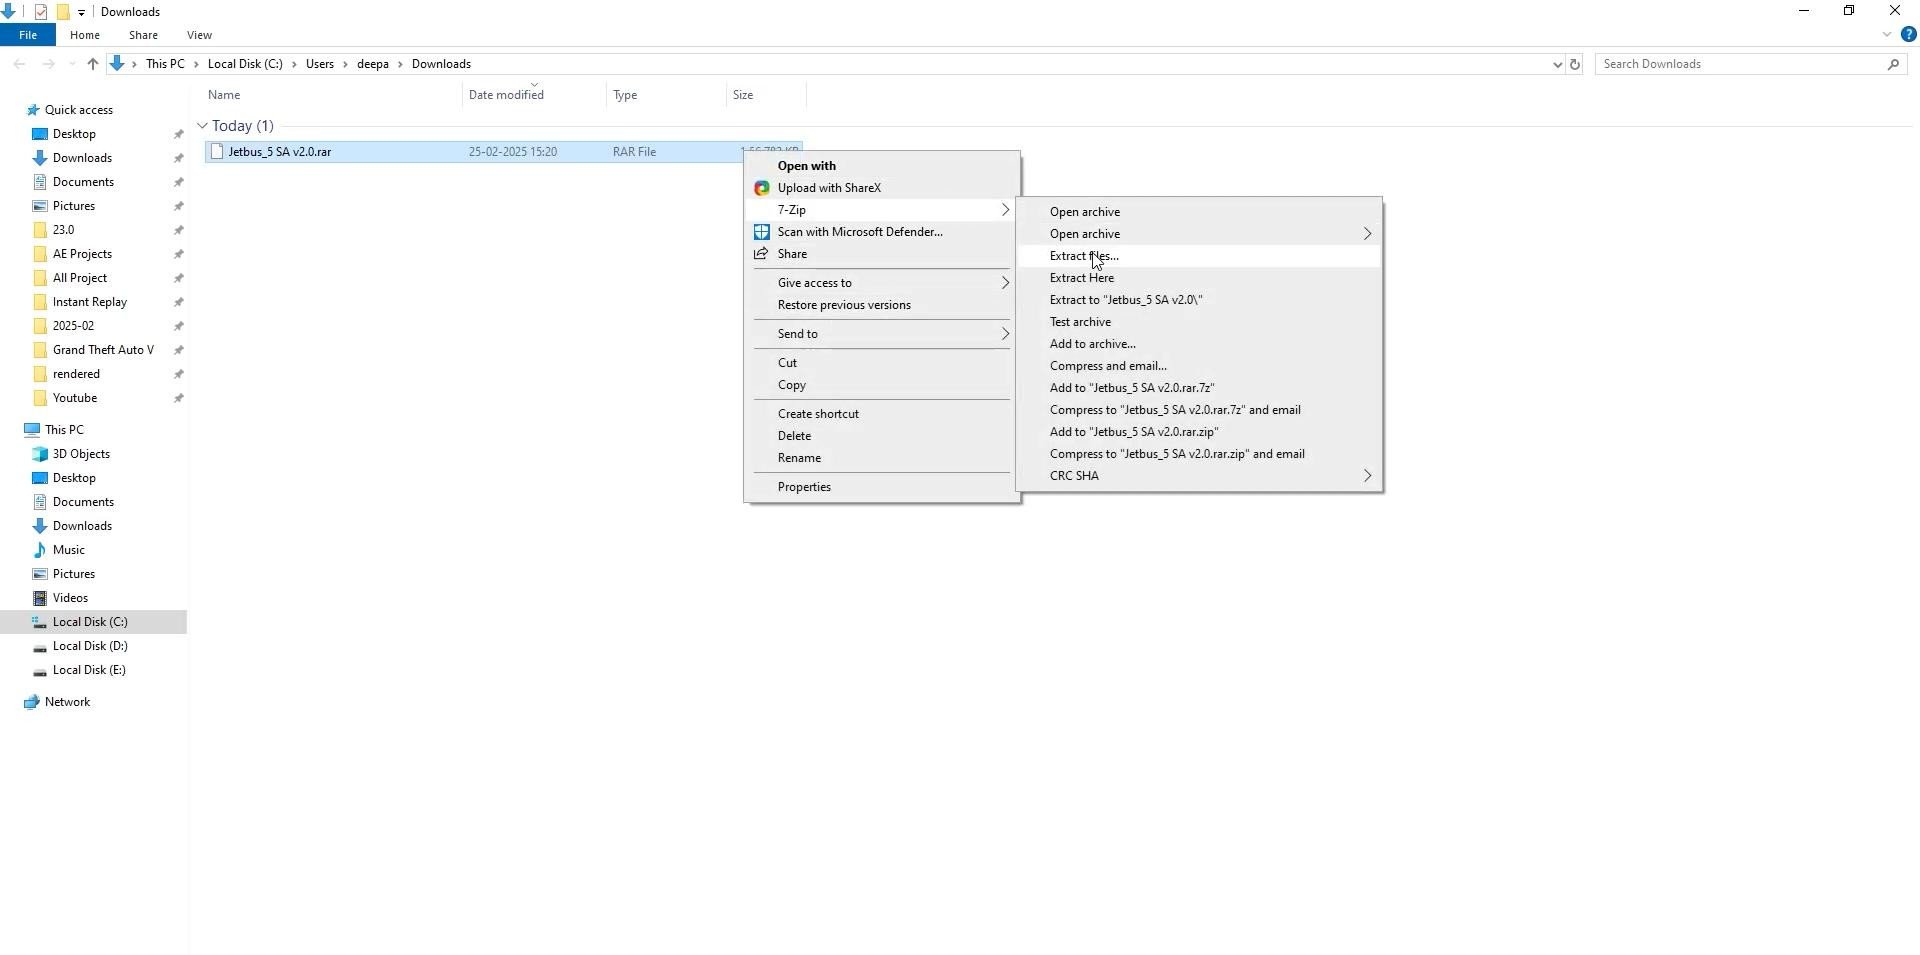
This method of installation is the most popular among players. Most often mods are distributed as files with the extension .scs, but sometimes they are packaged in .zip, .rar, .7z archives.
Go to the ETS2 section on ModLand and download the desired mod.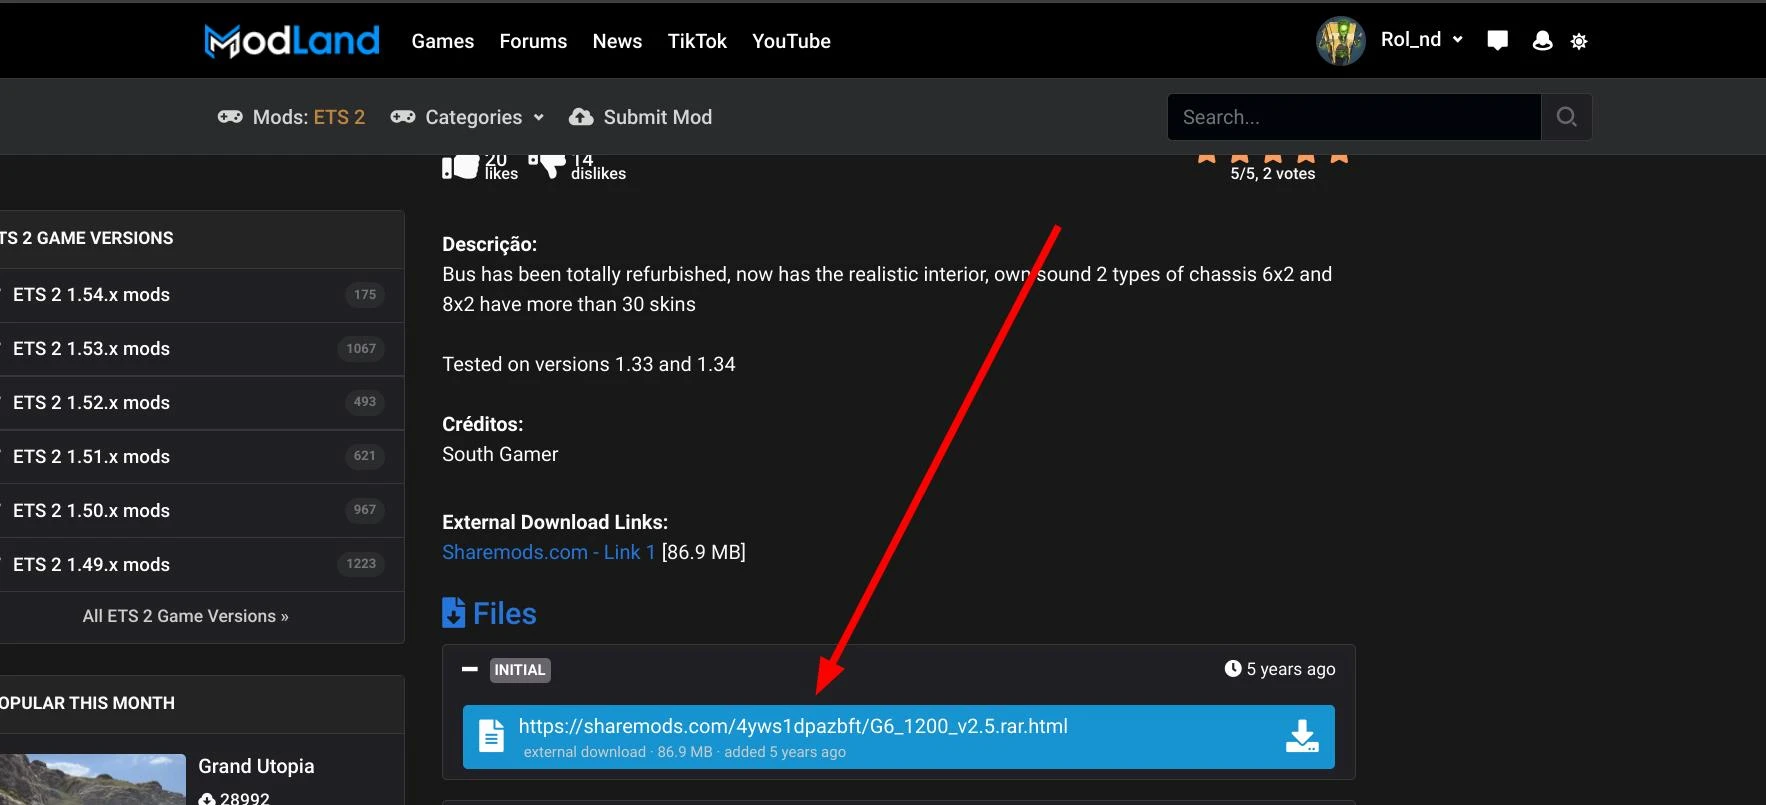
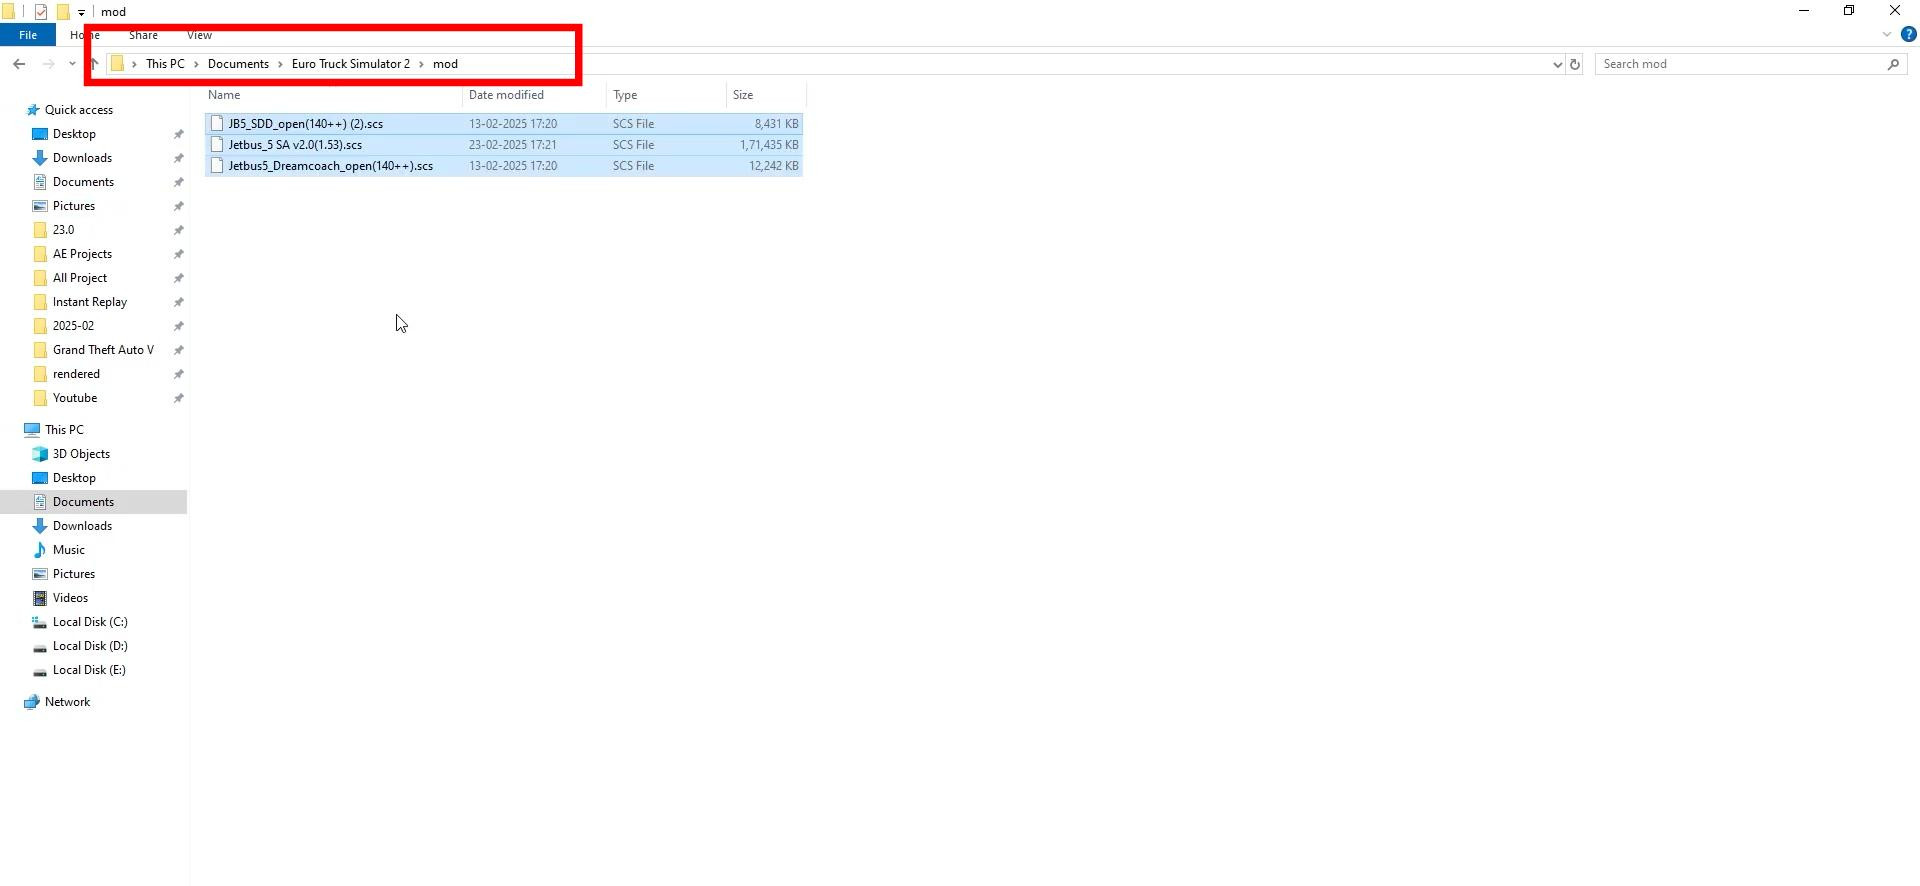
Then you need to unpack it (if it is an archive) and copy the .scs file to the folder with mods. To do this, open Documents on your computer, find the folder Euro Truck Simulator 2 and inside create a folder mod (if it is missing). Drag and drop the .scs file there.

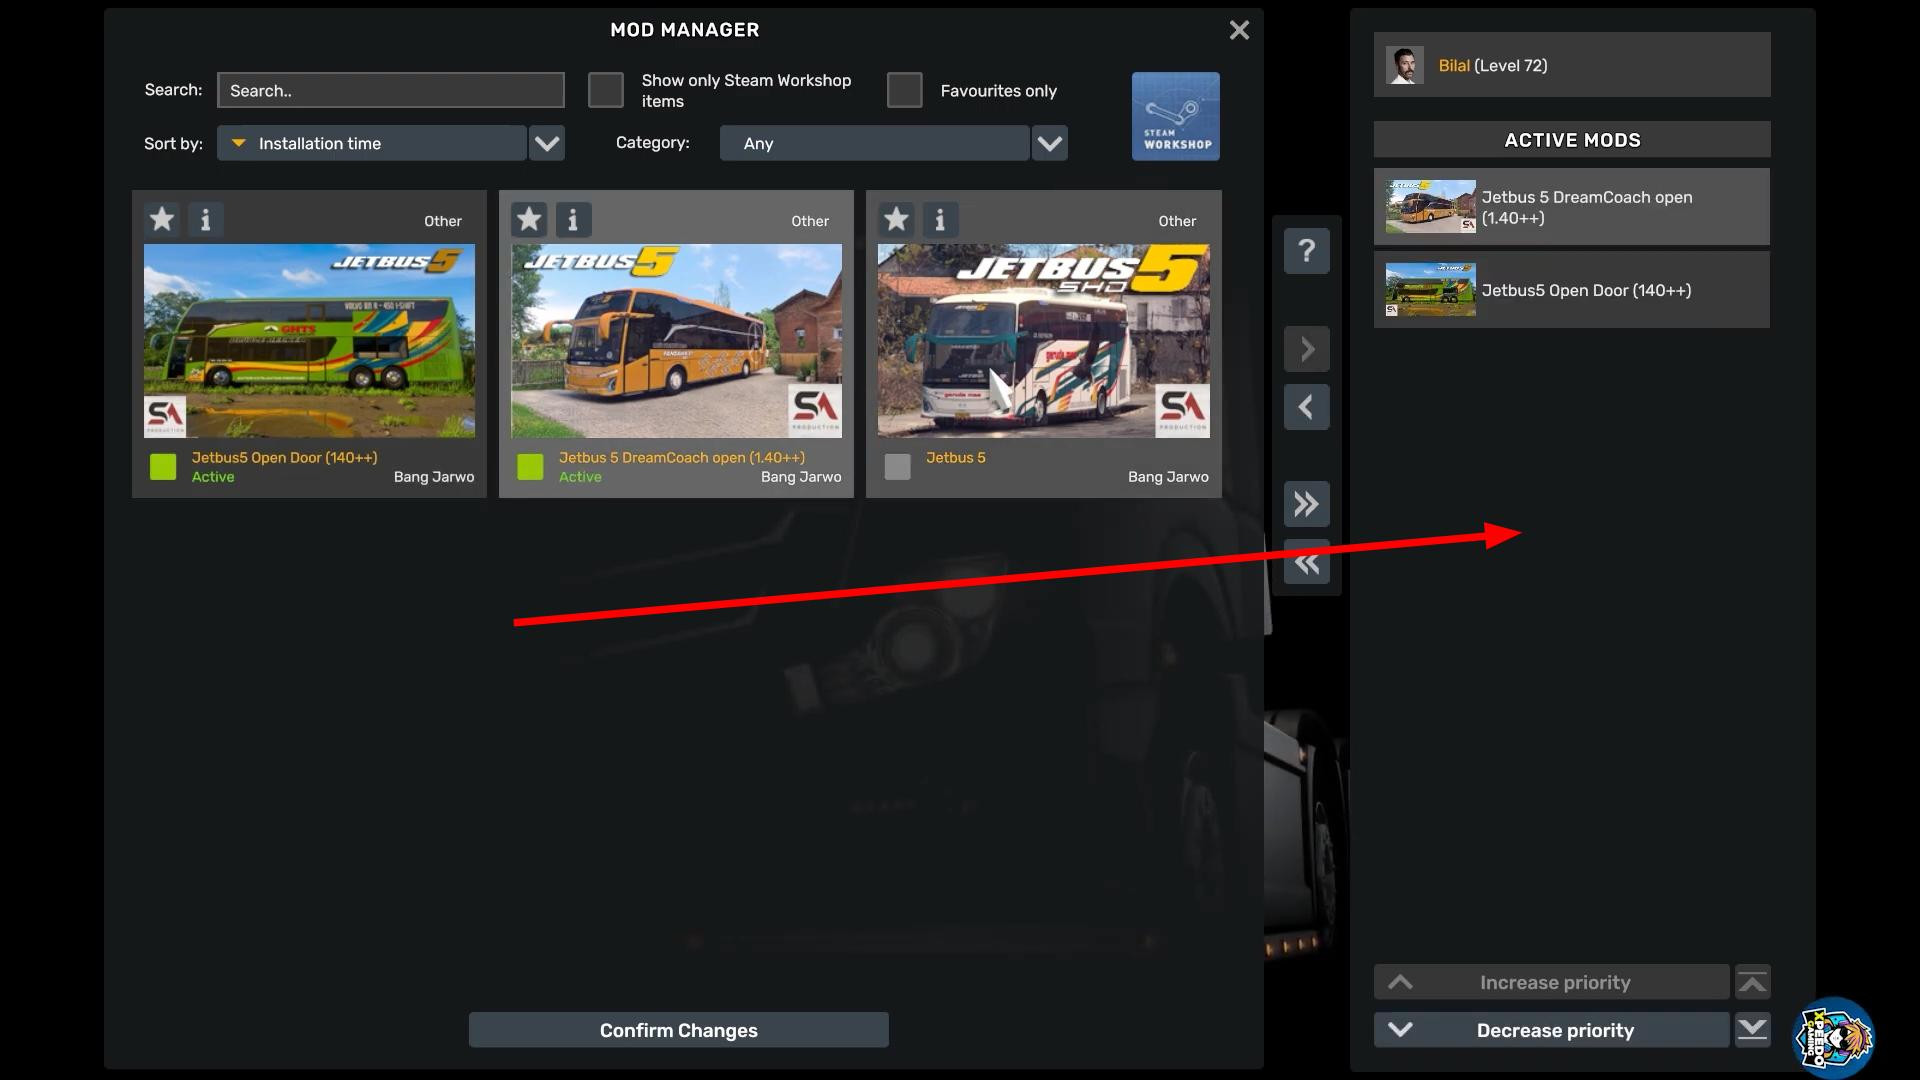
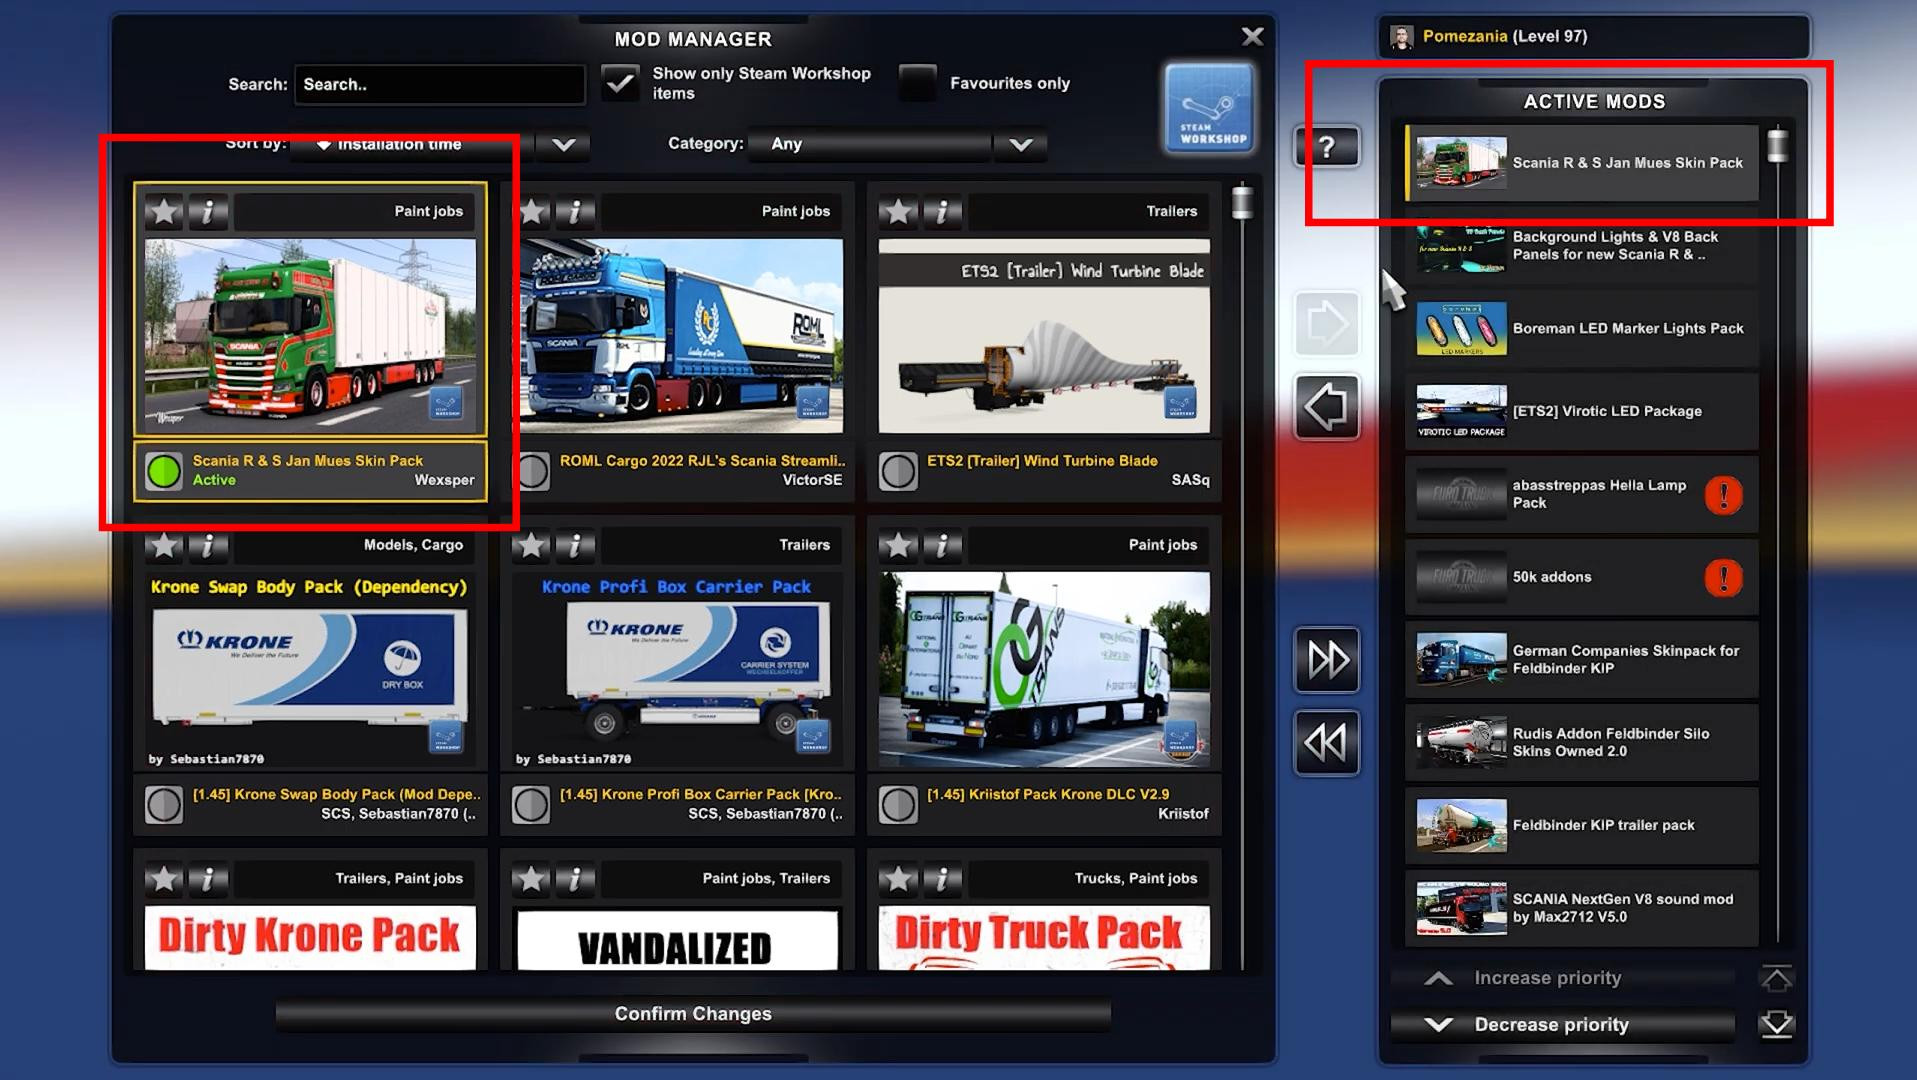
Done! As you can see, everything is incredibly simple. All that remains is to open the “Mod Manager” in the game. Here will be displayed all the modifications that are in the mod folder.
Move the desired mods to “Active Mods” and save the changes to activate the mods.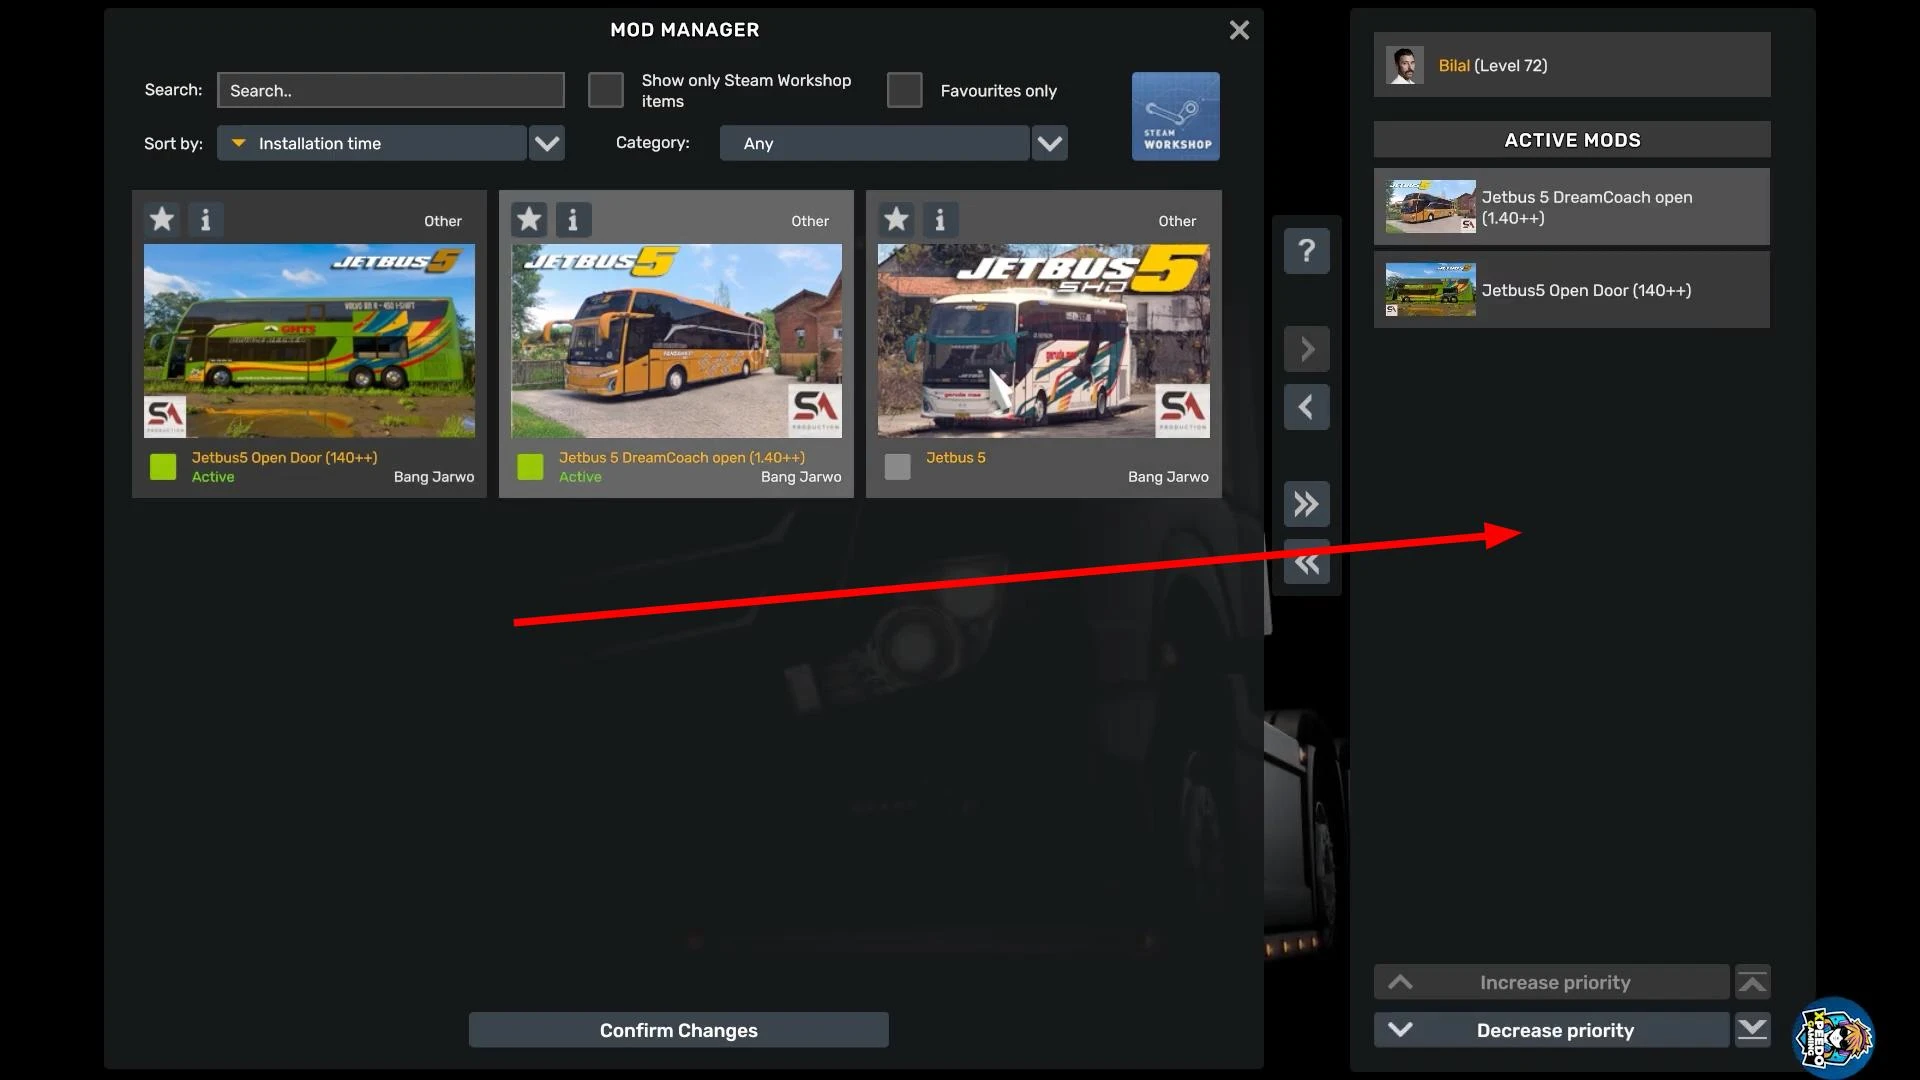
Important: The files must be located directly in the mod folder, not in additional subfolders. If the mod does not work or the game crashes, check its compatibility with the ETS2 version.
Installing mods via Steam Workshop
If you have a game purchased on Steam, it is the easiest way to install mods - use Steam Workshop. This is convenient, as mods are downloaded and updated automatically without having to work with files.
To get started, open Steam and go to your game library. Find Euro Truck Simulator 2, then click on the “Workshop” tab. There is a huge number of mods from players and developers. Find the desired mod, click on it and click “Subscribe”.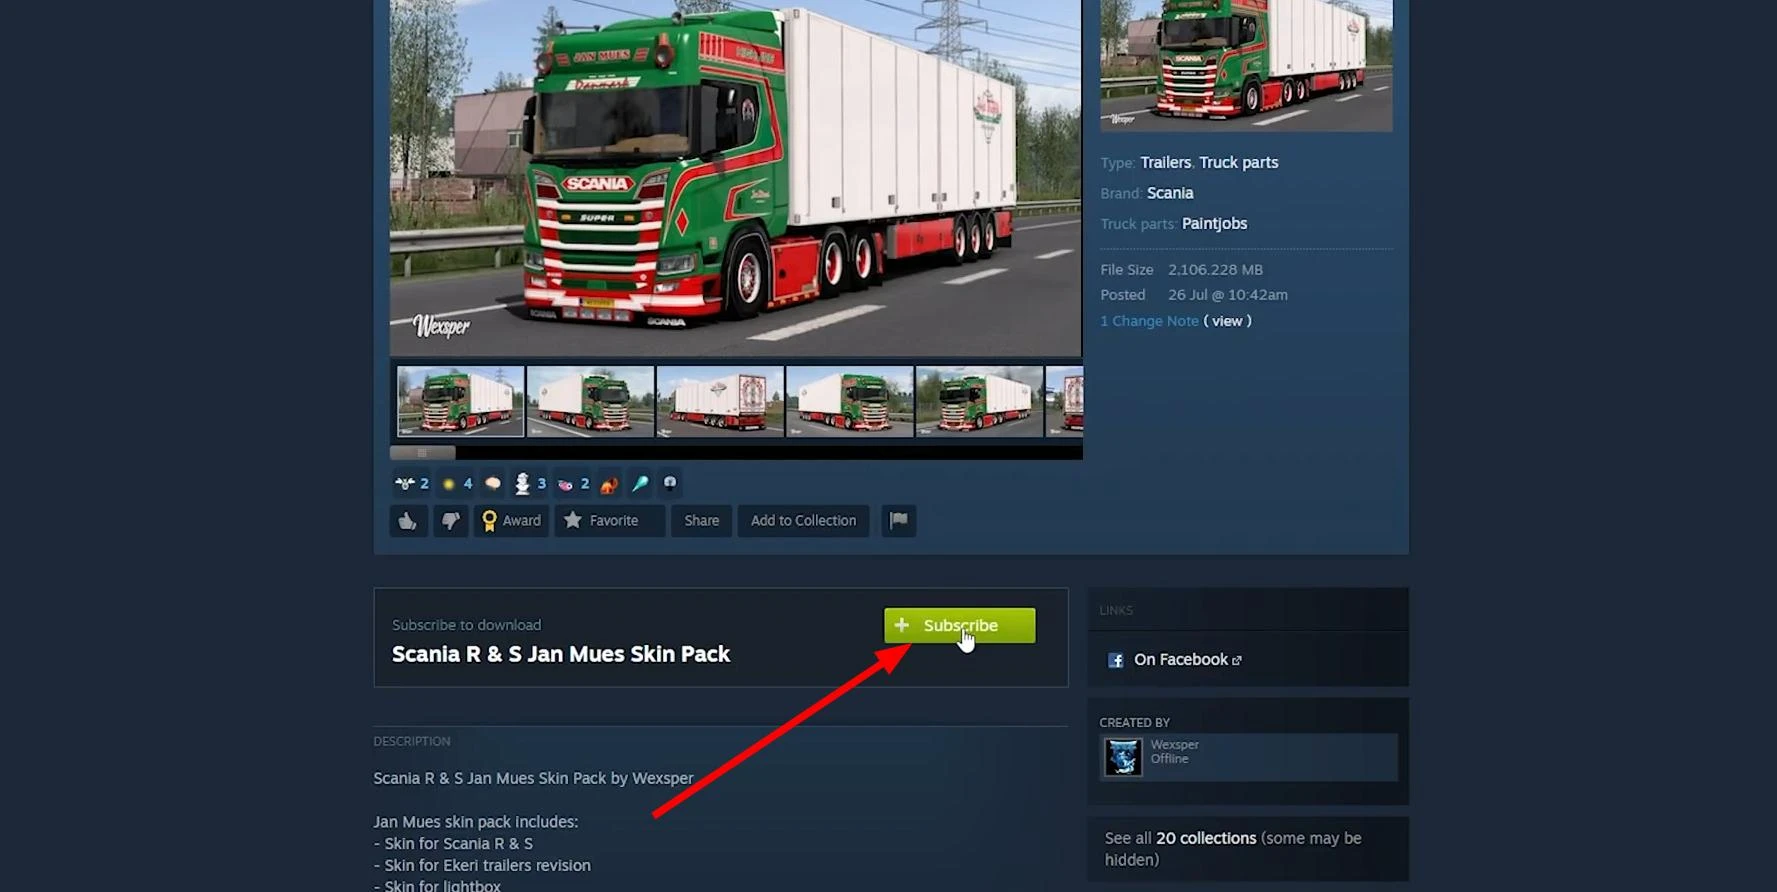
Once subscribed, the mod will automatically download. Now open the game, go to “Mod Manager”, find the downloaded mod and move it to “Active Mods”. After confirming the changes, you can start the game with the mods installed.
This method is good for its simplicity, but not all mods are available in Steam Workshop. If the desired mod is not there, you will have to install it manually, using the instructions above.
Installing mods on the server (ETS2 MP)
In Euro Truck Simulator 2 multiplayer, installing mods requires additional actions. But, if you are careful, there is also nothing complicated here. Let's understand it step by step.
First, activate the necessary mods in the single-player game, after which start the trip. Then open the console (~ or \ depending on your keyboard settings) and type the export_server_packages command, then press Enter.
Next, close the game and go to the Documents/Euro Truck Simulator 2 folder. Here you will see the files server_packages.sii, server_packages.dat and mods_info.sii. They should be uploaded to the server via FTP to the /local/share/Euro Truck Simulator 2 folder. After restarting the server the mods will become active in multiplayer.
Disabling ETS2 automatic updates
After game updates, some mods may stop working. To avoid problems, you can disable automatic update of ETS2 in Steam.
To do this, open your game library, find Euro Truck Simulator 2, right-click and select “Properties”. Go to the “Updates” tab, where you can select the “Only on startup” option. You can also go to the “Beta Versions” section and select the previous version of the game, if the update has already been released and is not compatible with your mods.
Videos
Added by


https://modland.net
Sanjeymasaniya
Vijay