How to Enable RTX in Minecraft Bedrock Edition (Step-by-Step Guide)
-lg_modland.jpg)
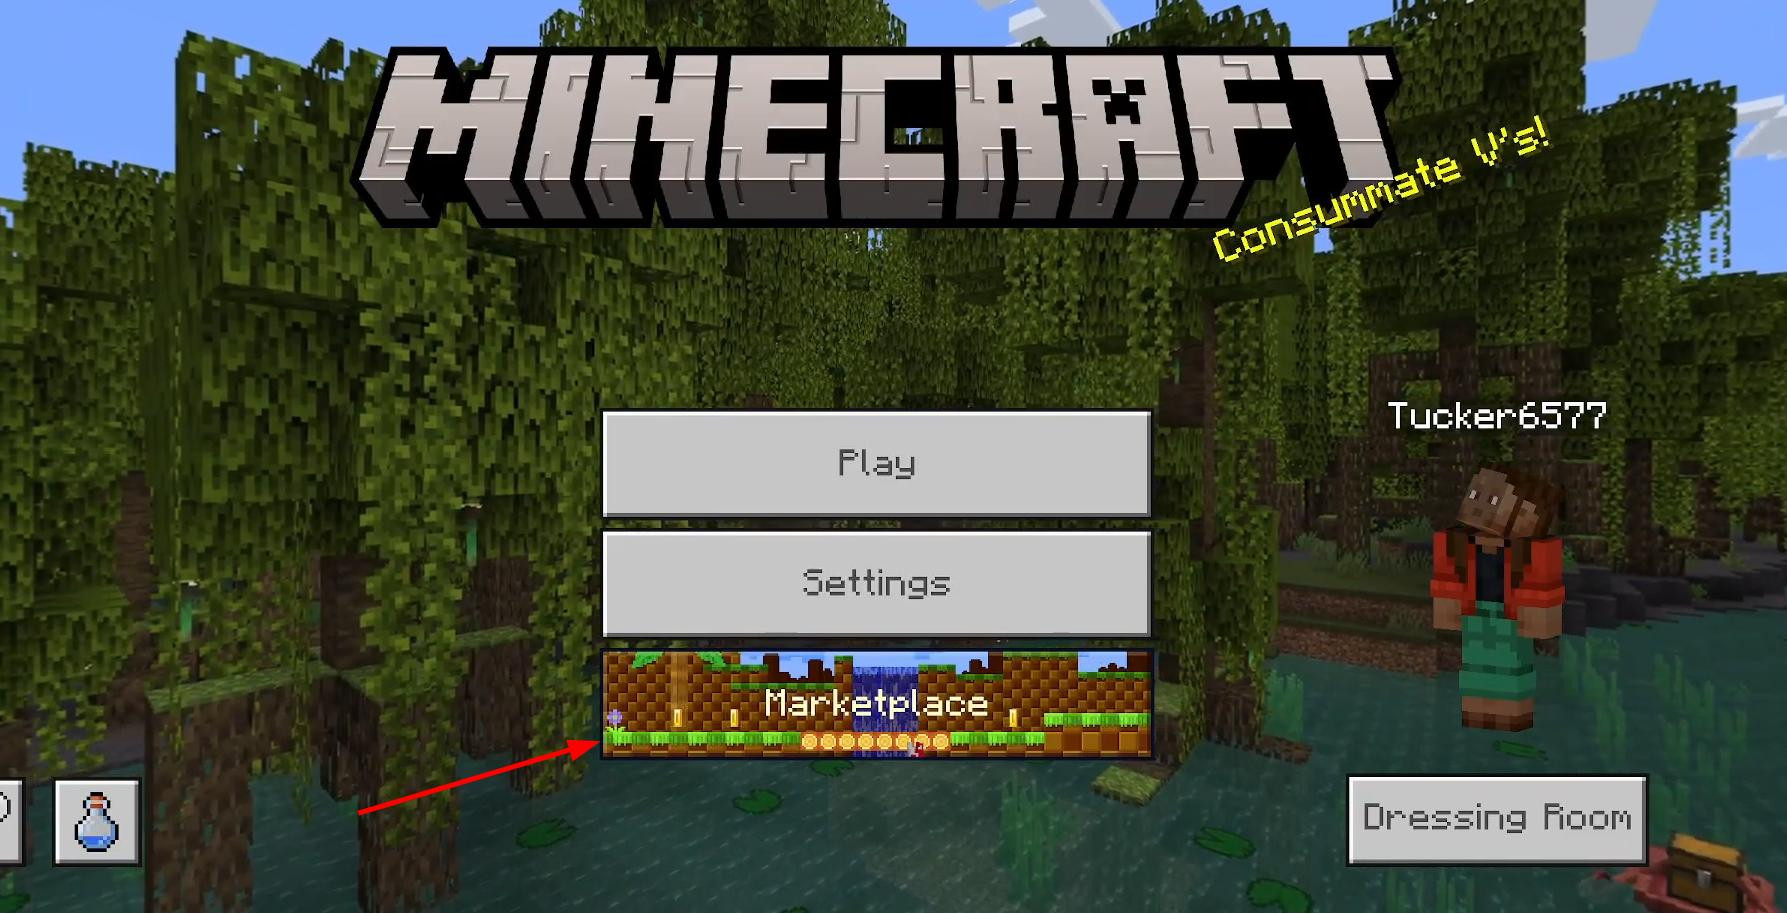


To enable RTX in Minecraft Bedrock, you first need to make sure that your computer supports this technology. Not all devices can handle Ray Tracing, so the first thing you need to do is check this. Open Minecraft and click on the “Marketplace” button on the main page.
Next, in the upper right corner, there will be a search bar where you can enter RTX and click search.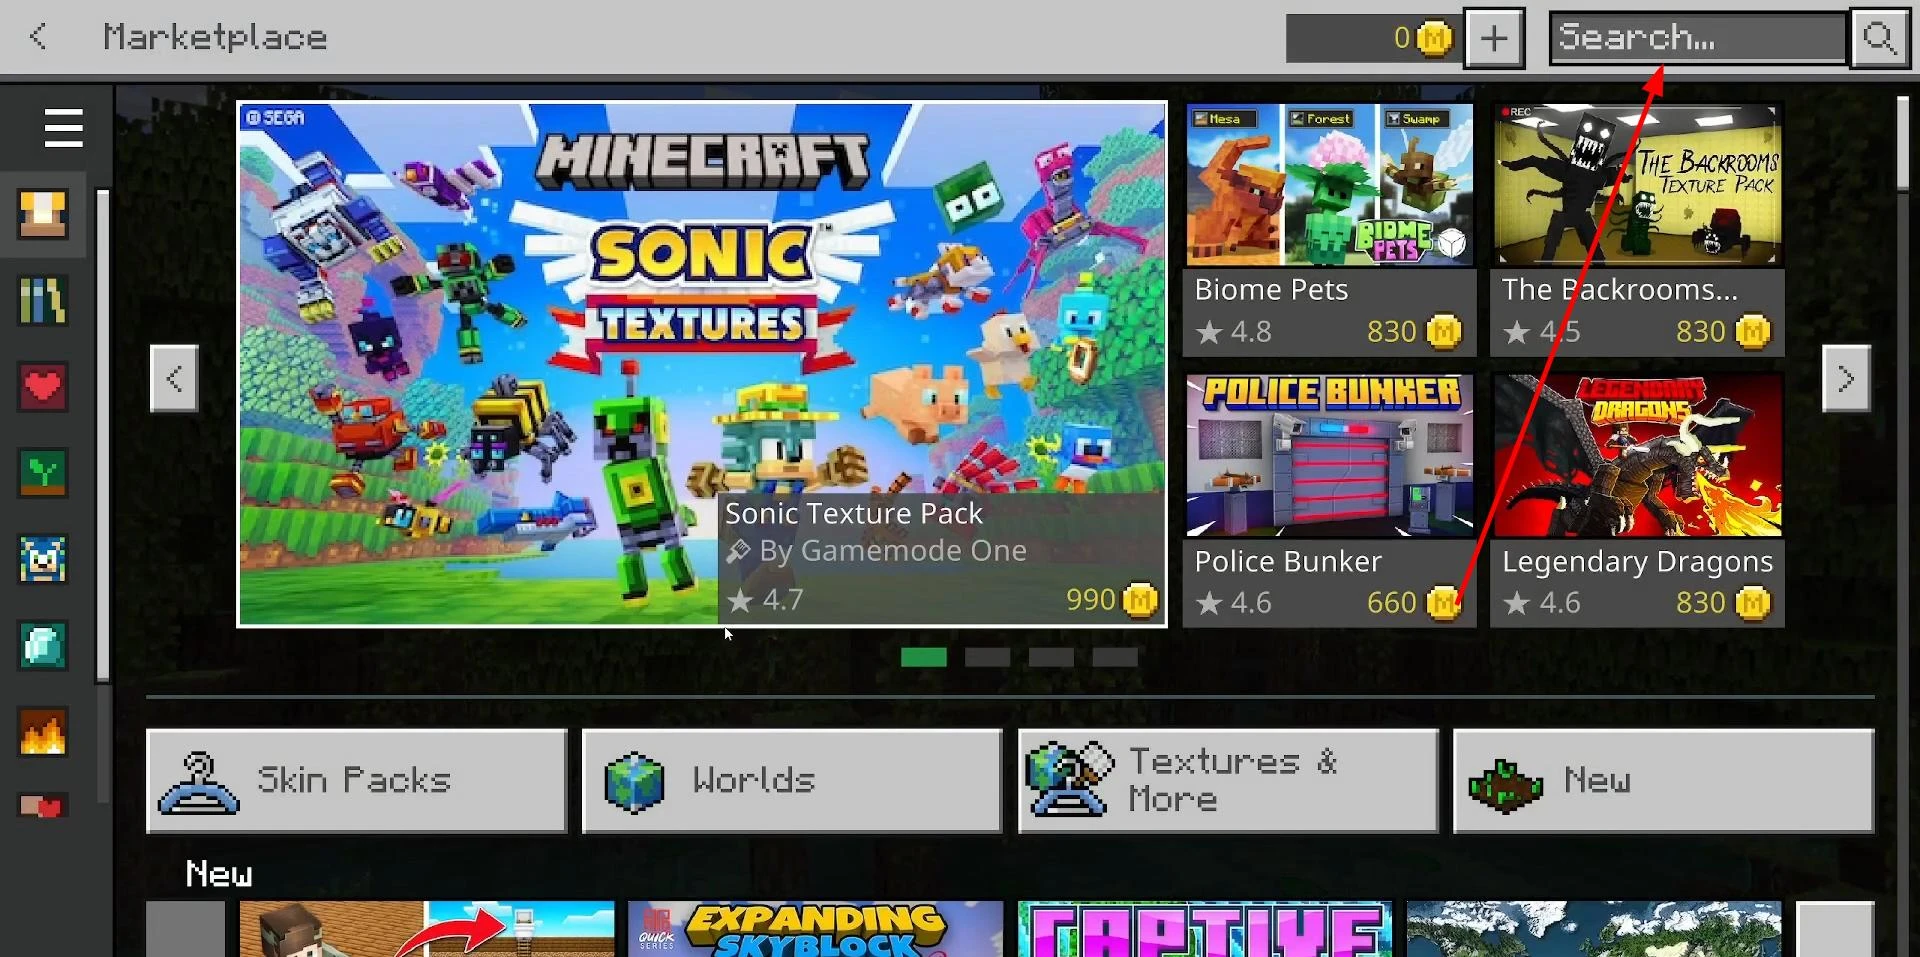
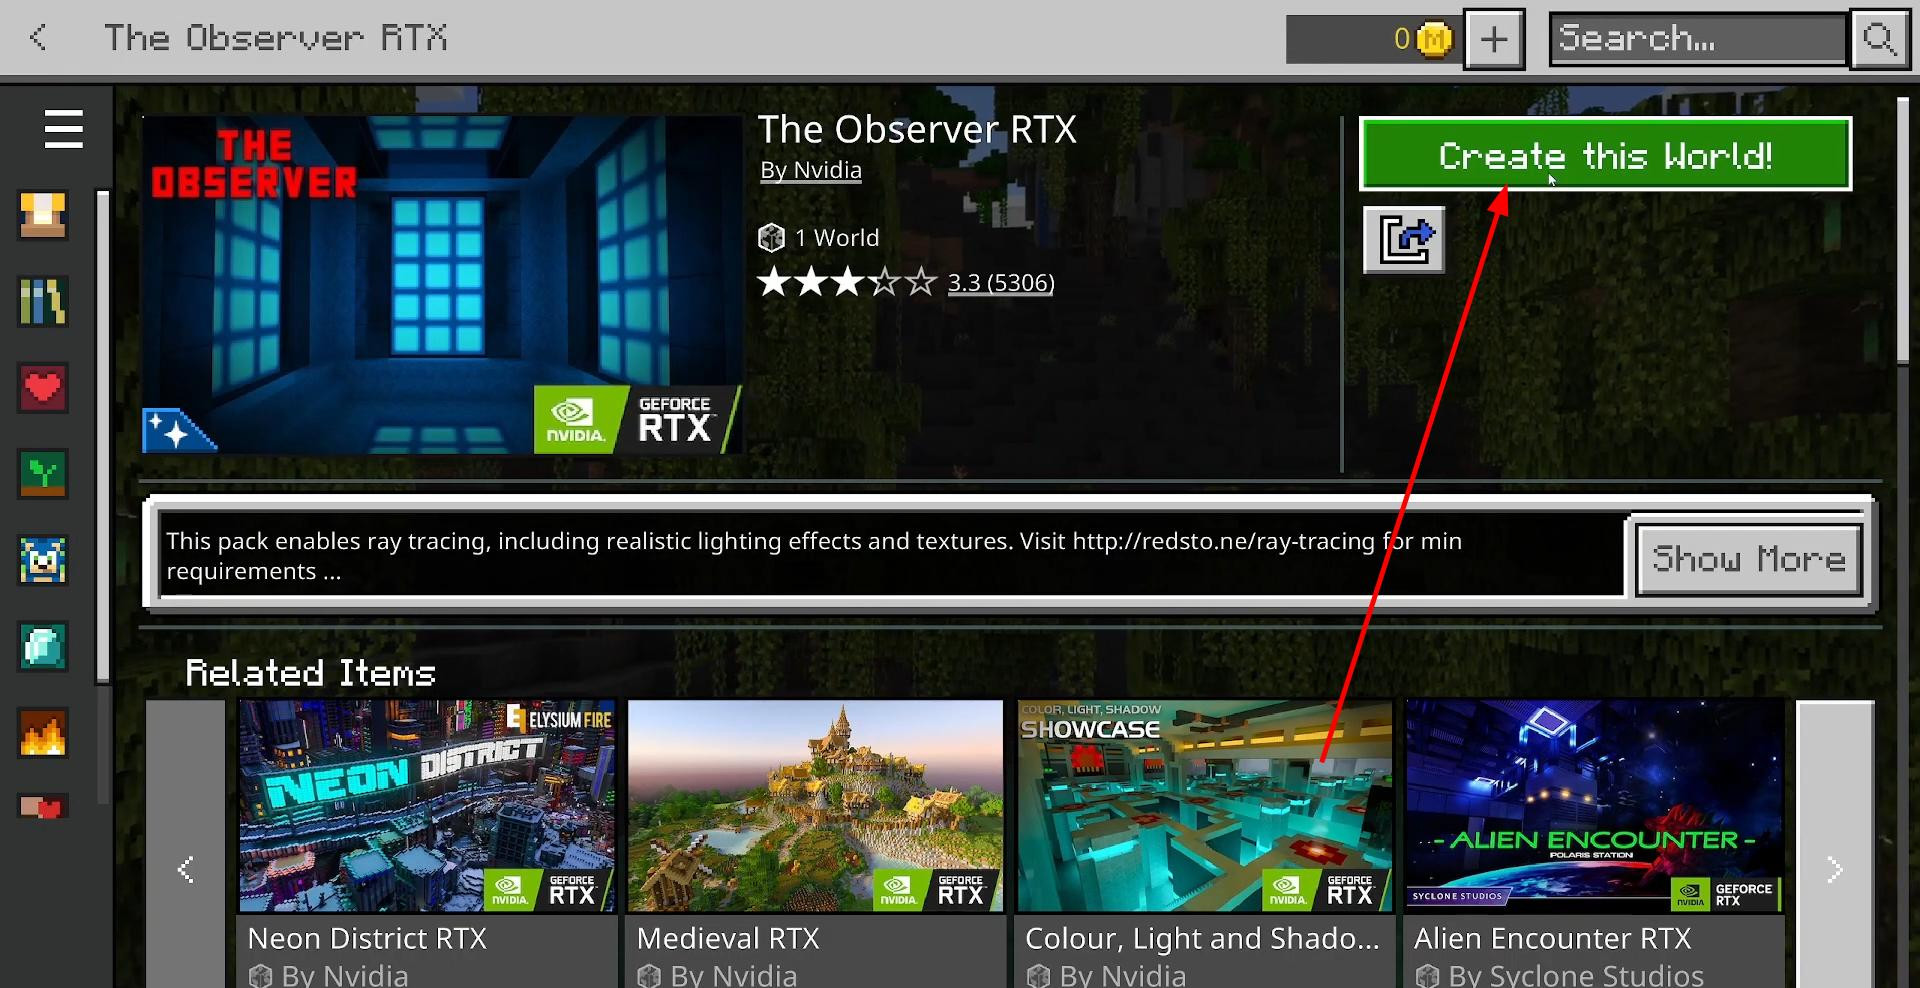
The results will show different worlds specially made for RTX. Find any world that says “RTX” in the lower right corner and click on it.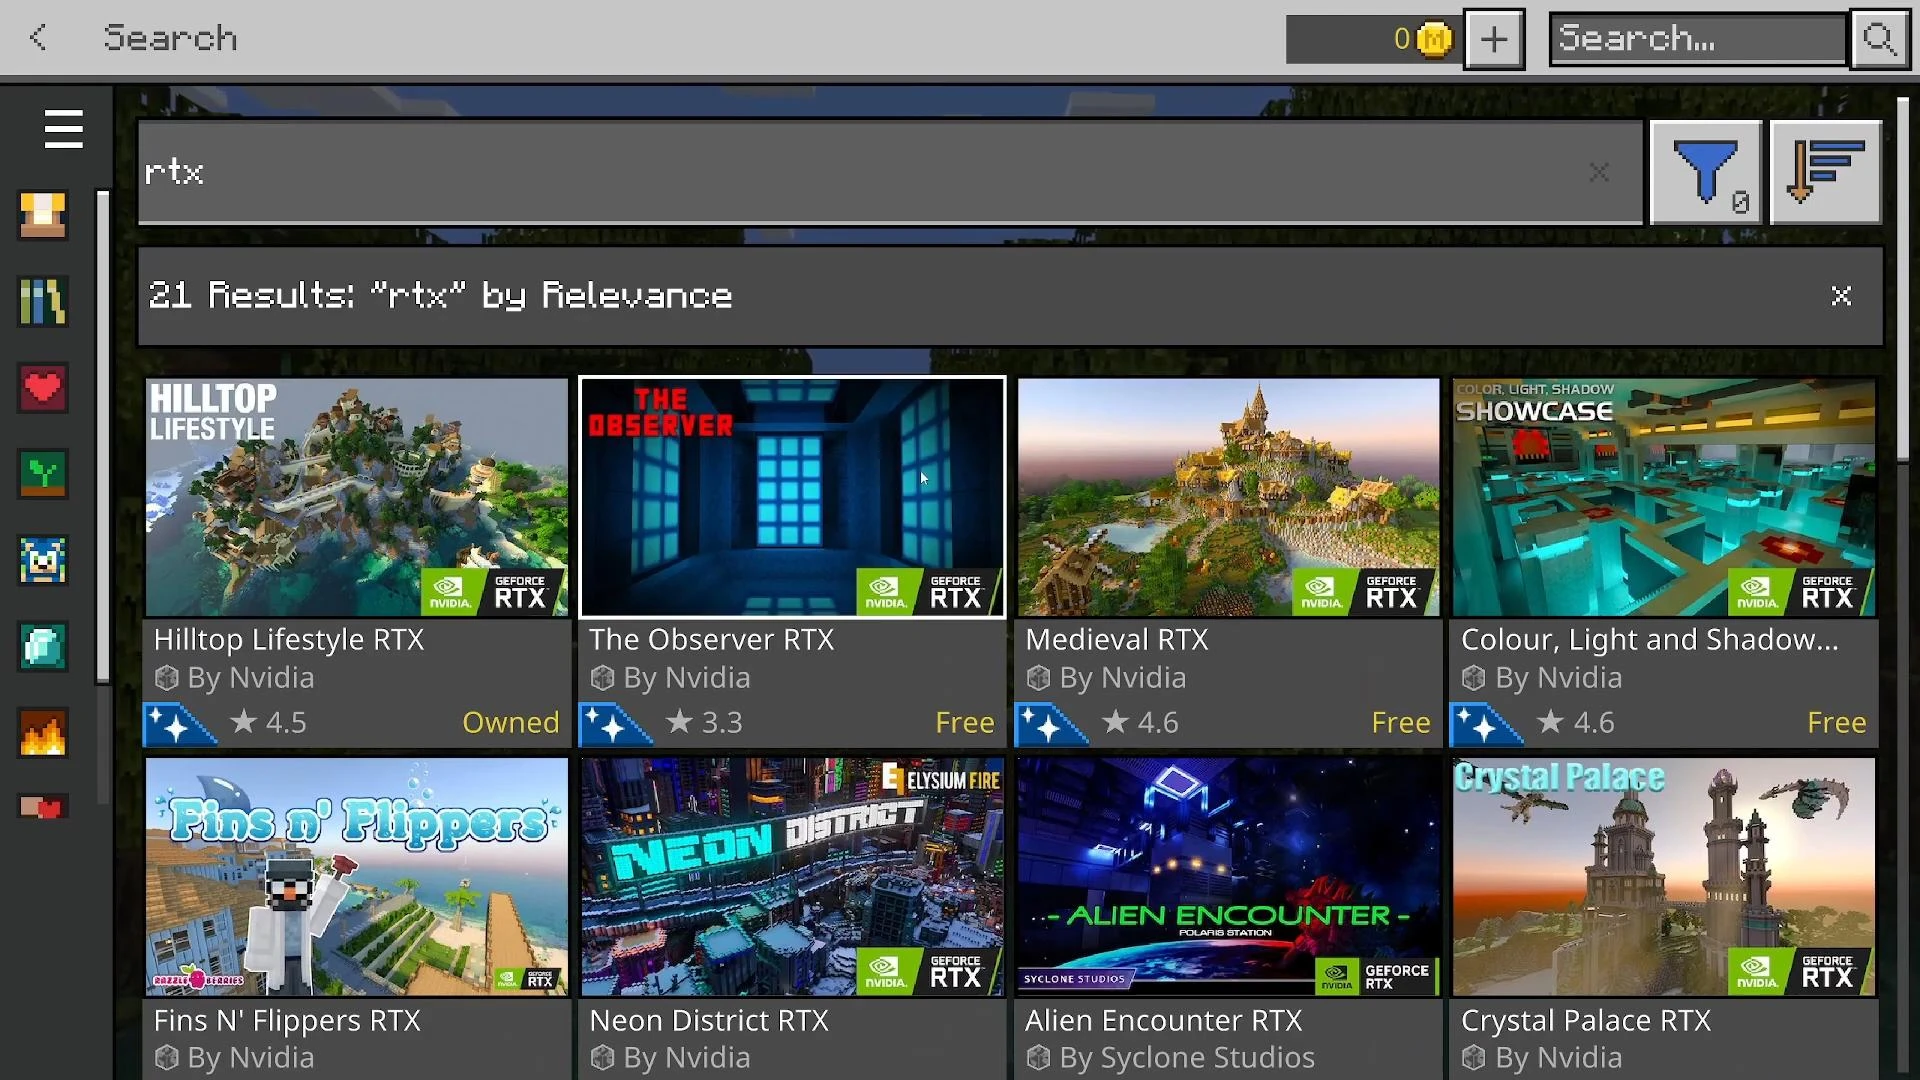
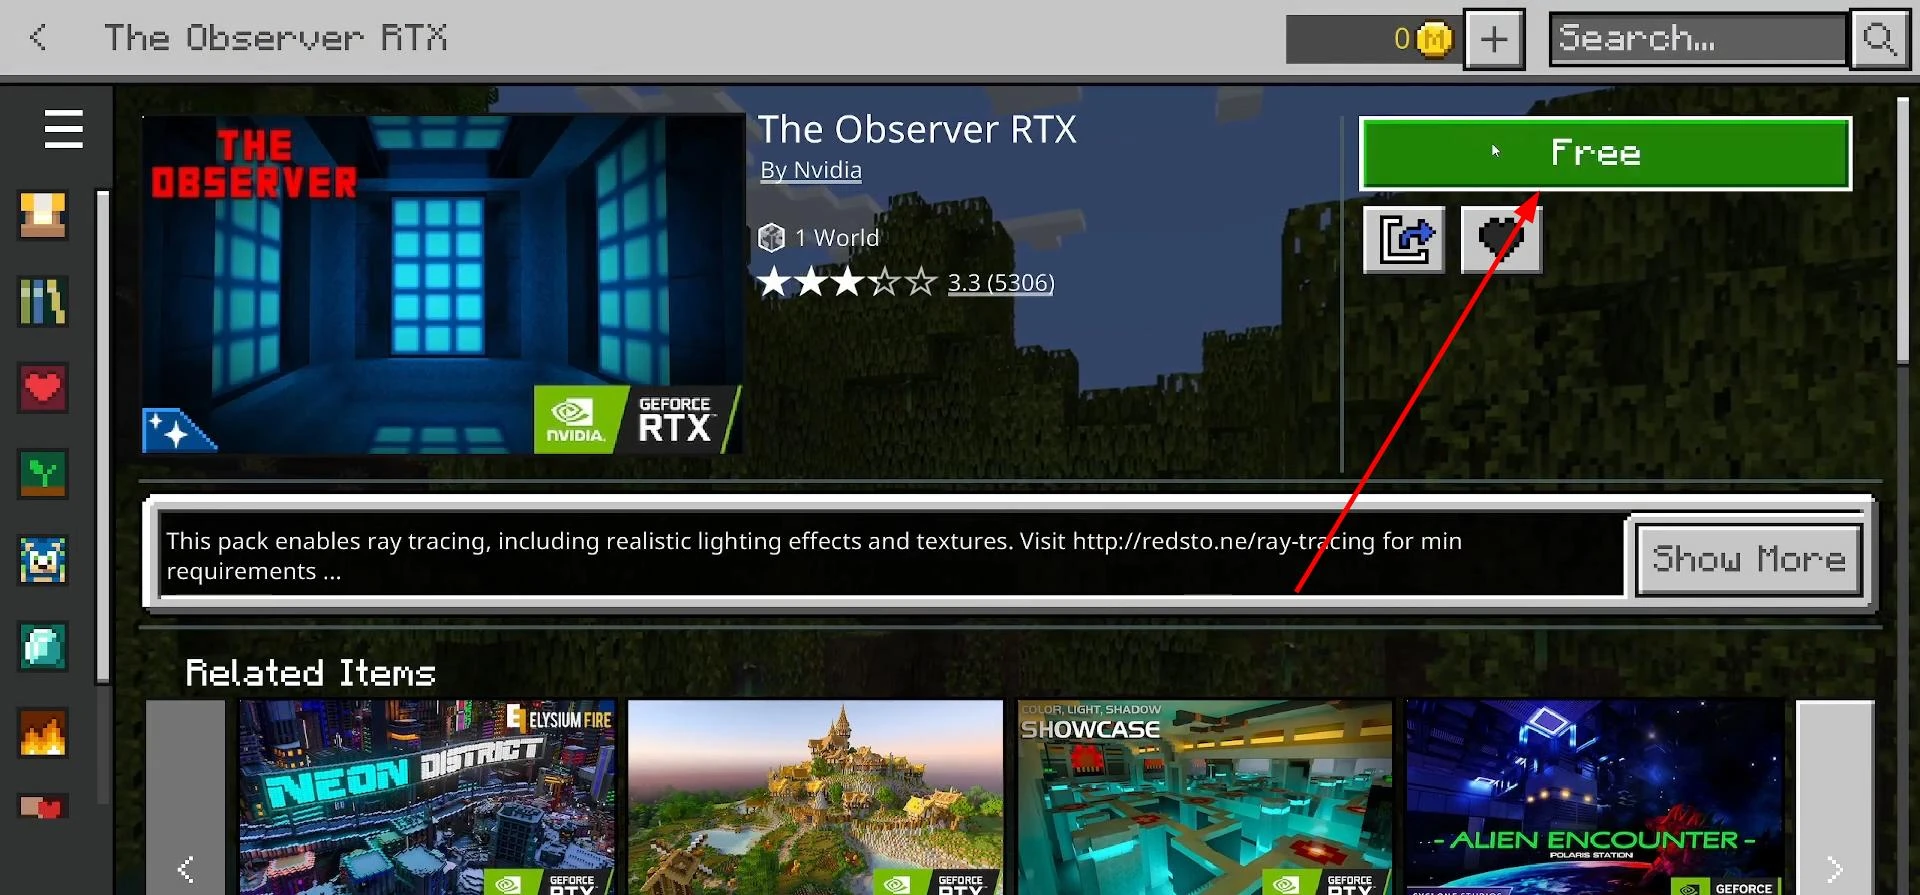
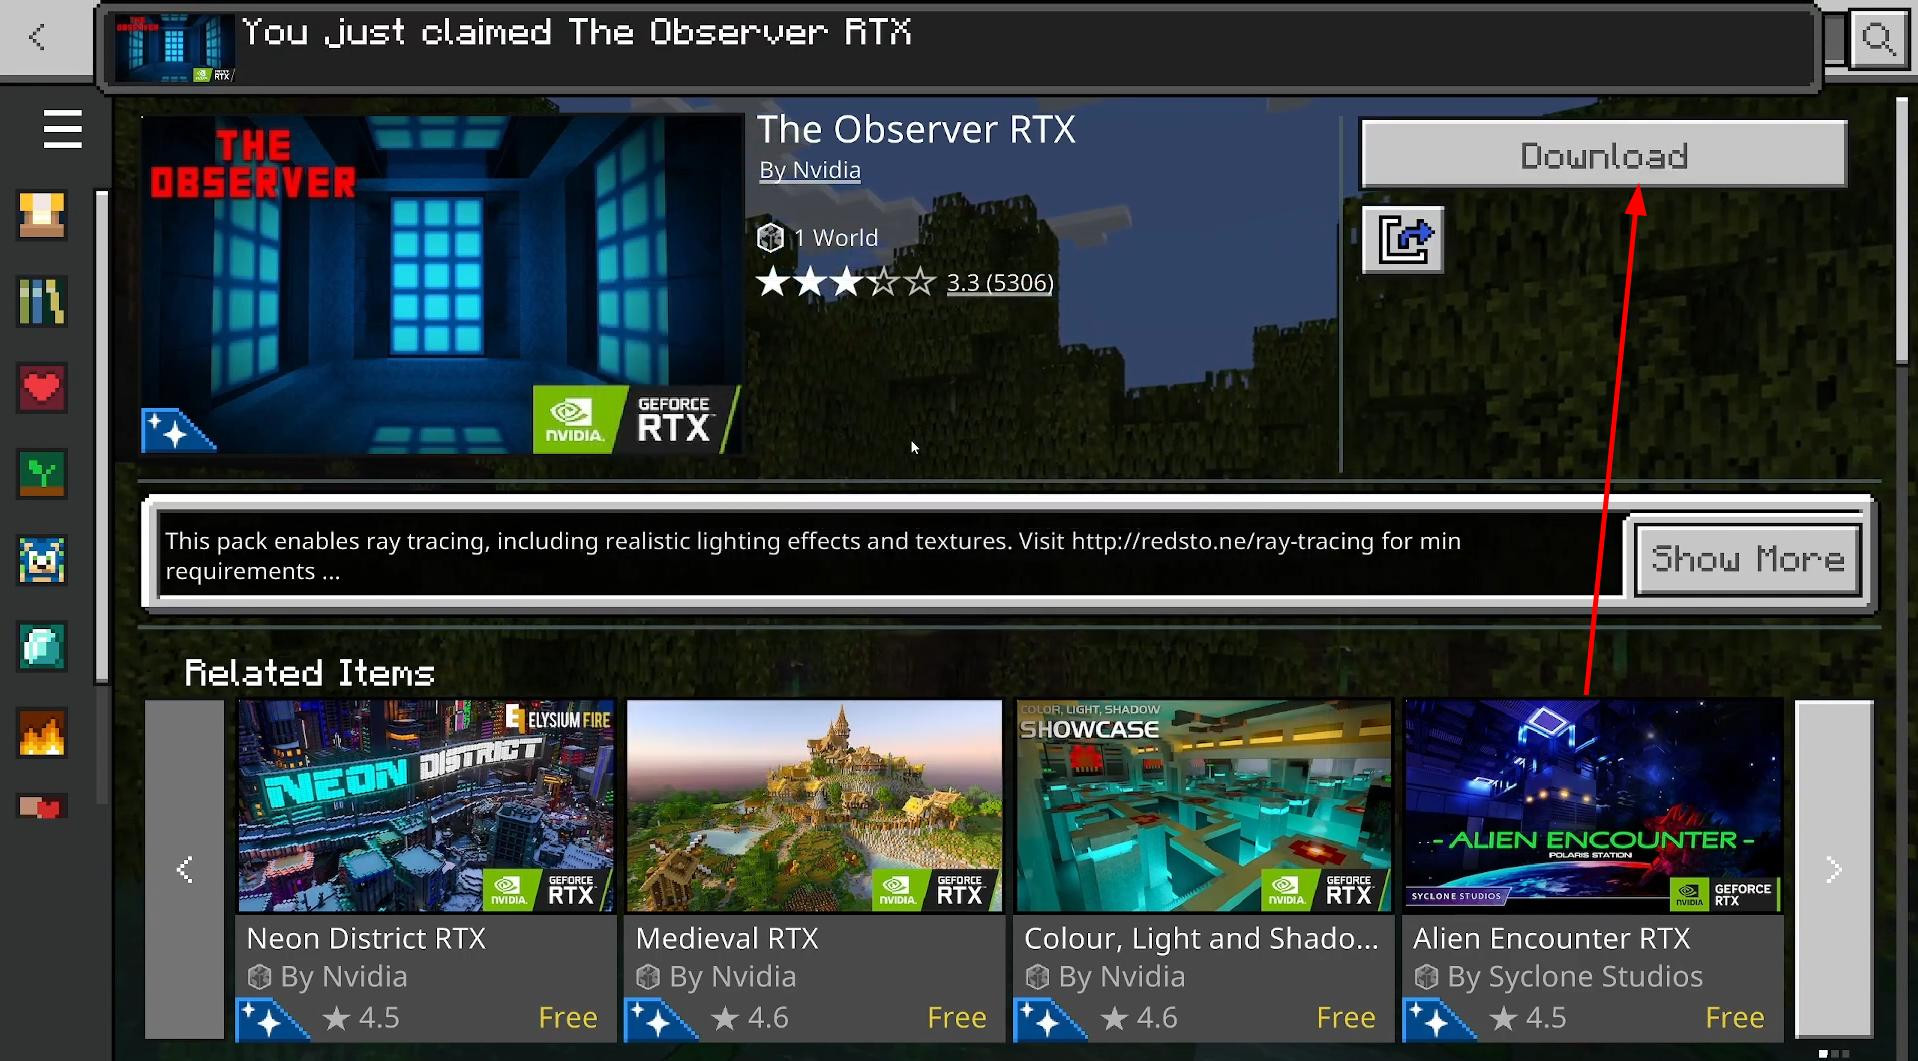
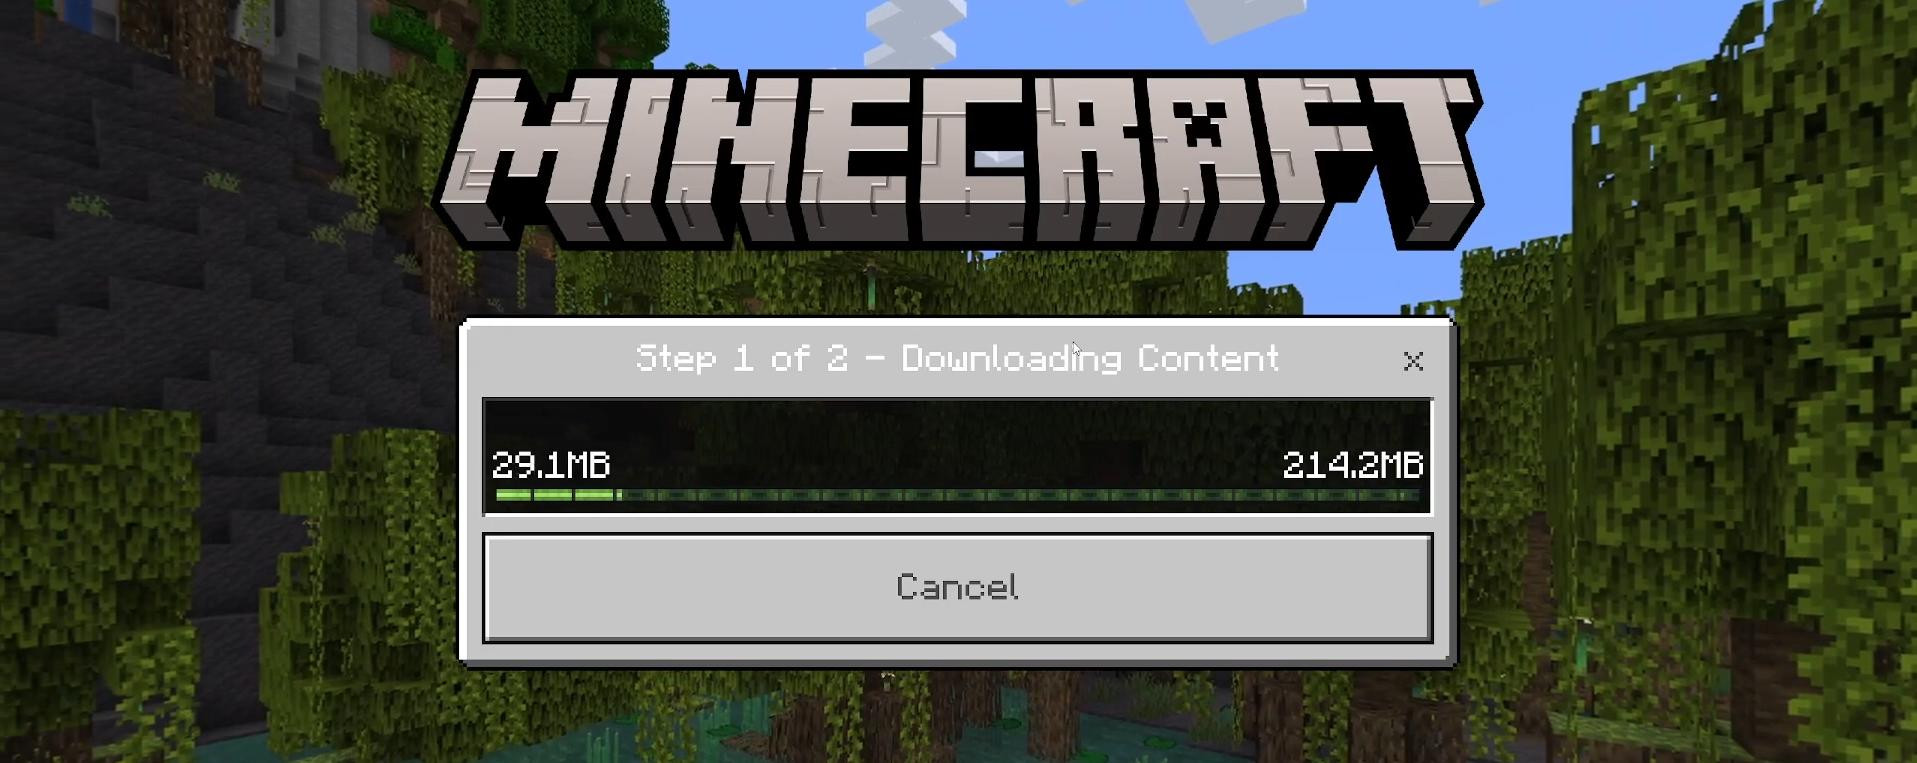
When the world page opens, click “Free” in the upper right corner (it's free, the system just says ‘purchase’), and then “Download”.
Wait for the download to finish.
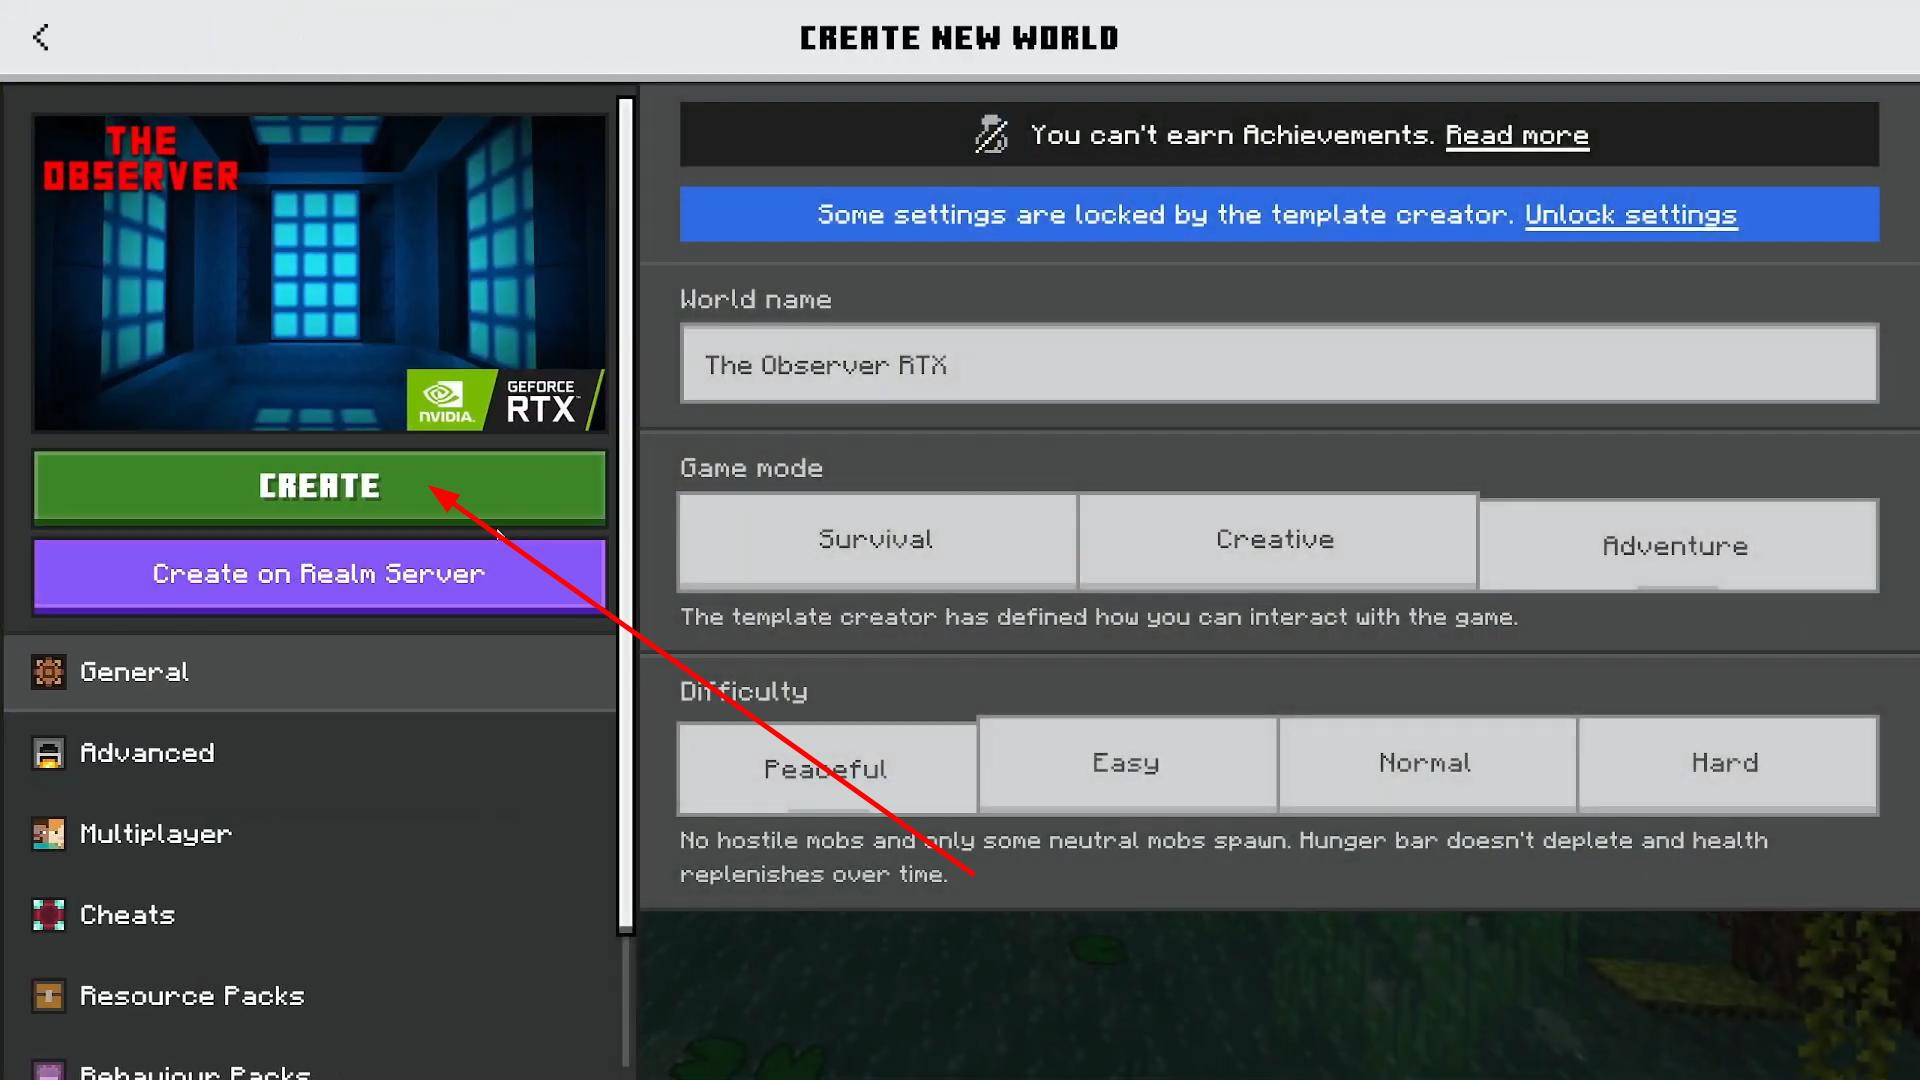
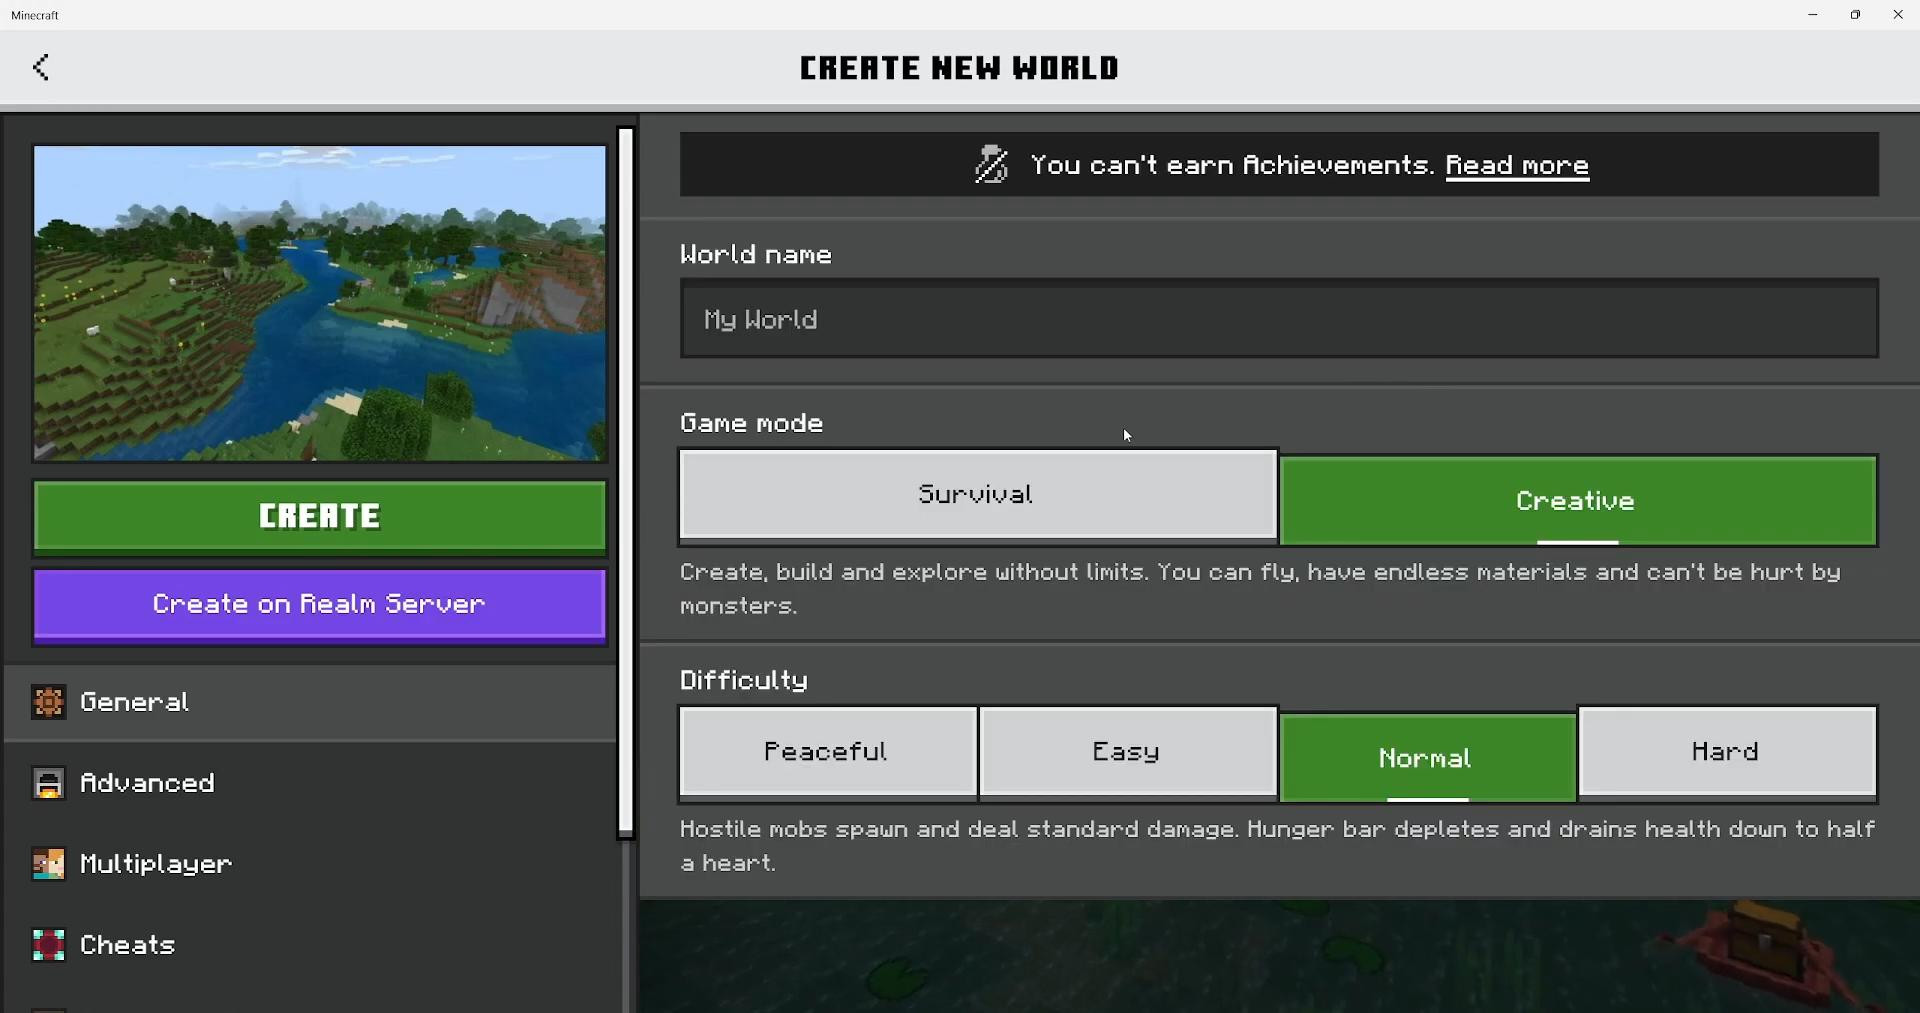
After that, click “Create this world” and then “Create”.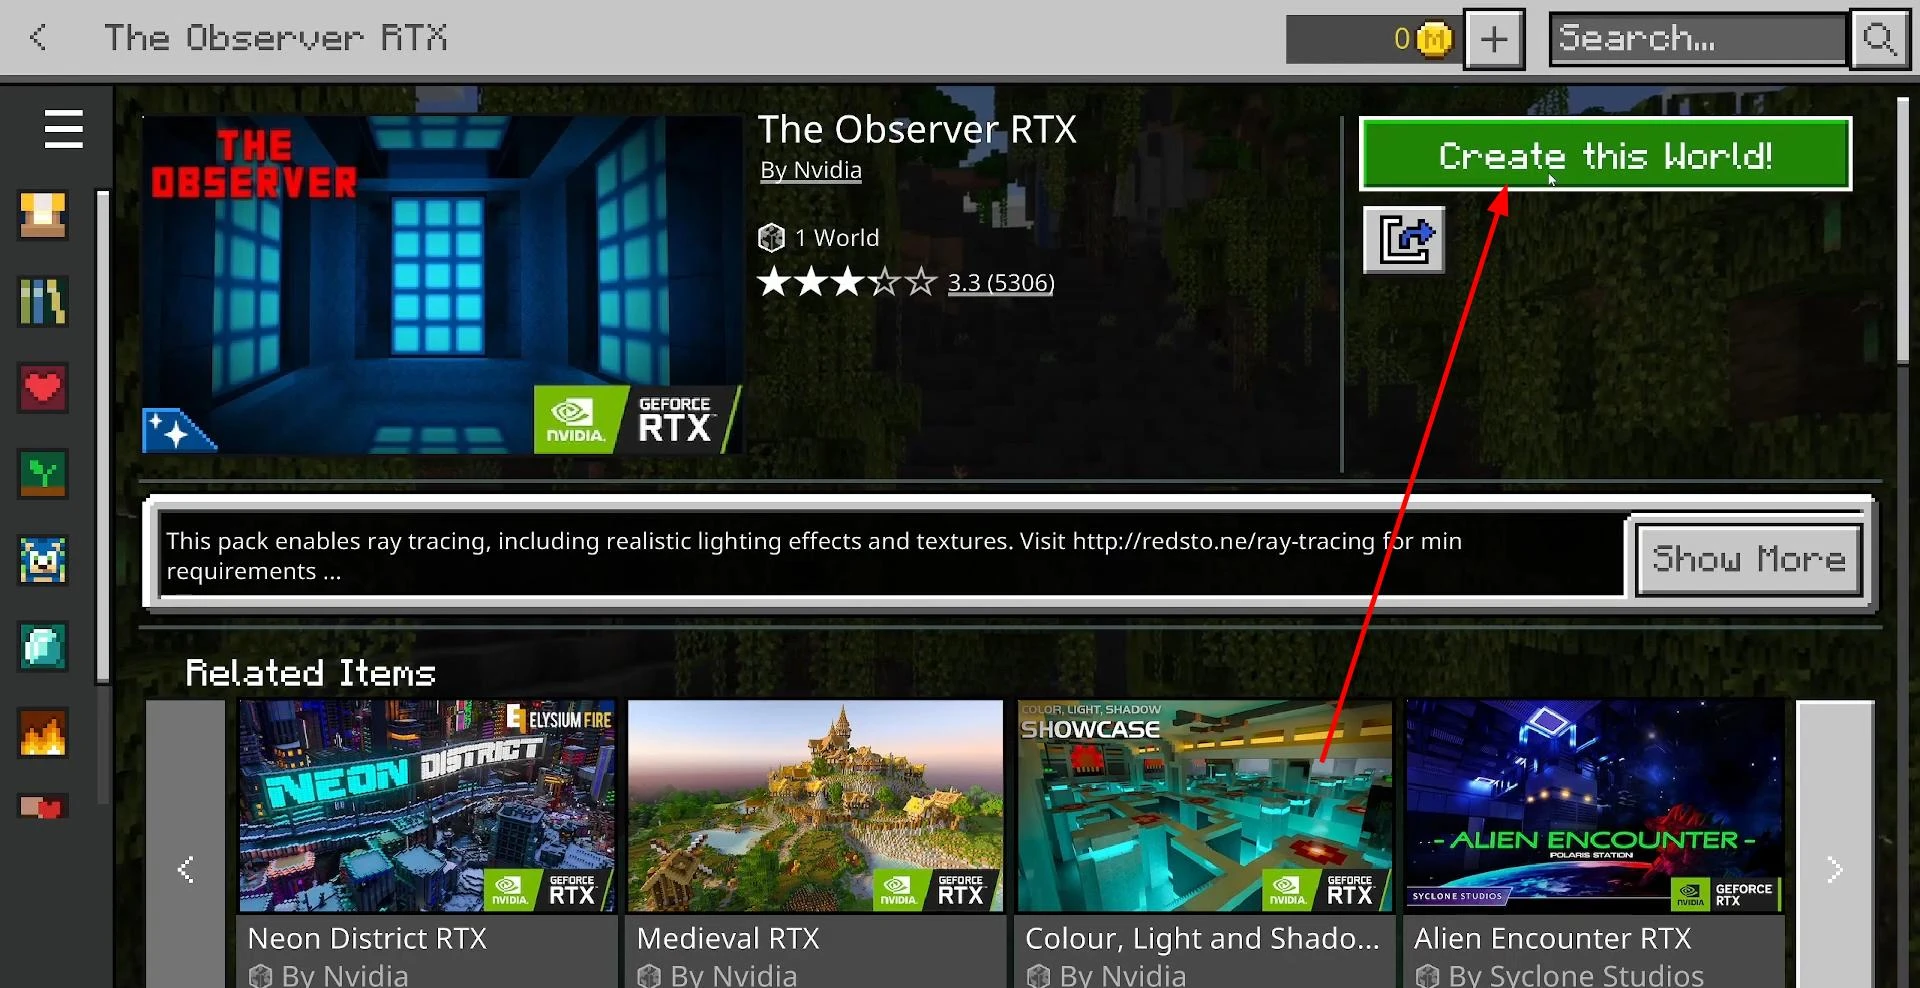

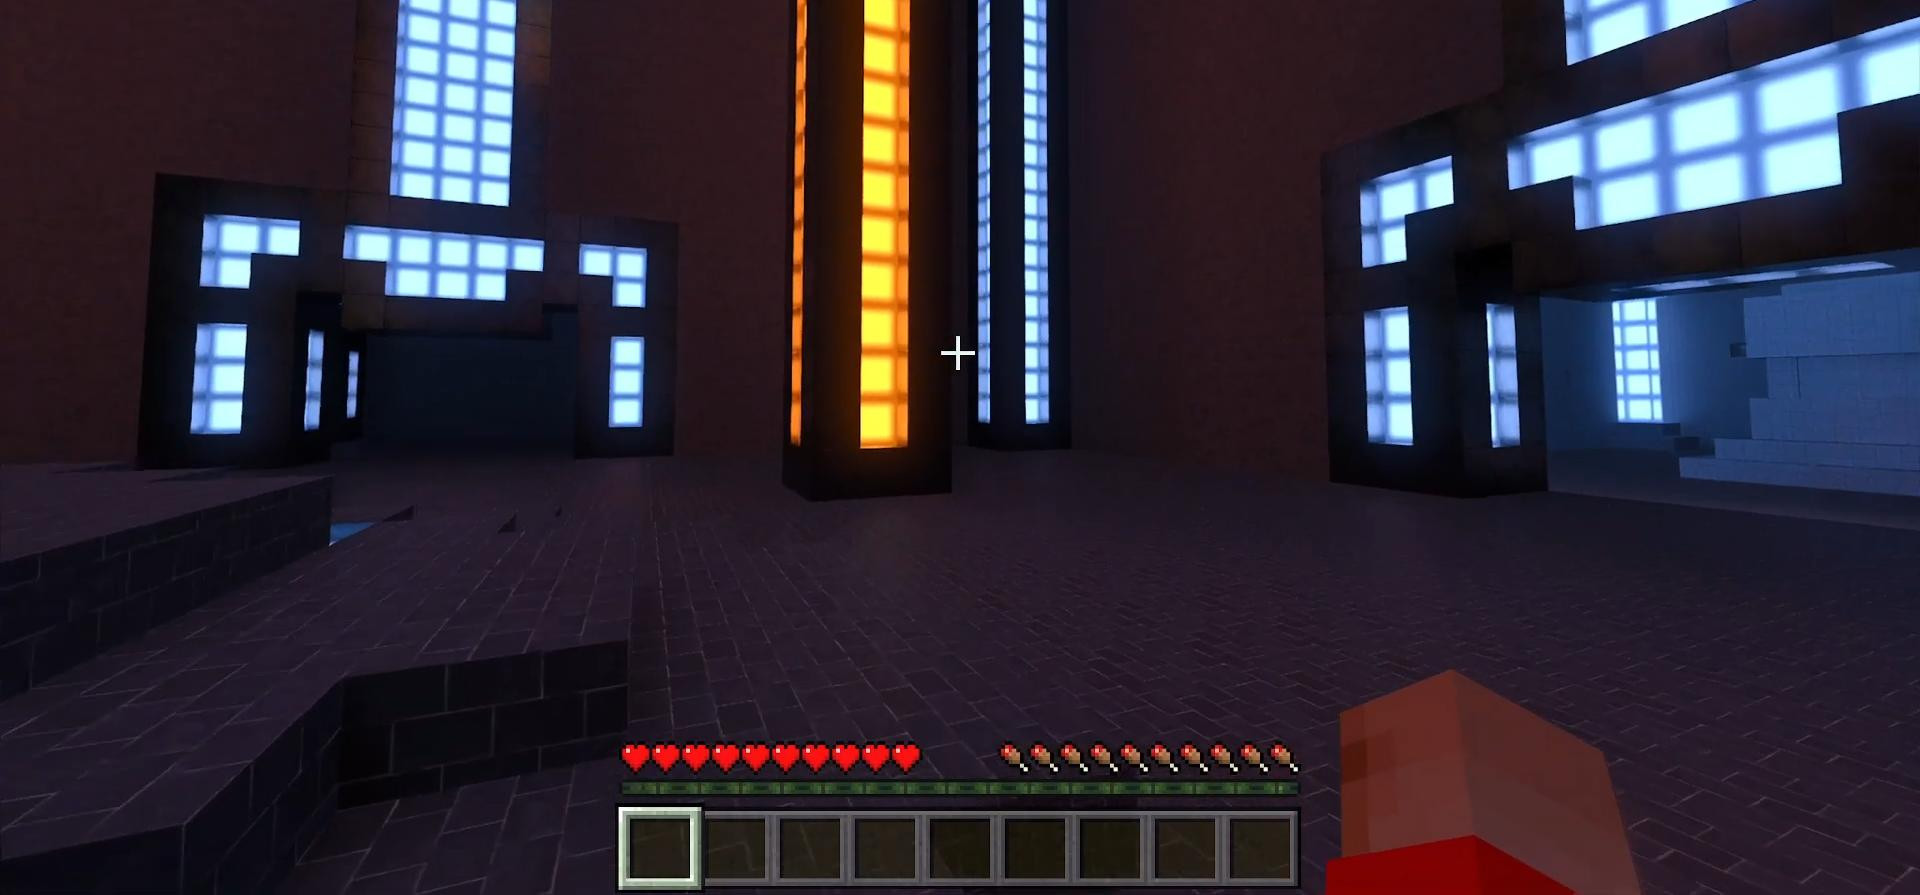
The game will load the RTX world, and you will know that everything is working if you see beautiful reflections, bright lighting, and realistic shadows. This means that your computer can handle RTX. If the world does not start, then most likely your PC does not support the technology.
Then you can exit this world: click “Save & Quit”, return to the Minecraft main screen, and then simply close the game.
Now comes the most interesting part — how to enable RTX in your own world, not just in pre-created ones. To do this, open any browser (for example, Google Chrome) and type something like “Minecraft Bedrock Ray tracing texture pack” in the search bar. Go to one of the sites that offer RTX packs. A good site is, for example, PlanetMinecraft or Modland. There are many different RTX resource packs there.
Choose the one you like, click on it, and scroll down until you find the download button (for example, “Download Bedrock Texture Pack”). Download the file. After that, you can close your browser.
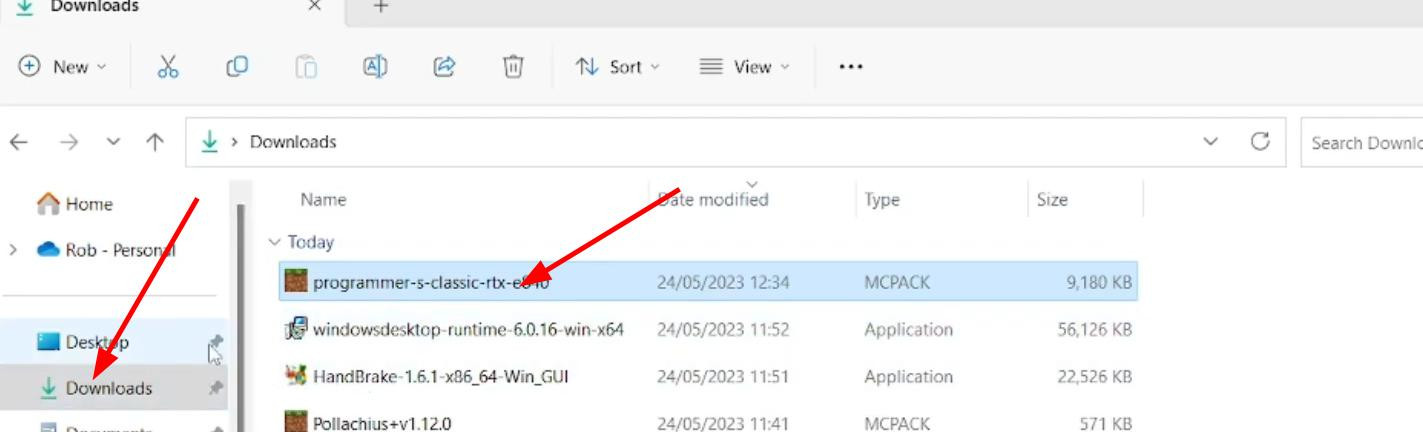
Next, open Windows File Explorer and go to the “Downloads” folder. Find the file you just downloaded — it should have the .mcpack extension.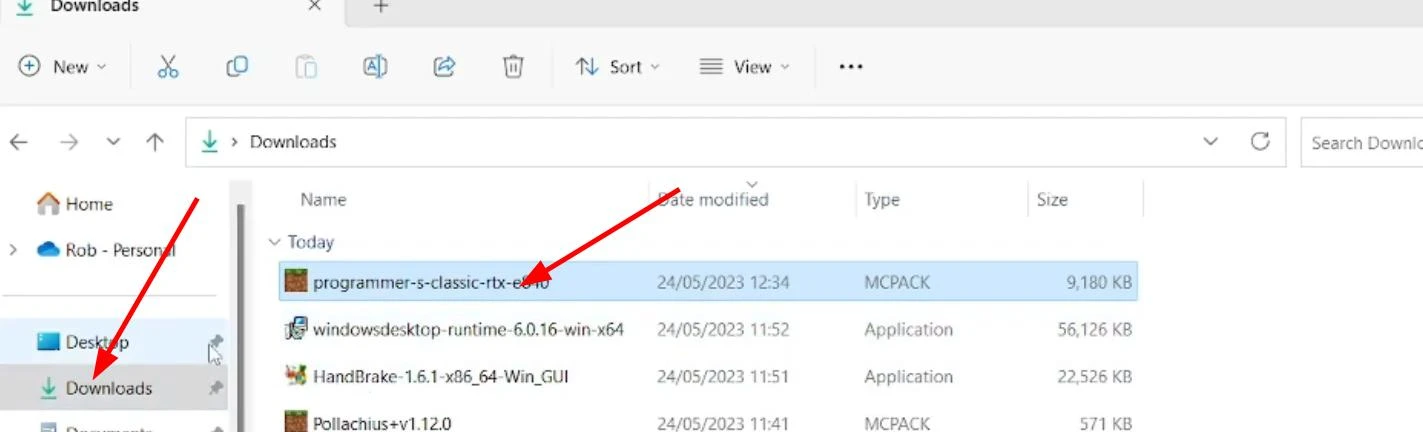
This is important. If everything is correct, just double-click on the file. Minecraft Bedrock will open automatically, and the message “Import started” will appear at the top, followed shortly by “Import successful”. This means that the pack has been successfully added to the game.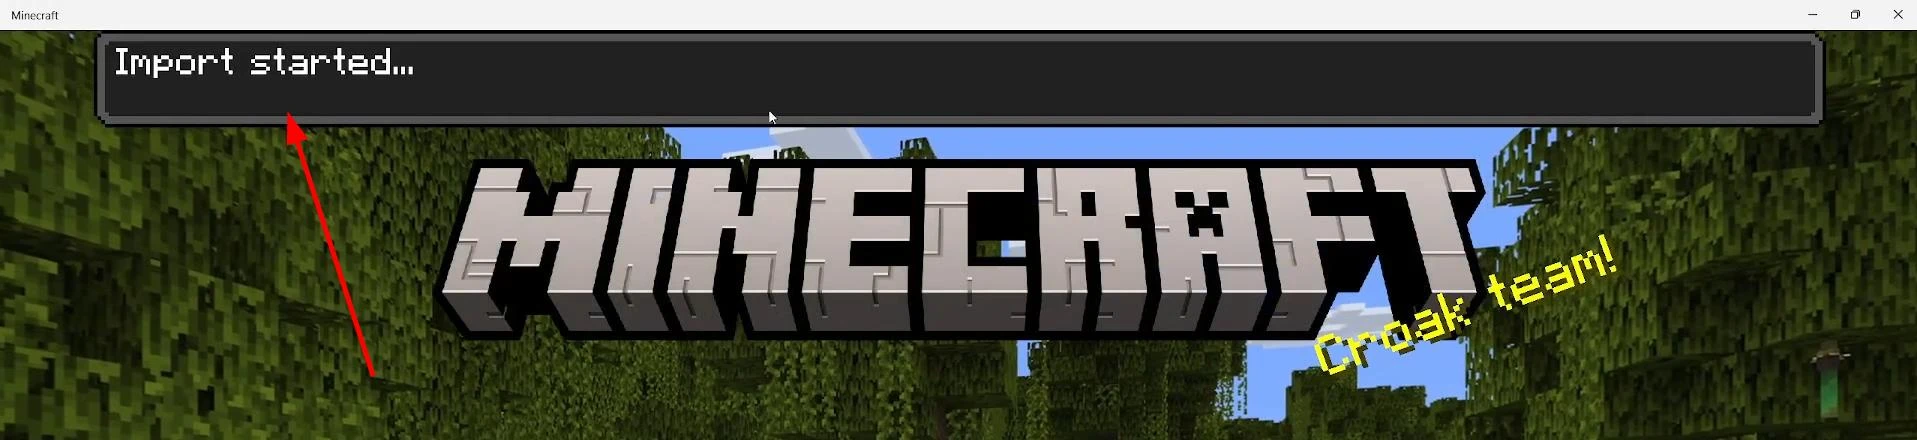
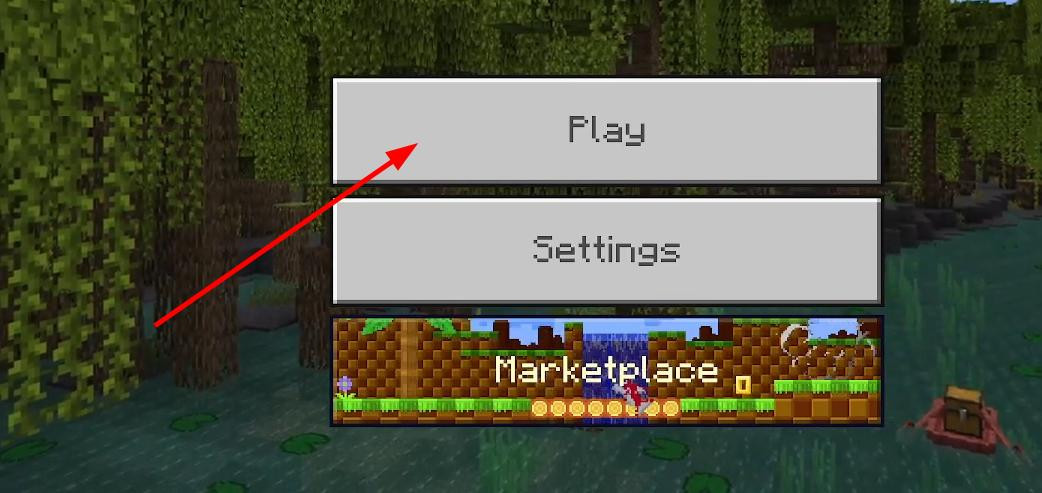
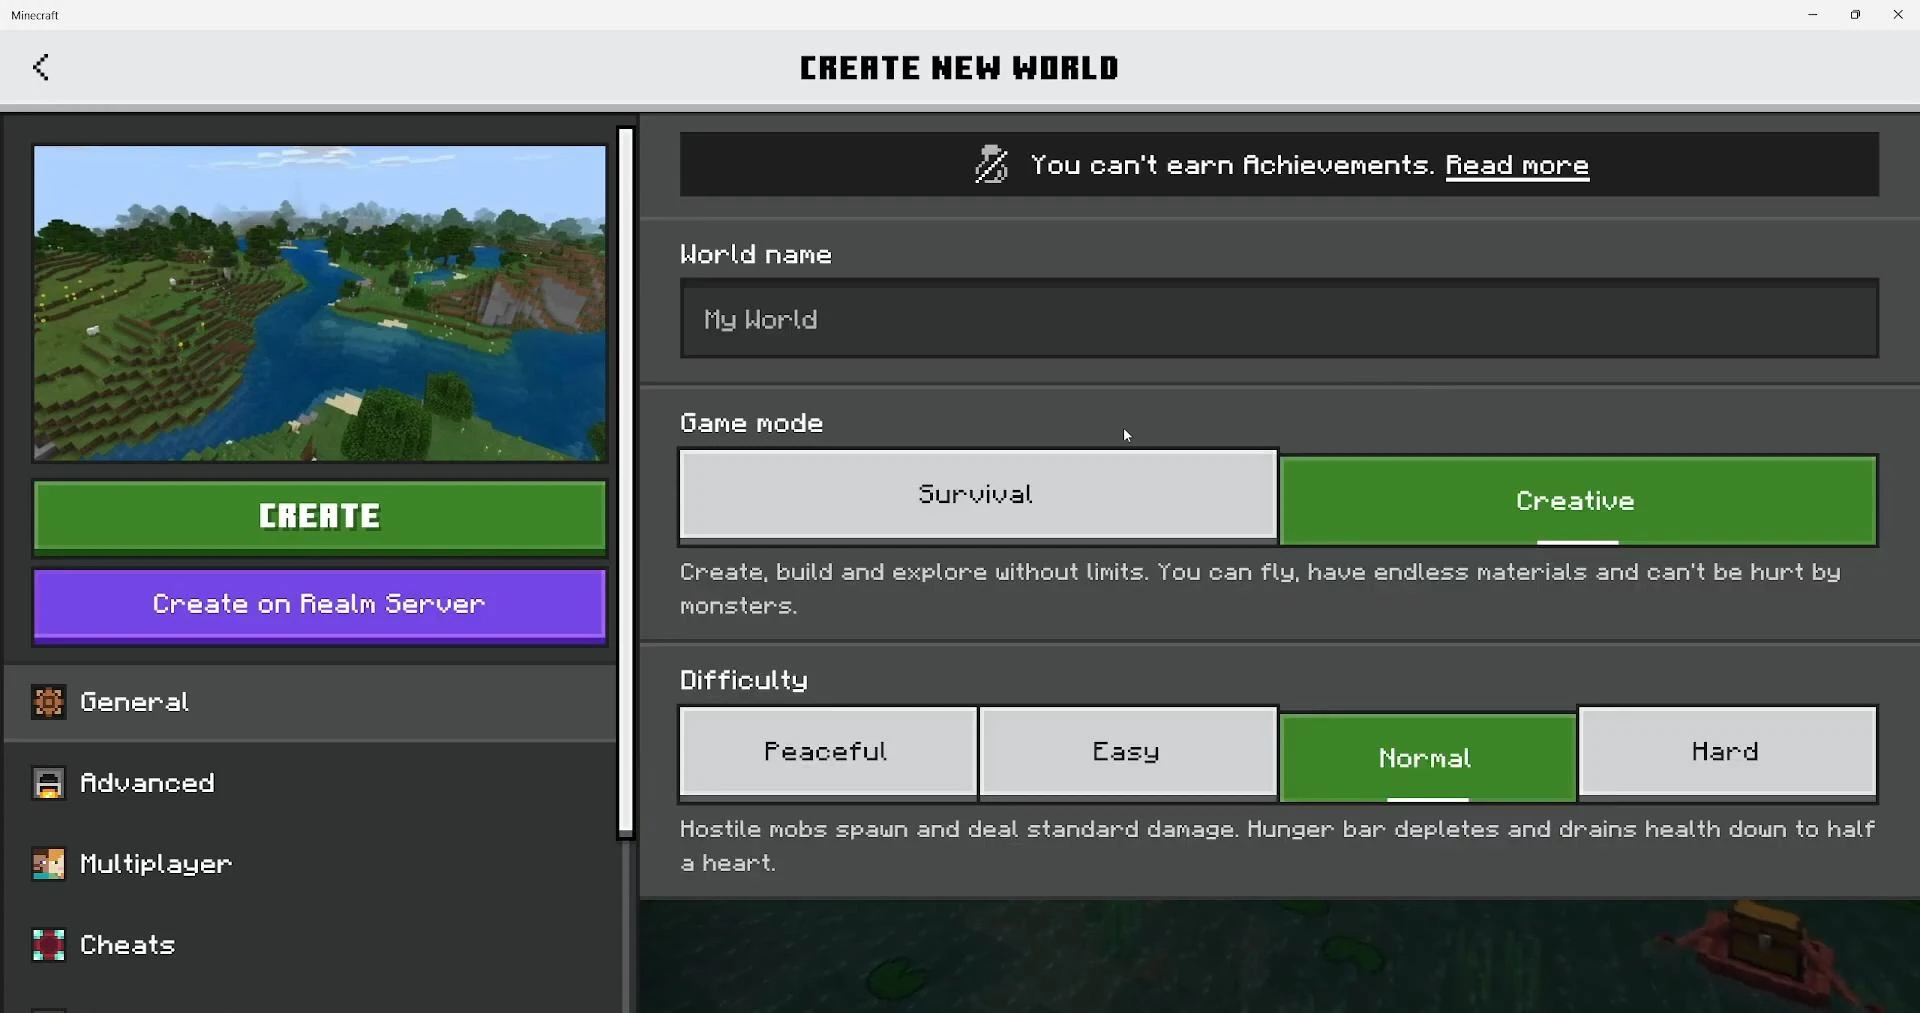
Now click “Play” again, you can either create a new world or open an existing one by clicking on the pencil icon to the right of the name.
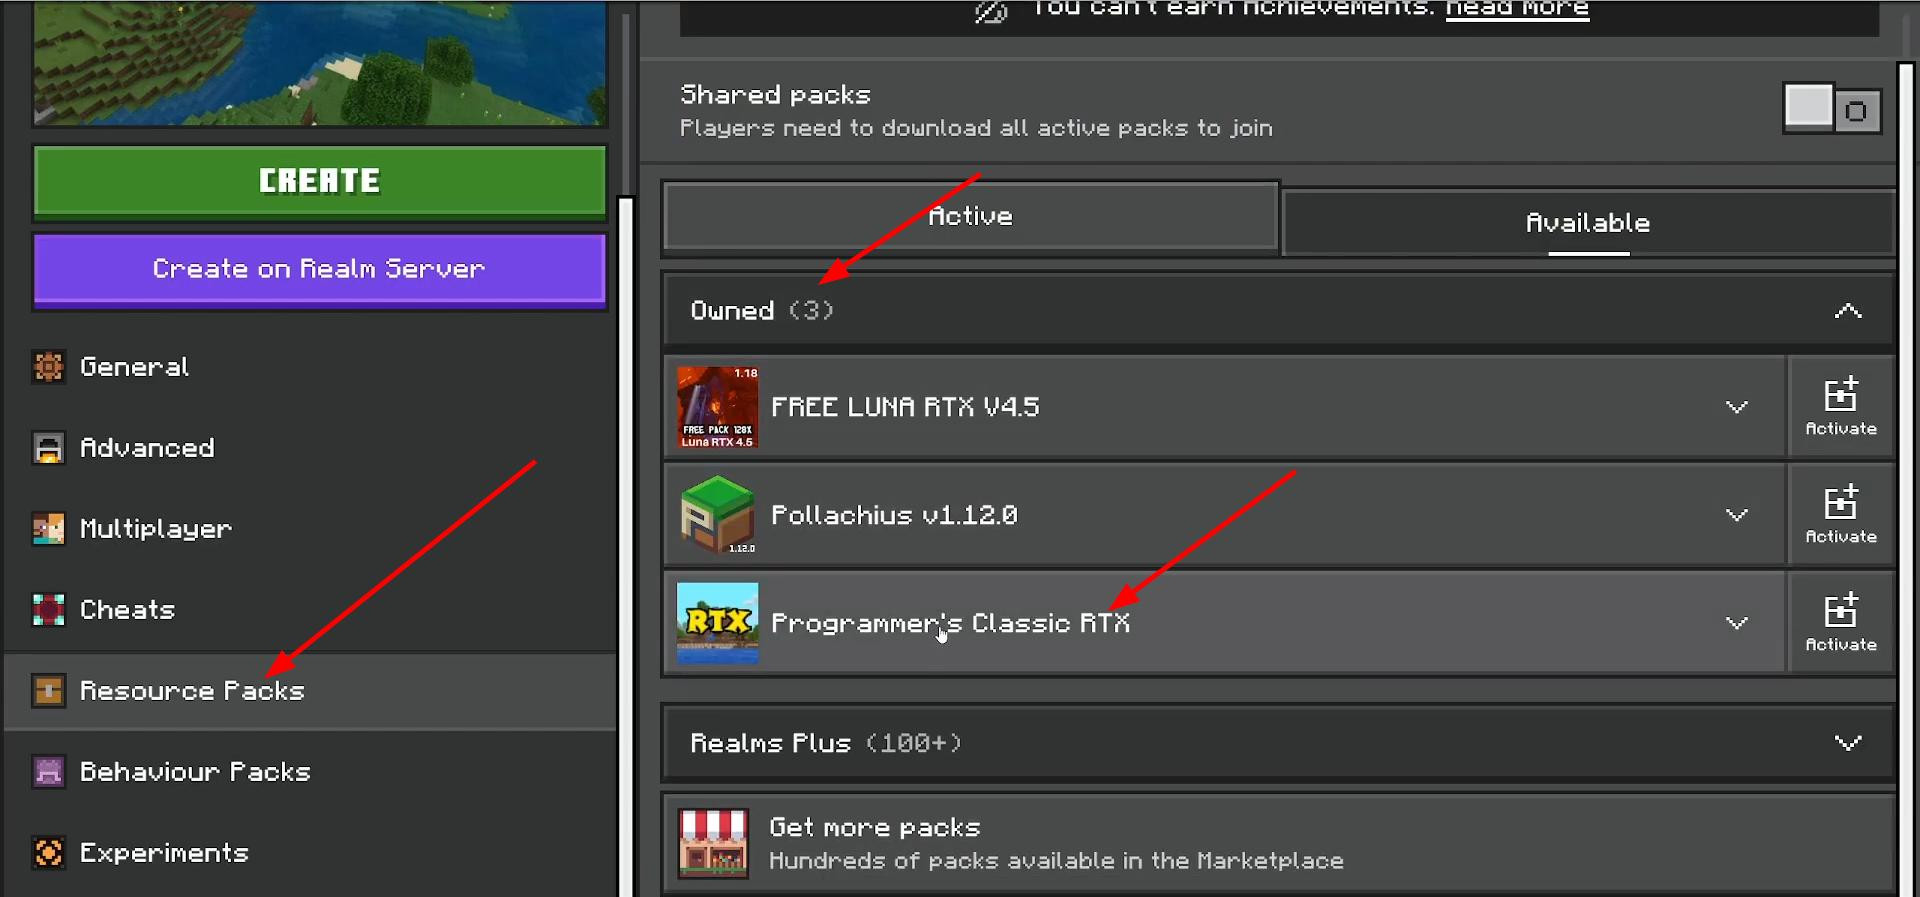
Once you enter the world settings, look for the “Resource Packs” section on the left. Open the “Owned” tab, where you should see the downloaded RTX pack. Click on it and select “Activate”.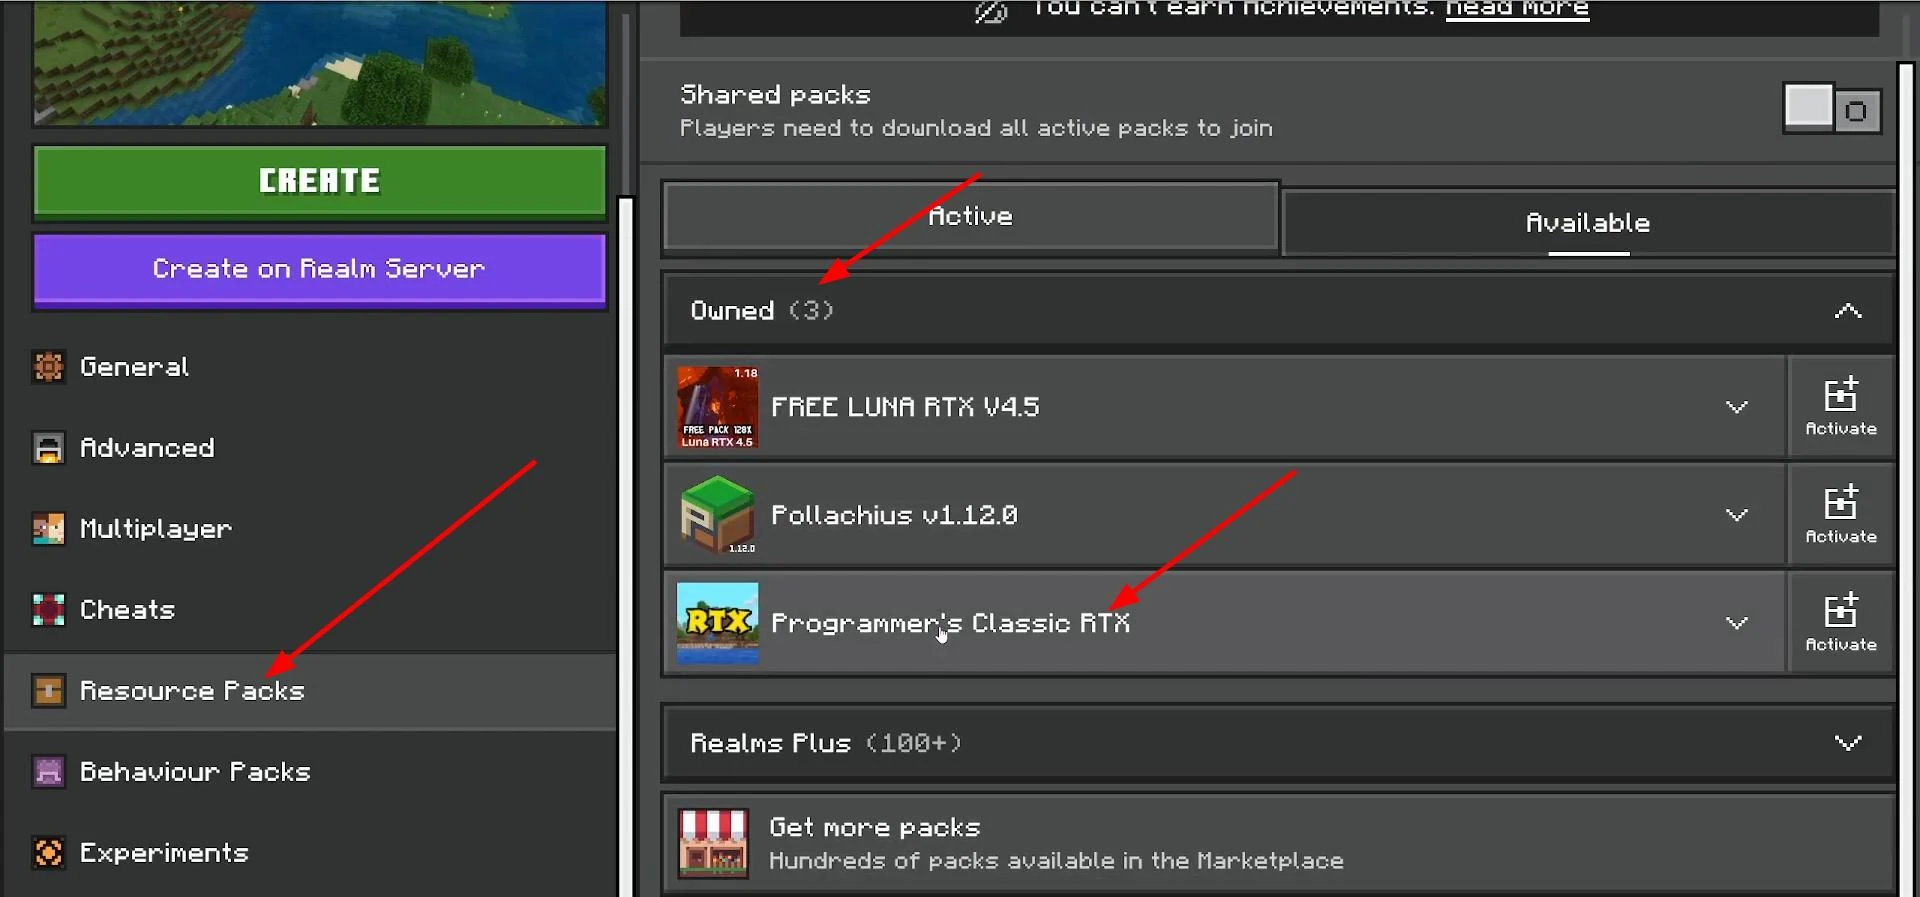
It will appear in the active resources section on the right.
Then just create a world or enter an existing one, and the world with RTX will load.
If RTX does not turn on and nothing changes, try pressing Esc, go to settings, then scroll down to “Video” on the left. Find the “Ray Tracing” option and make sure it is enabled. If the button is inactive or says that the feature is unavailable, then most likely the pack you downloaded does not support RTX. Try installing another one.
That's it. Good luck, and may your Minecraft look like the real next-gen!
Videos

Added by
![NeoForge Installer [Minecraft 1.21.1, 1.20.6 - 1.20.1]](https://i2.modland.net/i/66c5cbeb7e5ee/neoforge_modland.webp)
![Timeless and Classics Zero (TaCZ) [Minecraft 1.20.1, 1.19.2, 1.18.2]](https://i2.modland.net/i/669683678b42d/description_0ac47139-8e79-4b76-8a0c-d79bcb9039df_modland.webp)
![[1.5] THE DROPPER](https://li1.modland.net/minecraft/maps/thumbnail/th_ModLandNet_1.jpg)
_modland.webp)
_modland.webp)