How to Install Shaders in Minecraft Bedrock Edition
-lg_modland.jpg)


Minecraft Bedrock supports modern technologies such as ray tracing, making the game much more beautiful - with realistic light, shadows and reflections. Shaders are responsible for these visual enhancements.
Installing shaders can seem complicated, especially for beginners. Therefore, this quick guide will help you install and activate the shader pack step-by-step to enjoy the upgraded graphics without any hassle.
Checking Device Compatibility with Shaders in Minecraft Bedrock
Before you start, make sure that your PC meets the technical requirements. The most important requirement is an NVIDIA graphics card that supports RTX technology and has Ray Tracing enabled.
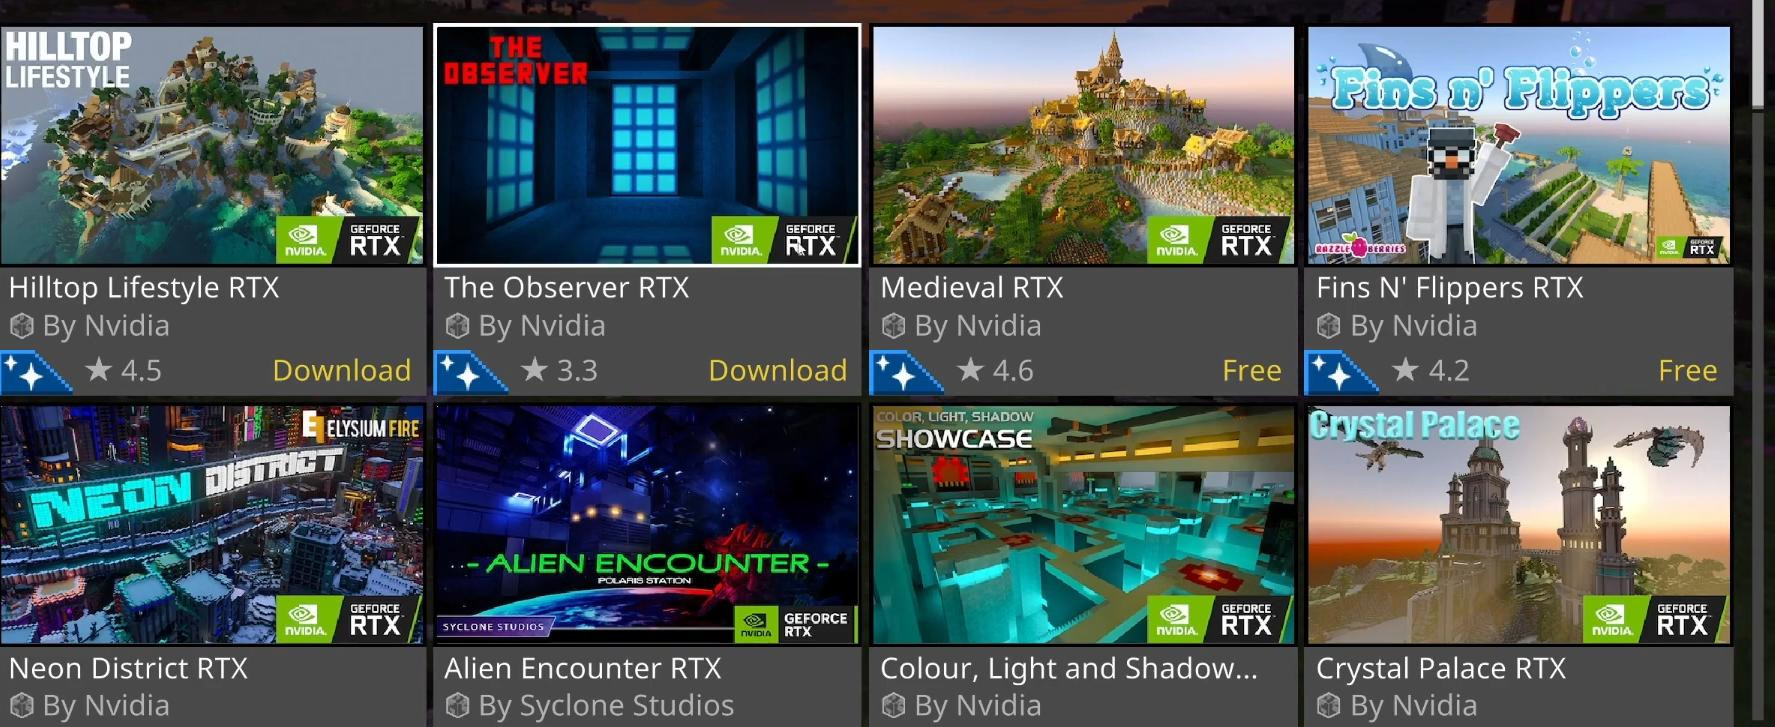
This technology enables shaders and improves graphics. To test for Ray Tracing support, there is a built-in feature in Minecraft. Launch the game and go to the Marketplace section of the home page.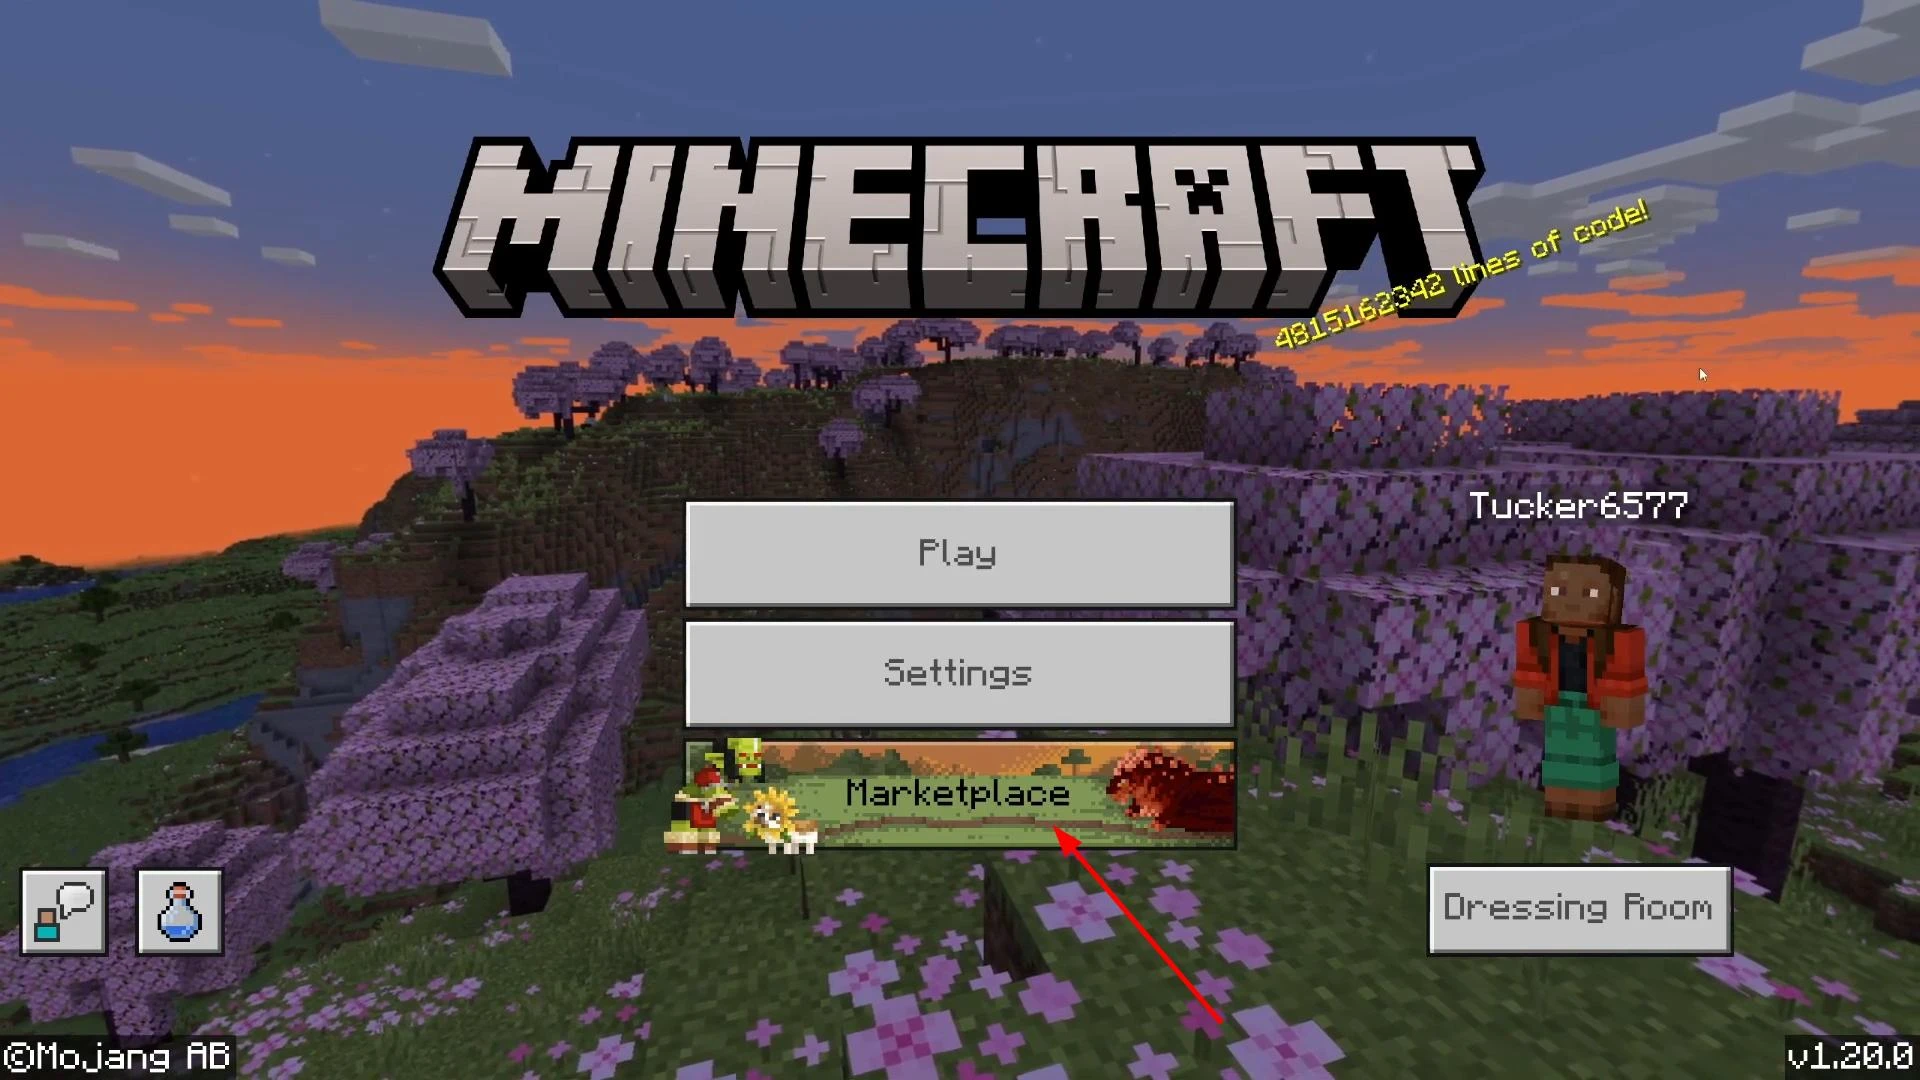
Then type “RTX” in the search box in the top right corner.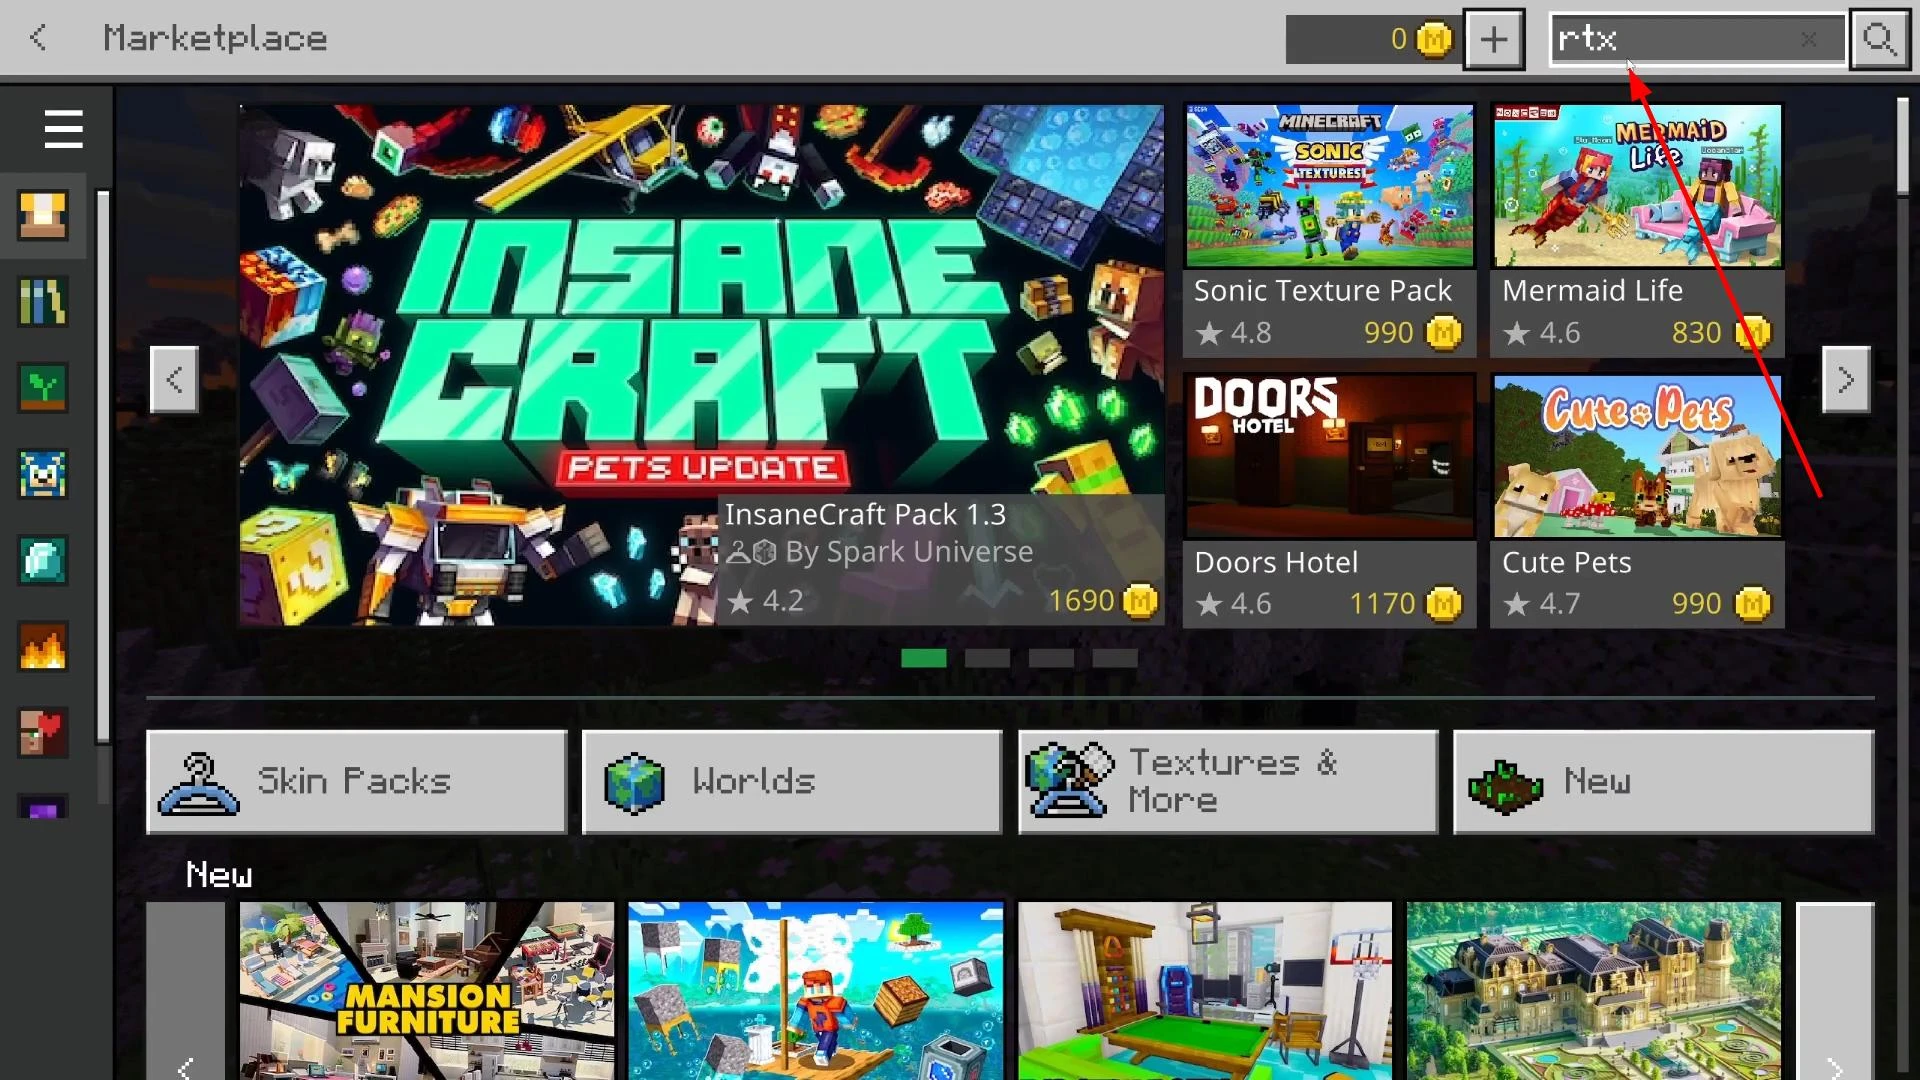
A list of special cards designed to showcase RTX technology will open up.
You can select any of them and click the download button.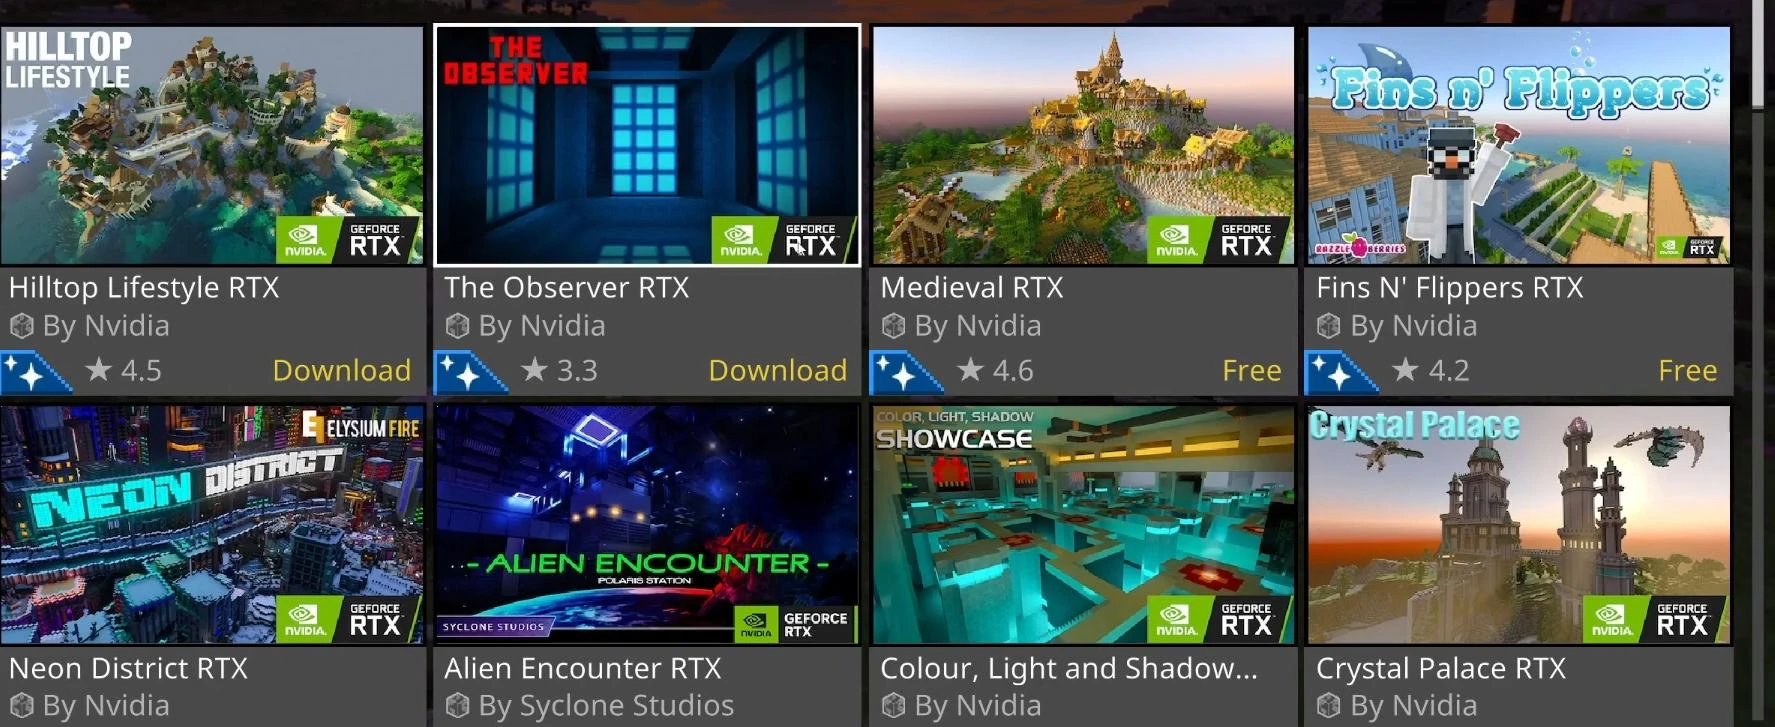
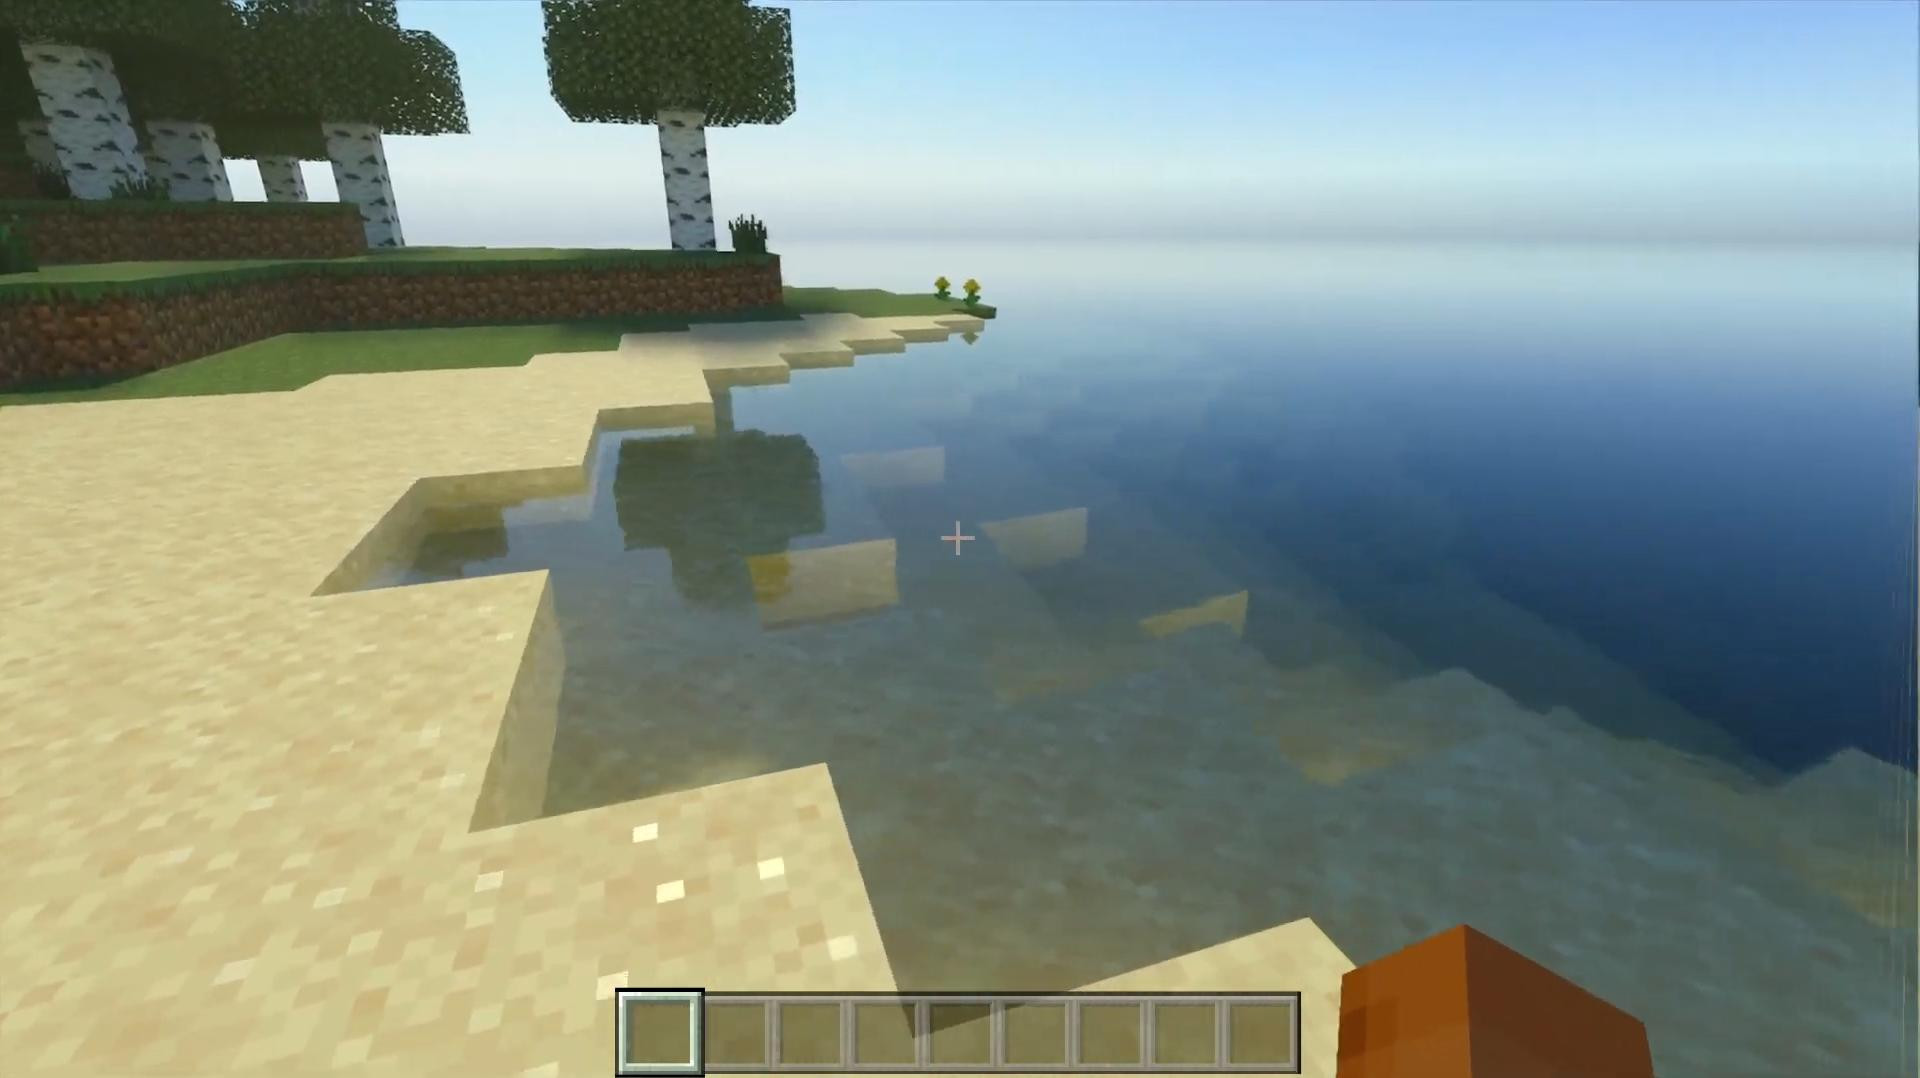
If done correctly, you'll find yourself in an environment with realistic lighting, shadows and reflections. This is the result of the built-in RTX shaders.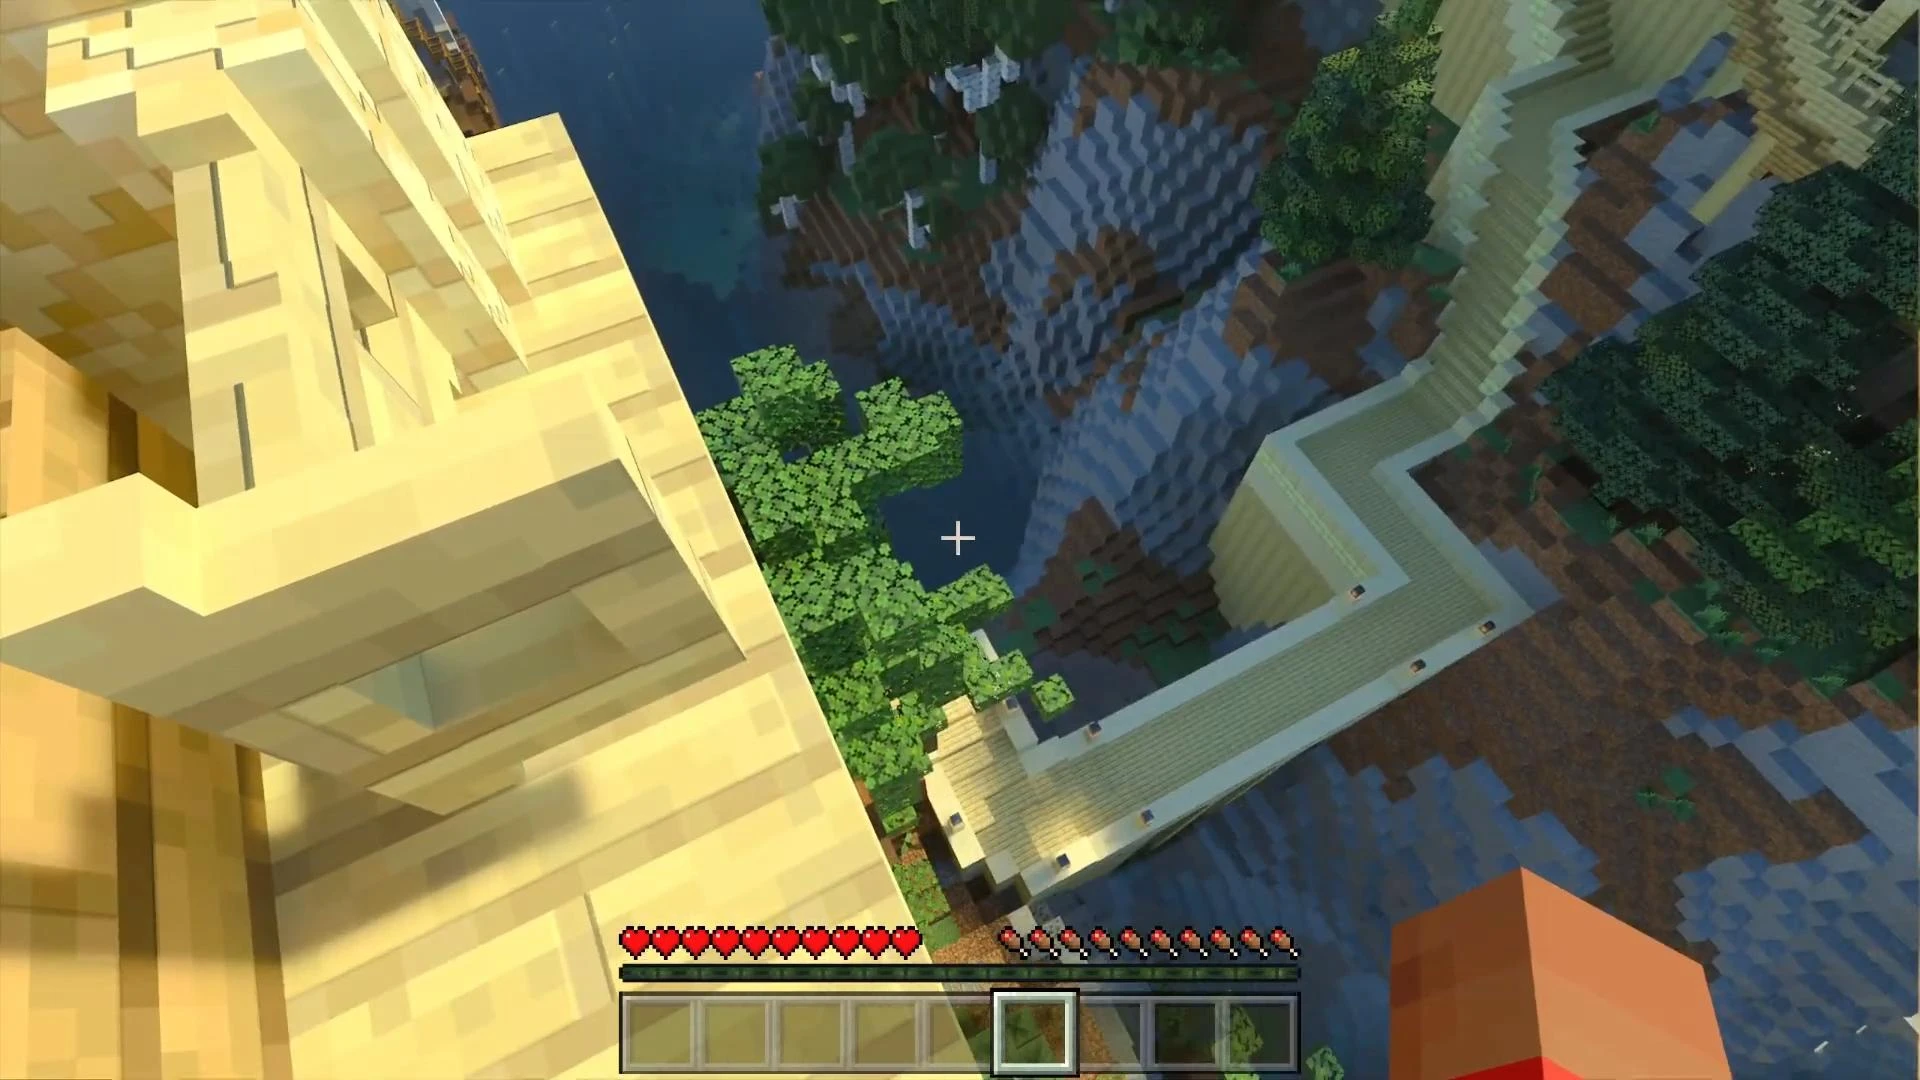
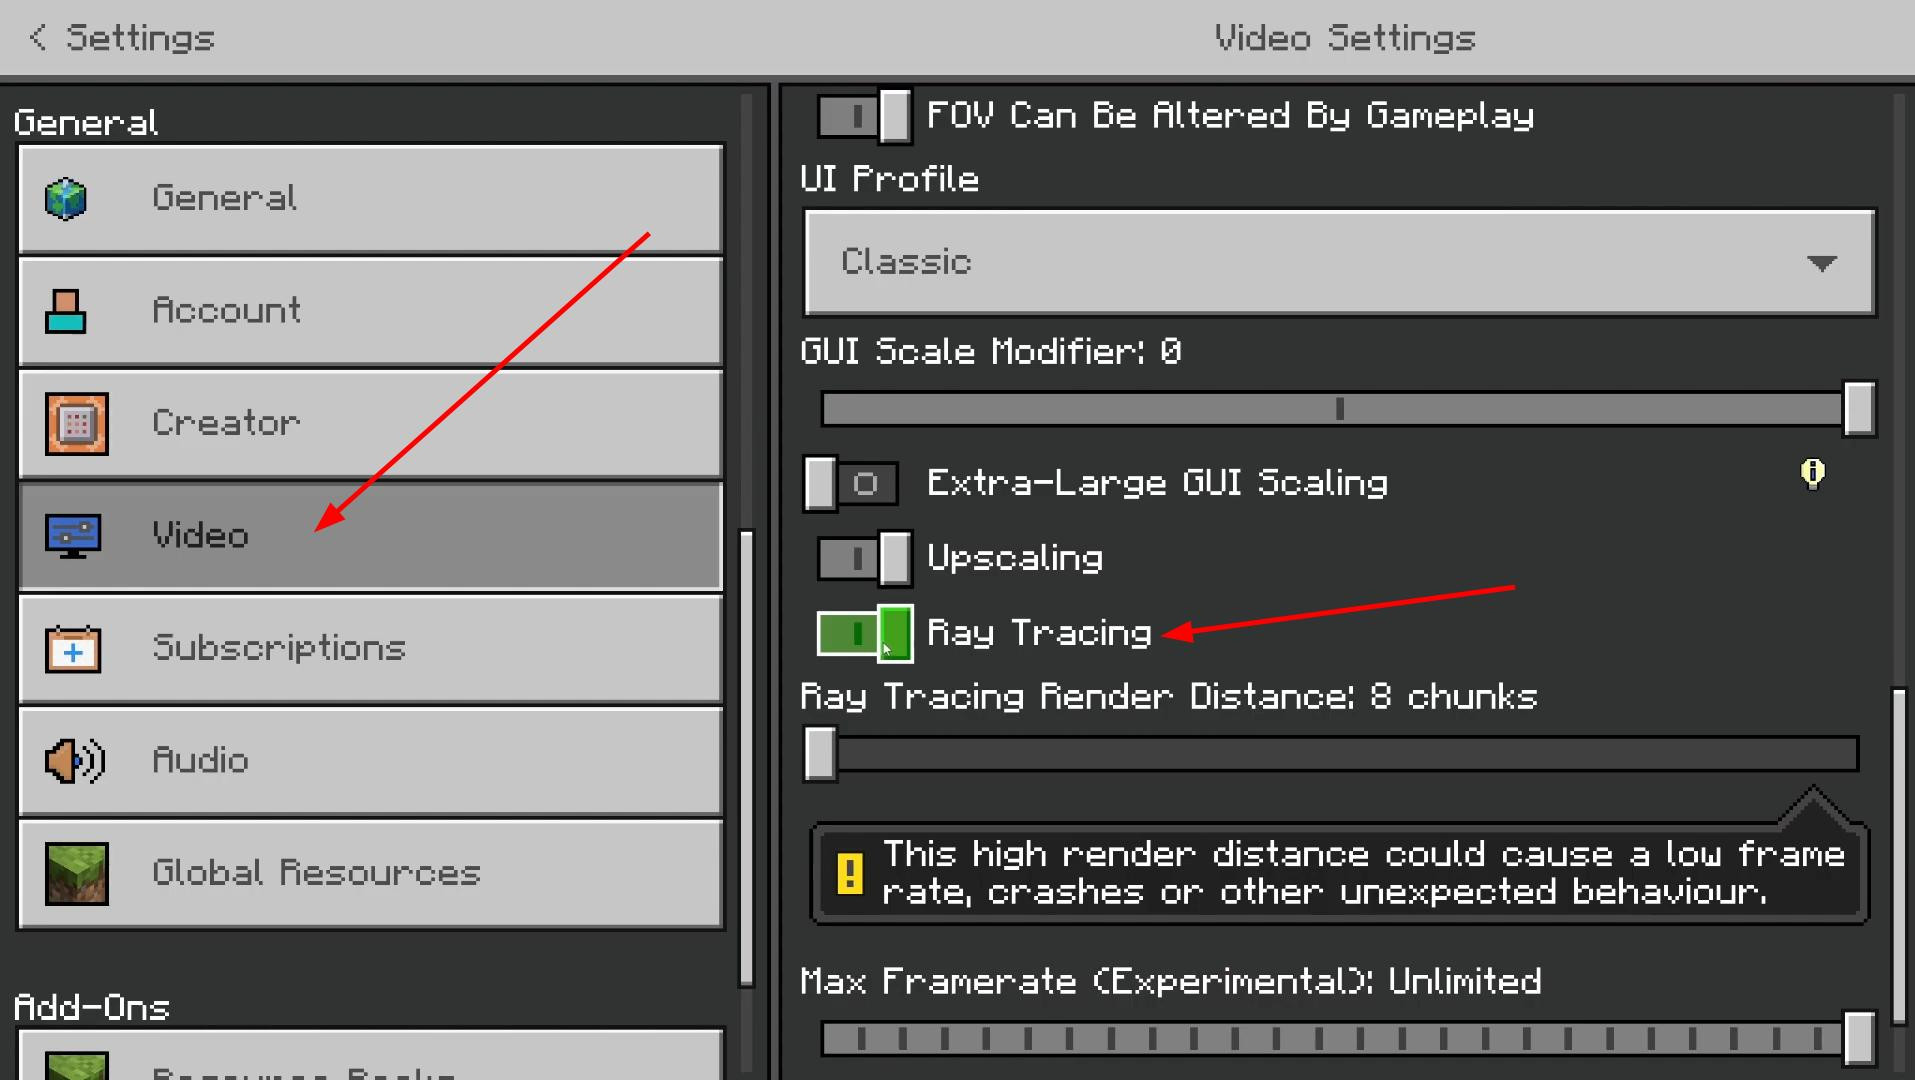
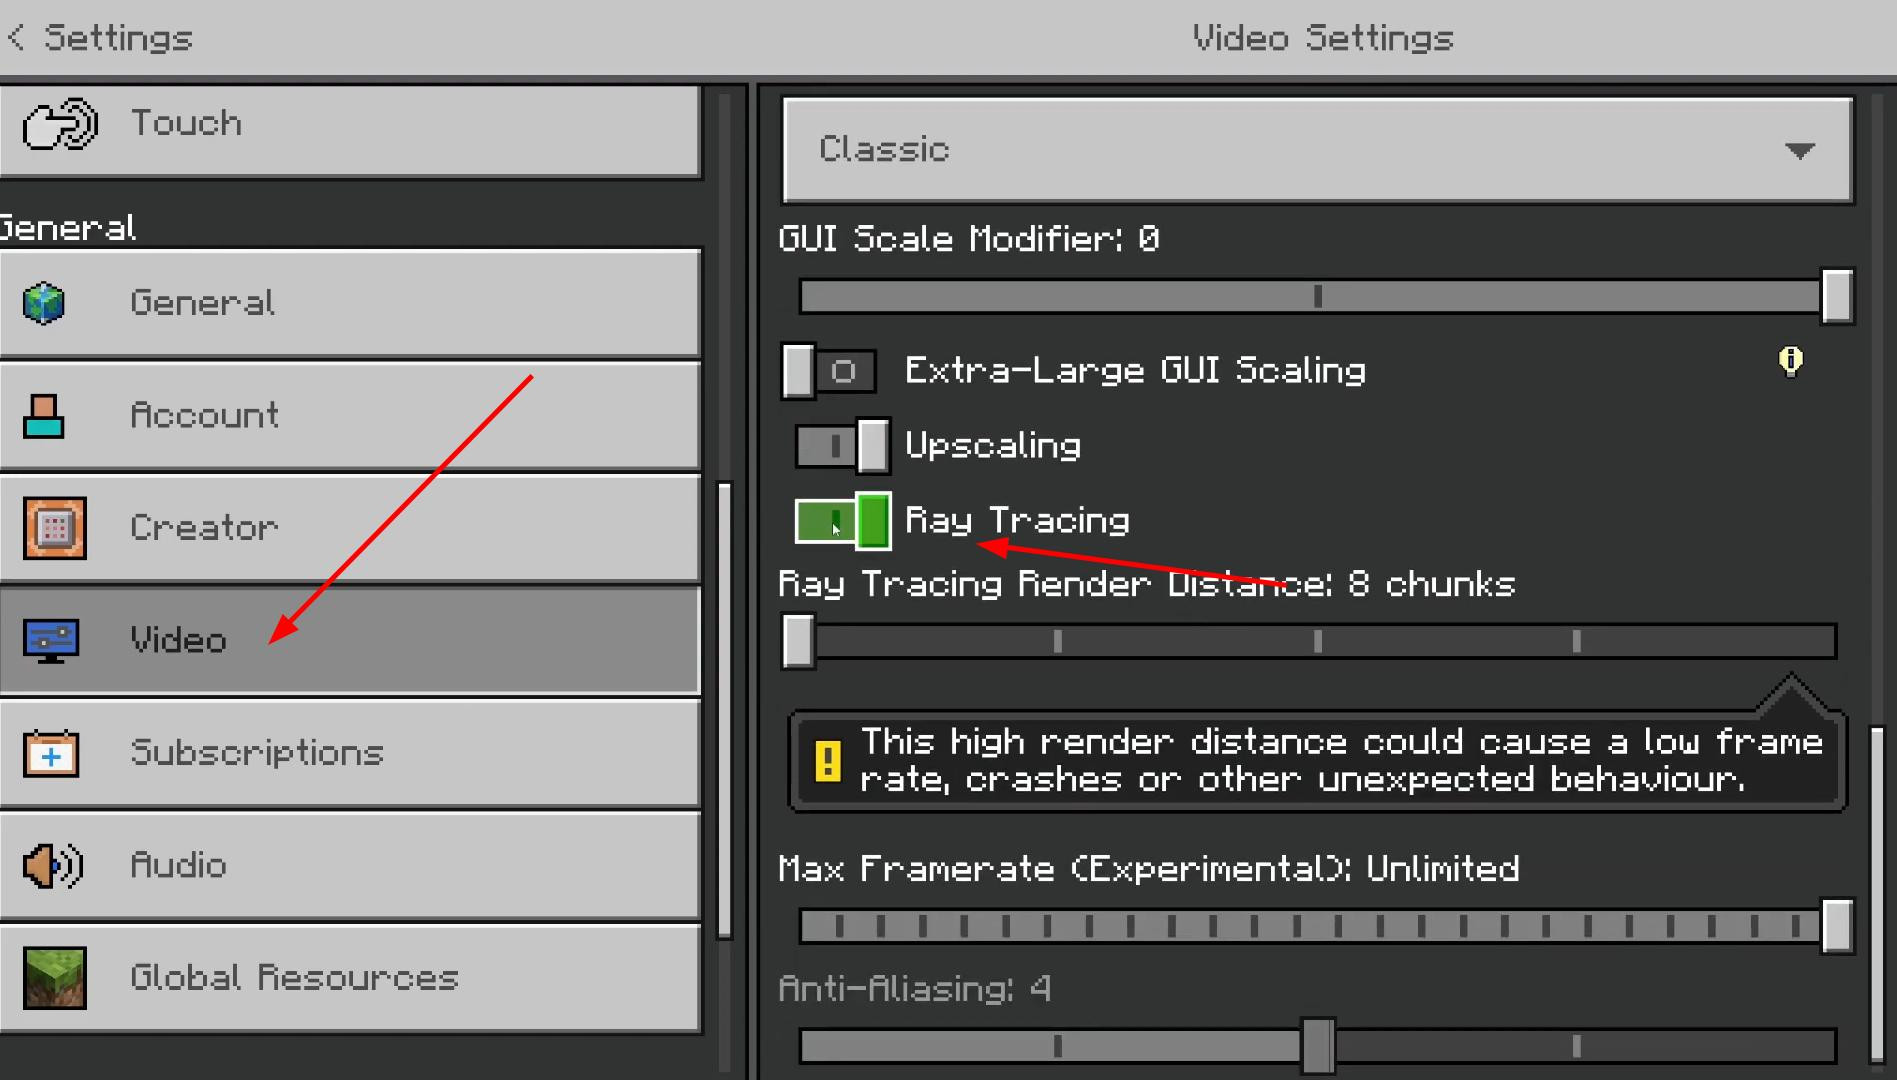
If the card has opened and the graphics have not changed, check the settings in the game menu via “Escape” and “Settings”. Go to the “Video” section and activate the “Ray Tracing” switch.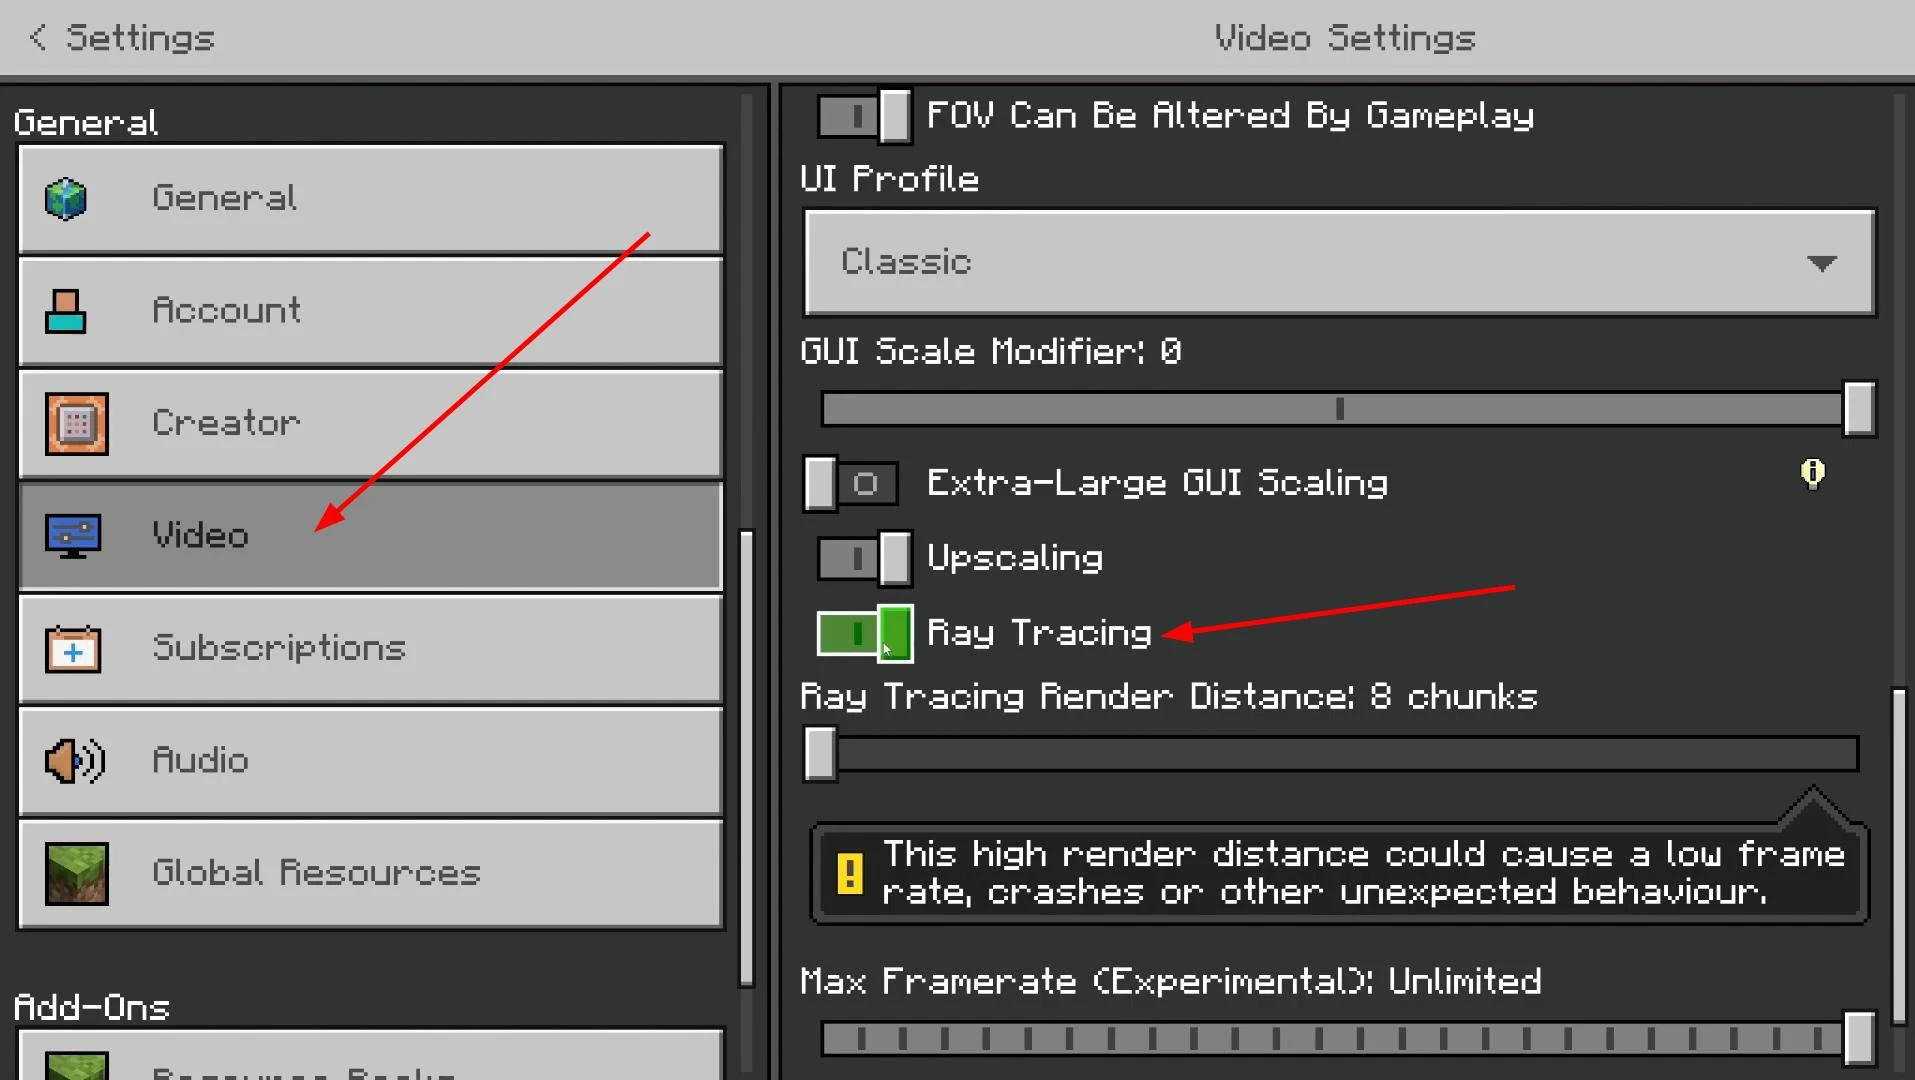
Once you do this, the visual changes will become noticeable.
Installing third-party shaders for Minecraft Bedrock
Once you have successfully verified RTX in the built-in maps, you can move on to installing third-party shaders.
First of all, you need to download Vanilla RTX.
Then the shaders need to be installed. Just double-click on the file and Minecraft Bedrock will automatically open, start the import process and notify you that the shader has been successfully installed.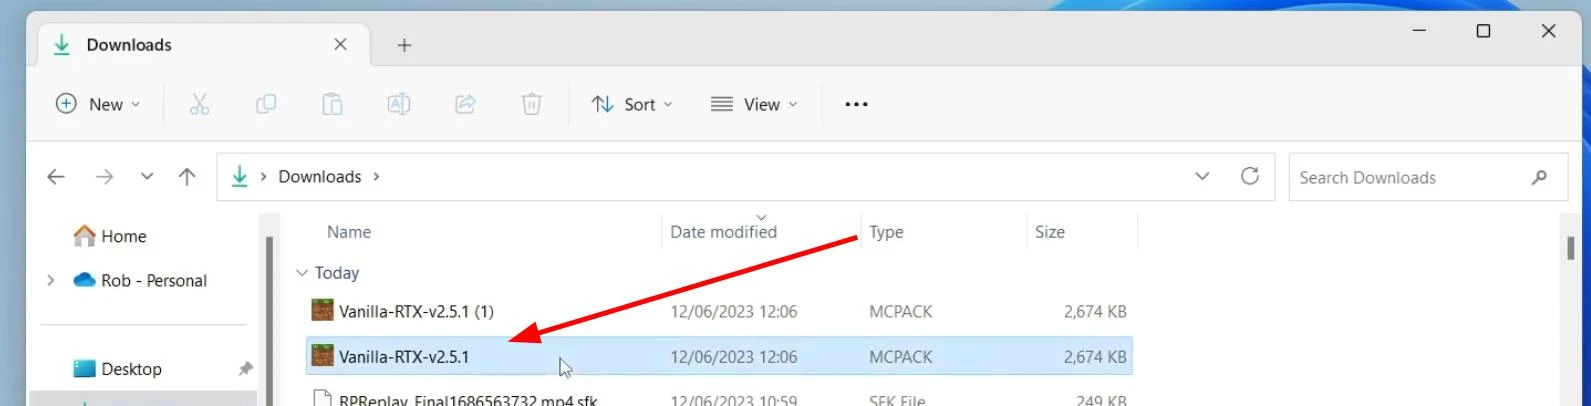
If for some reason the file does not run, you should right-click on it, select “Open with”, specify Minecraft and confirm the choice.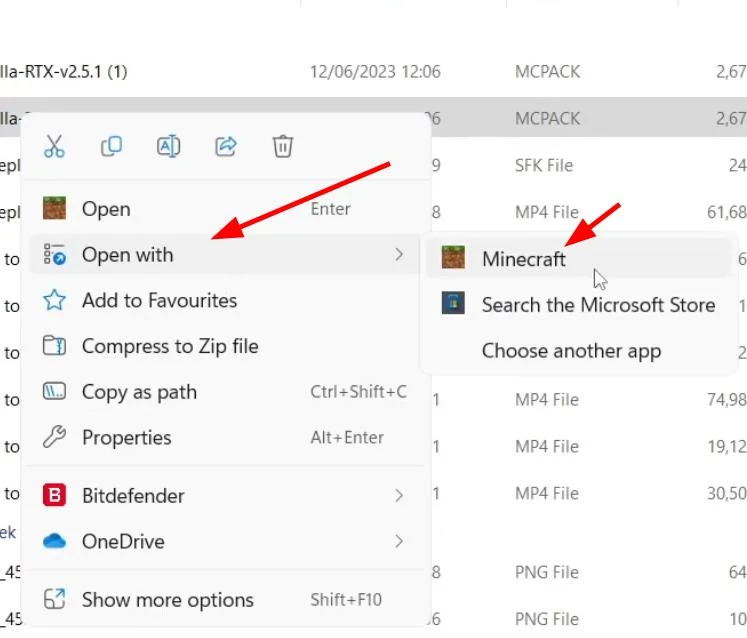
The installation is complete, and now the shader is ready to use.
Activating Shaders in a New Minecraft Bedrock World
Once the shader has been installed and imported into the game, it must be activated in the settings of the new or existing world.
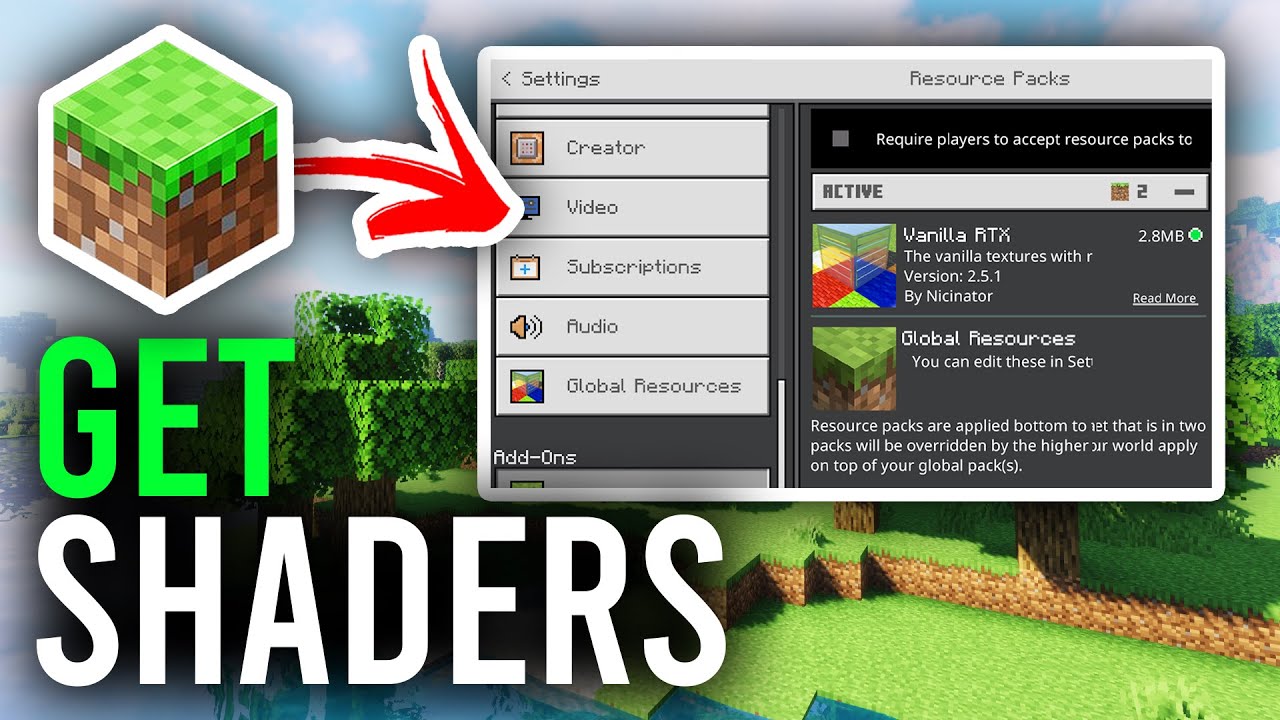
Start Minecraft and press the “Play” button. Here you can select as an already existing world or create one. In the case of creating a new world, you will need to click “Create New” and set the basic parameters: game mode, name, difficulty level. Go to “Resource Packs”.
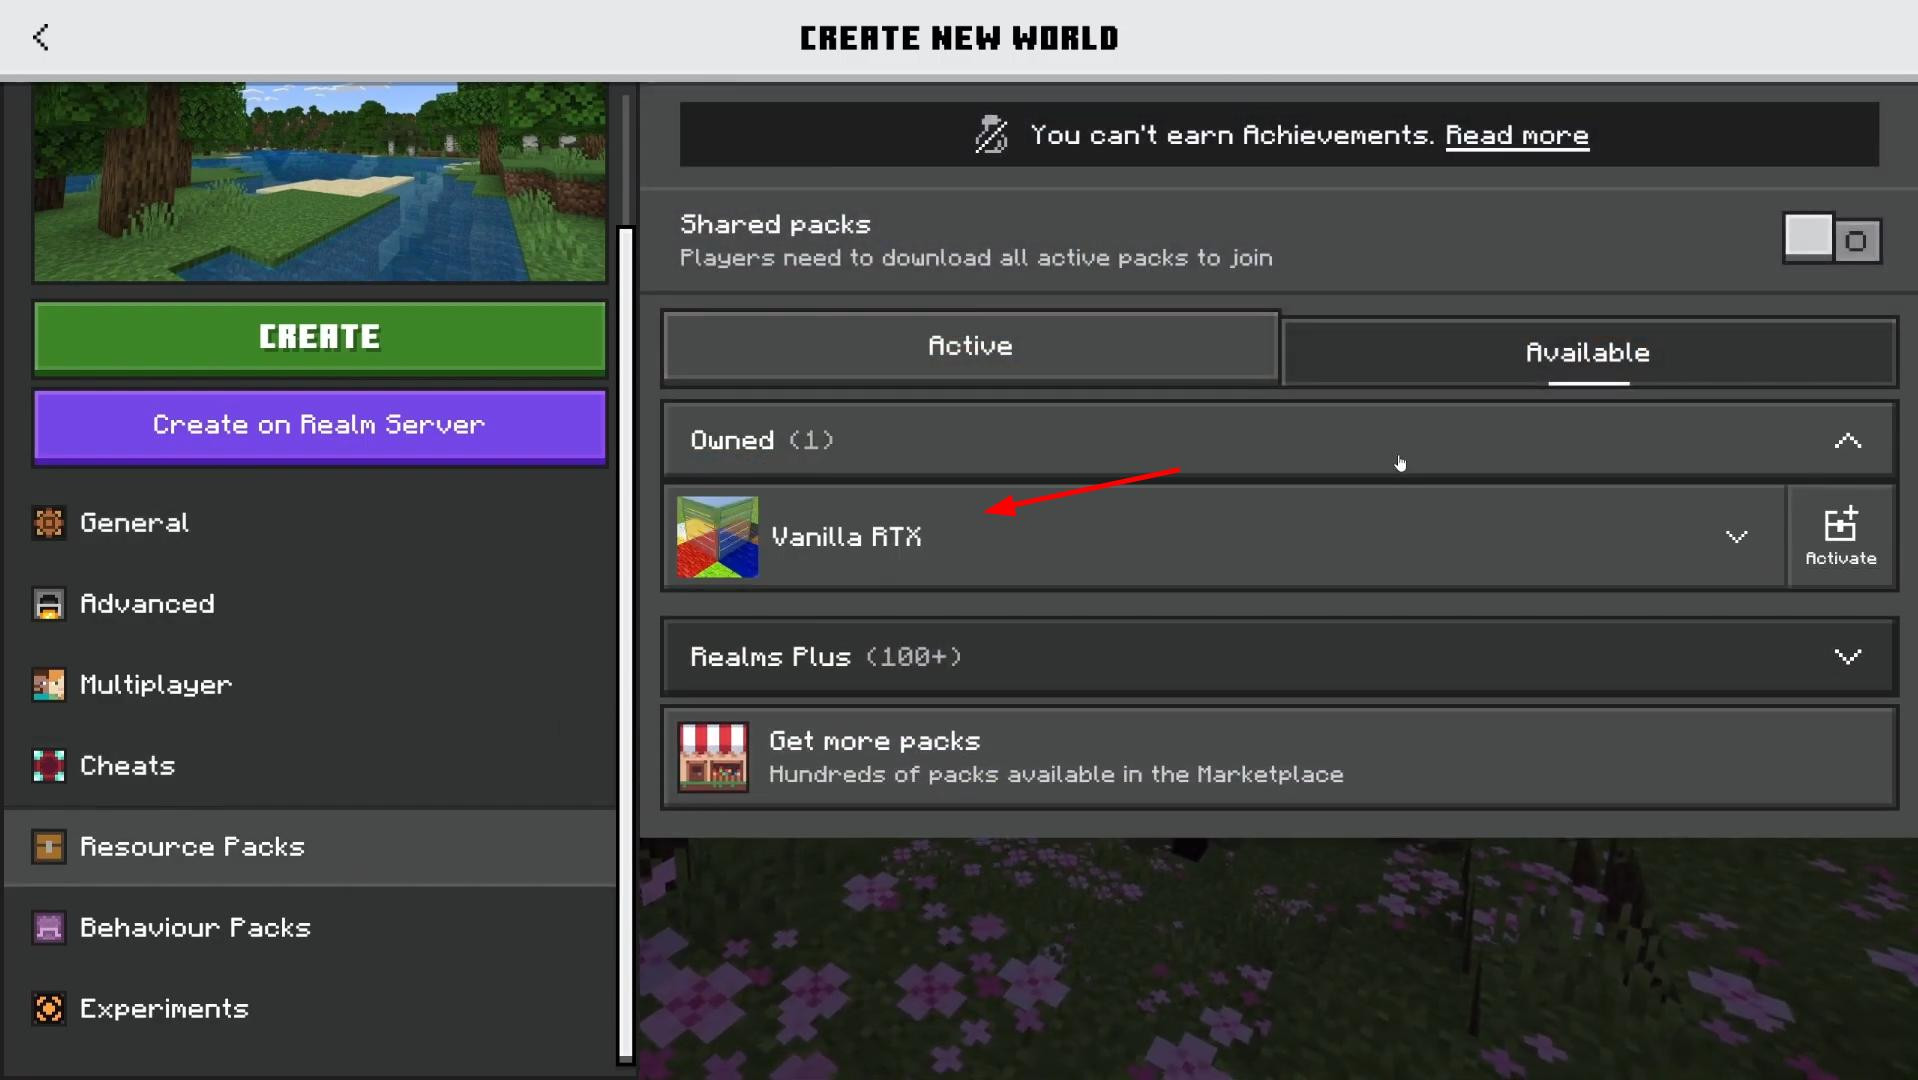
In the list that opens, first you need to expand the subsection “Owned”, which will display all the installed packages.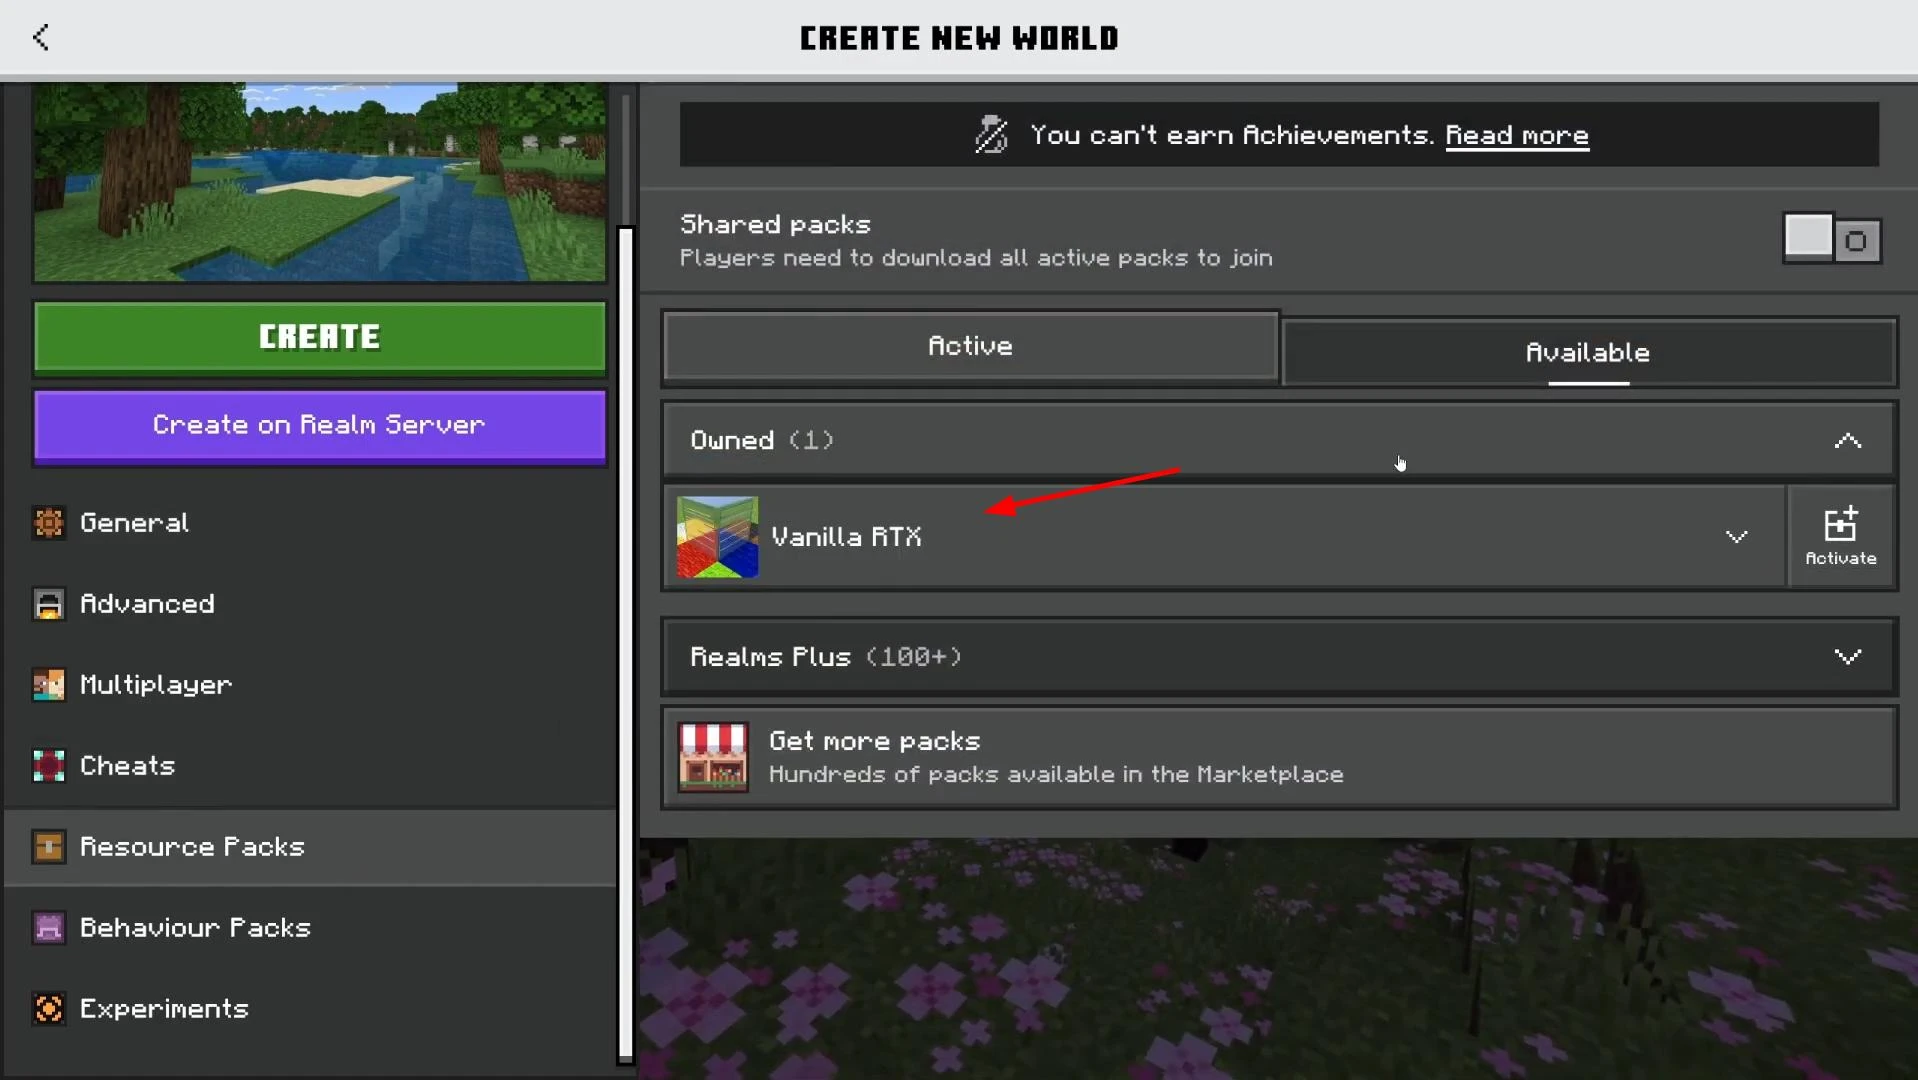
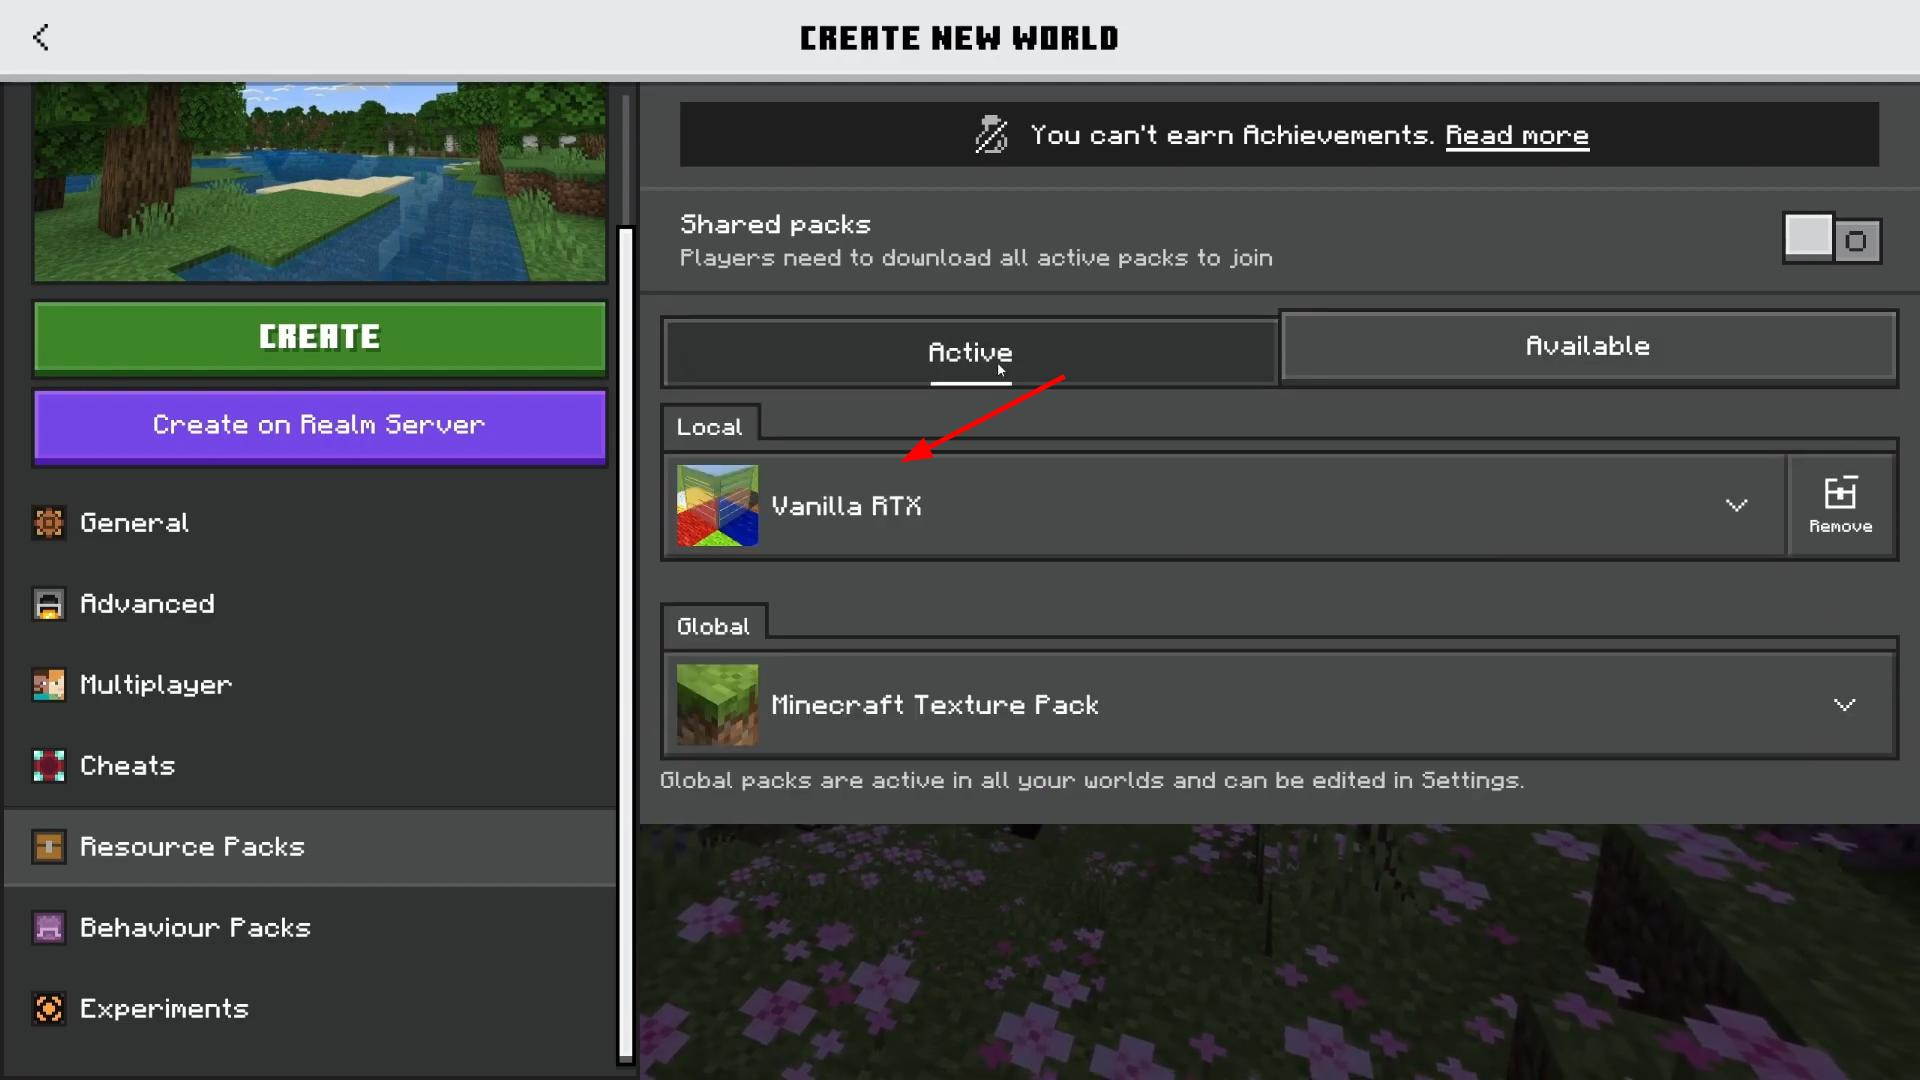
Among them should appear previously downloaded shader, for example, Vanilla RTX. It should be activated by clicking the “Activate” button on the right. After activation, it will be moved to the list of active resources.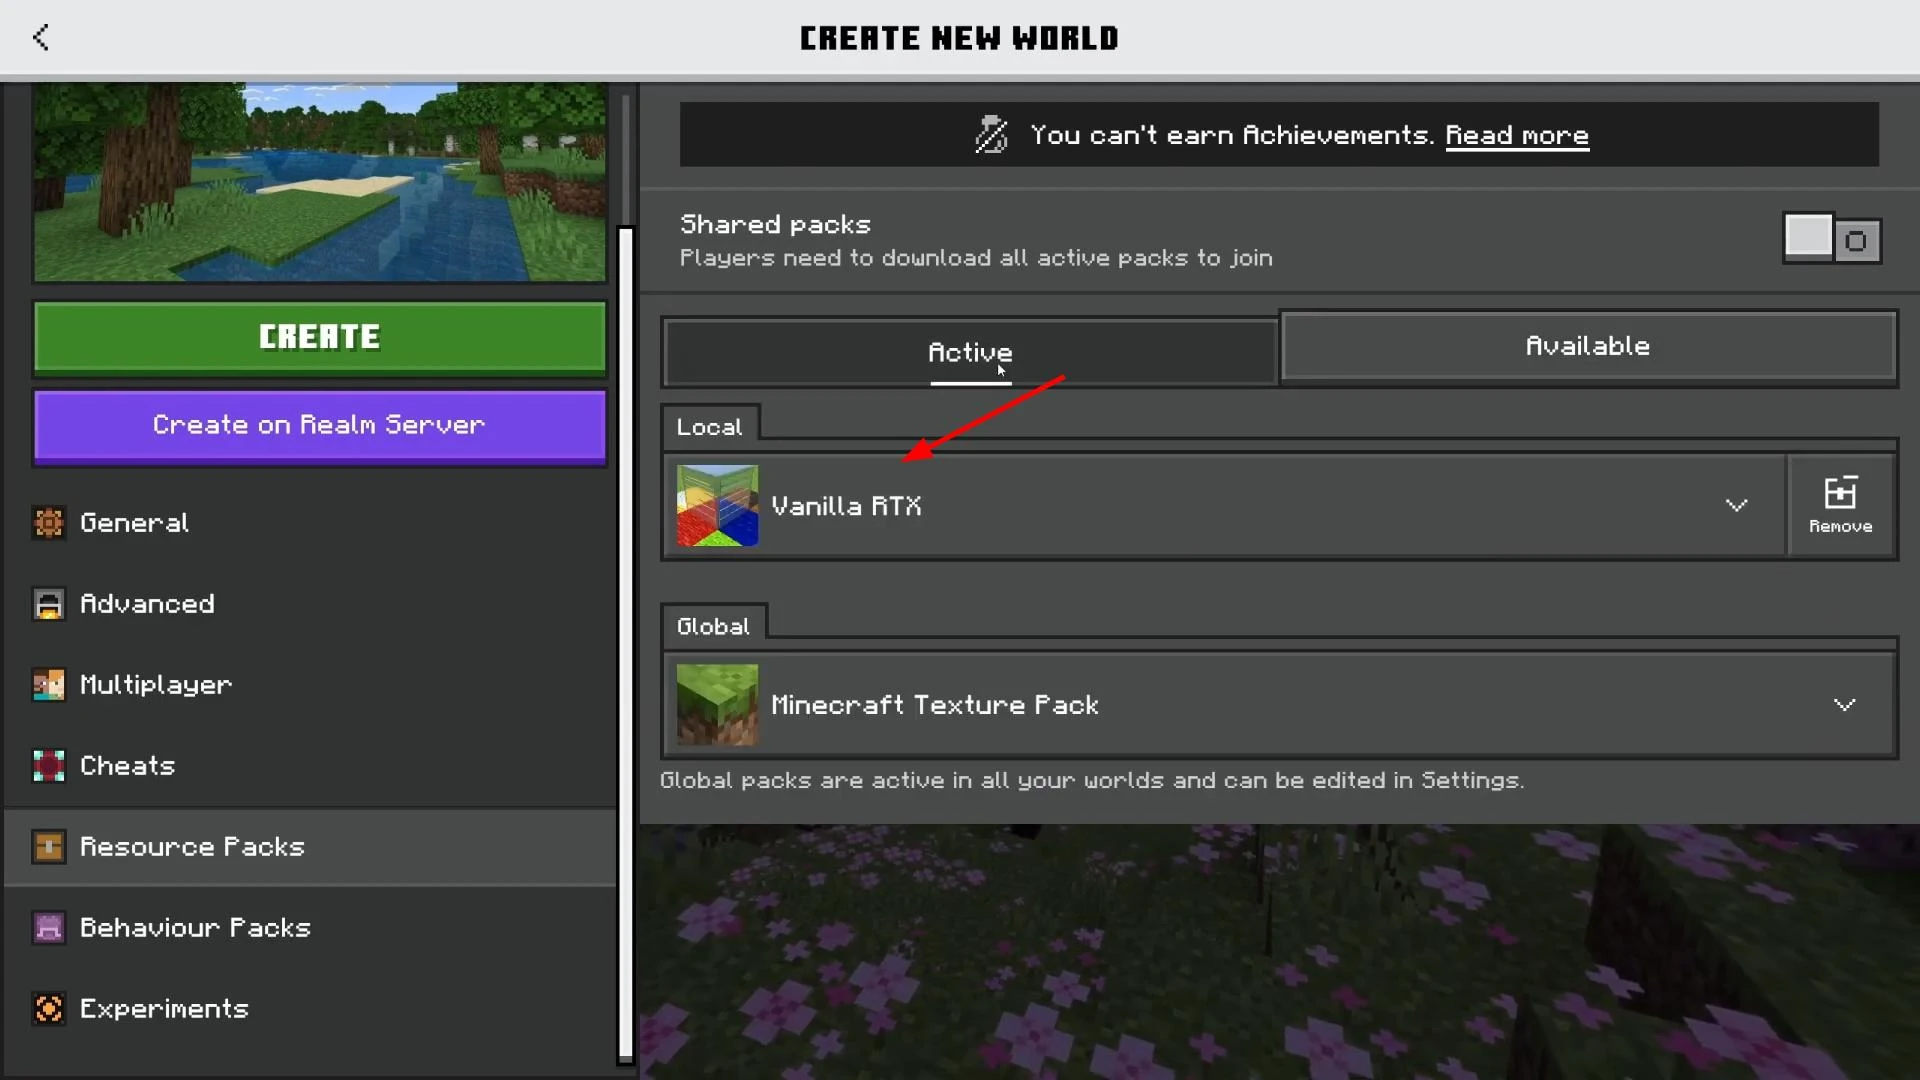
After that you should click “Create” and wait for the world to load. When the loading is finished, you can see that the reflections in the water have improved, realistic lighting has been added, the depth of shadows and textures have become more saturated.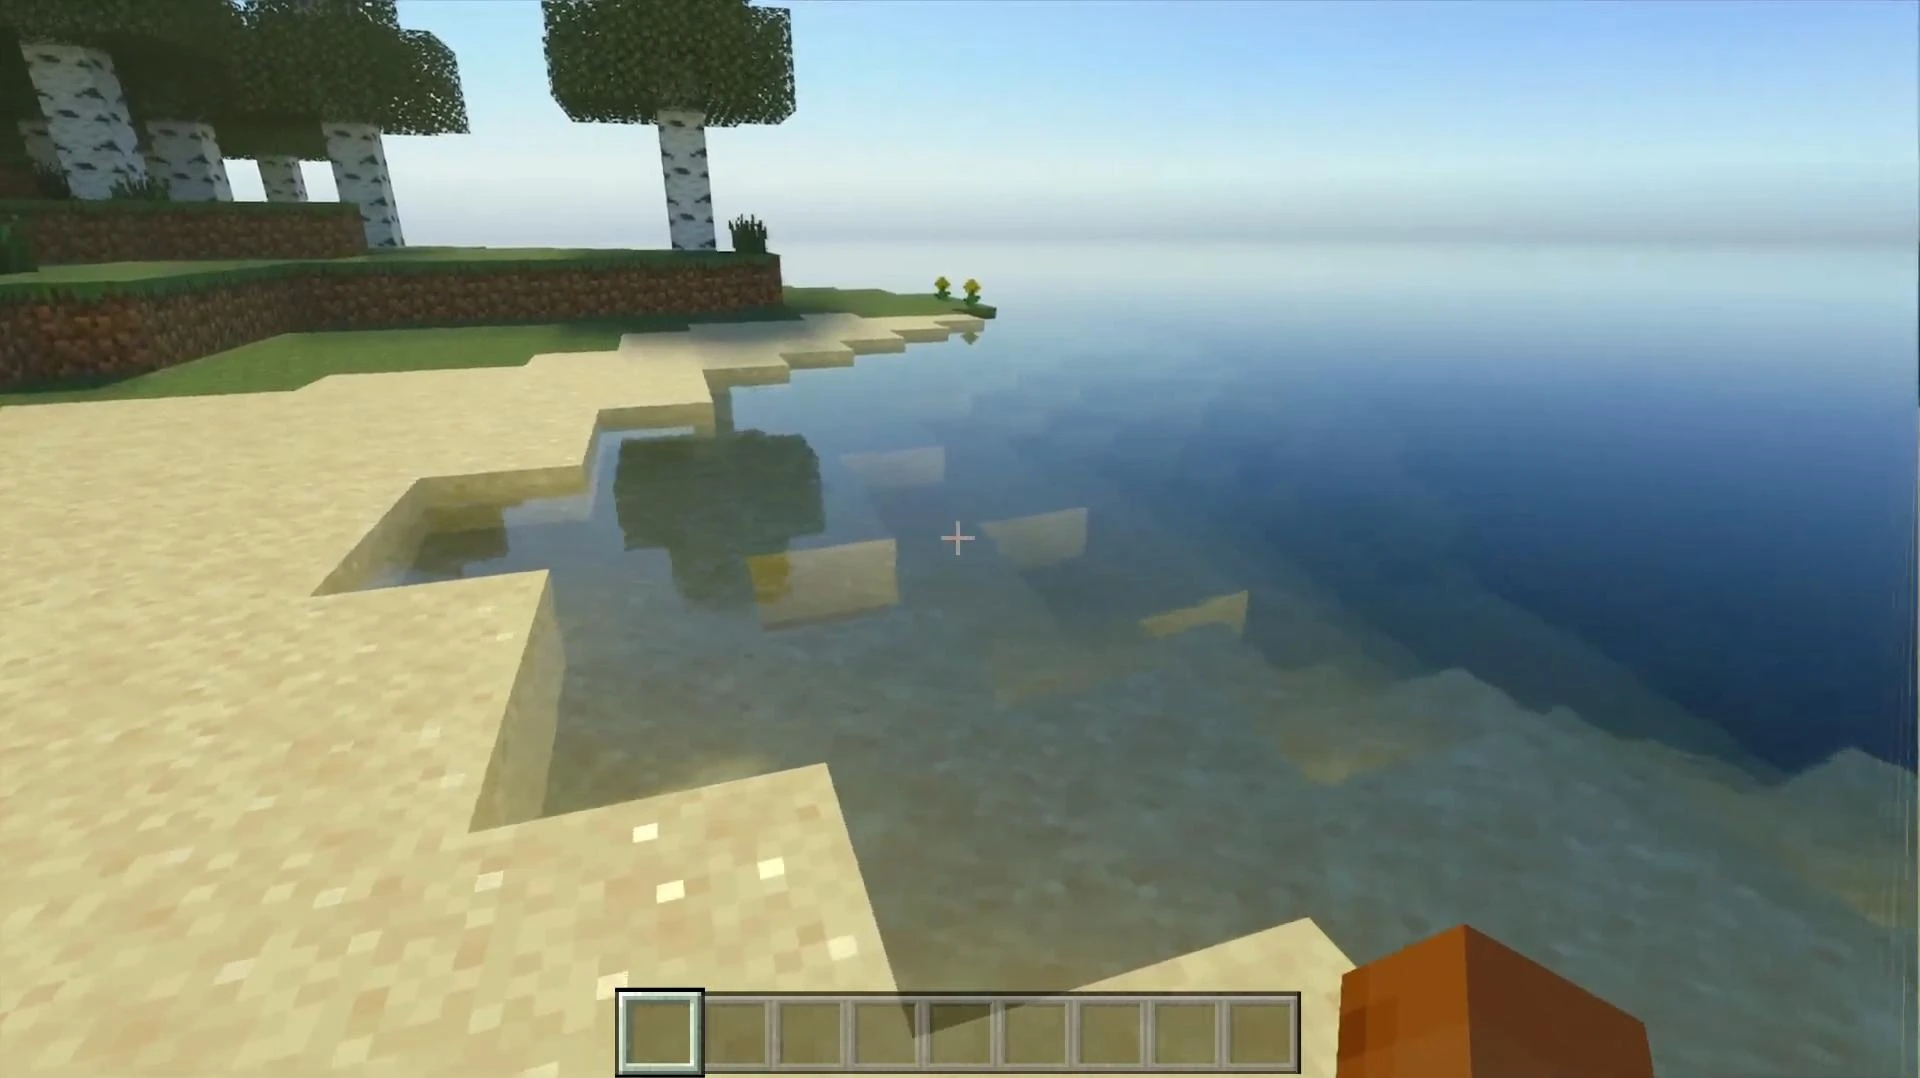
If visual effects are not displayed, you should reopen the settings via pause (Escape), go to “Settings”, then to “Video” and make sure that Ray Tracing is enabled. Only if it is activated will the shaders be able to work correctly.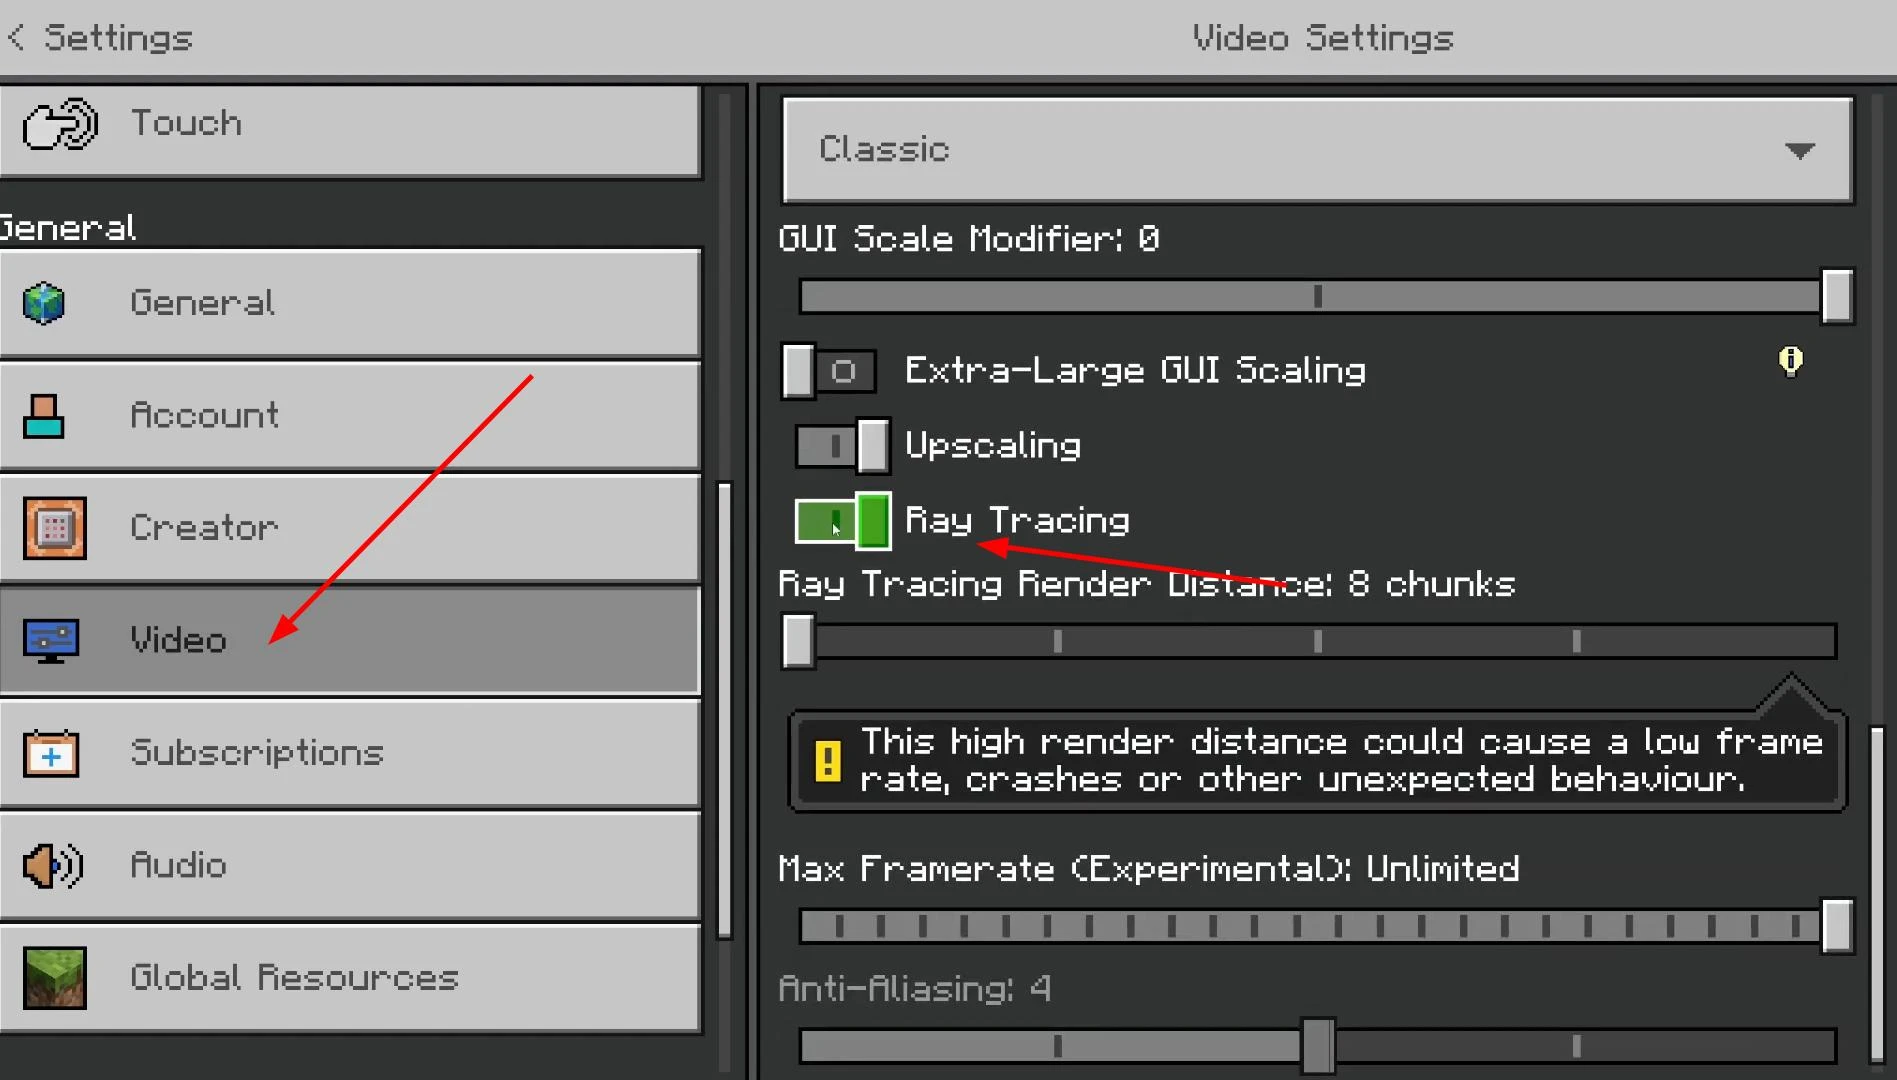
If the installed shader-pack did not meet expectations or did not fit the style, the user can always replace it with another. Minecraft Bedrock supports many different packages that differ not only in the quality of lighting, but also in the artistic design, texture detail and color palette.
To find alternative shaders, you just need to use your browser search again by typing a query like “Minecraft Bedrock RTX shaders” or “Minecraft Bedrock texture packs”. As before, it is important to download only from trusted resources to avoid downloading malicious files.
Installing the new package is no different from the previous one: the file is downloaded in .mcpack format, then opened through Minecraft, where it is automatically imported. After that, it can be activated in the world settings in the resources section.
But be aware that some packages can be more demanding on system resources. If the game starts to slow down or takes a long time to load, it is recommended to disable heavy shaders and try lighter versions, which can also look impressive, but consume fewer resources.
Videos
Added by
![NeoForge Installer [Minecraft 1.21.1, 1.20.6 - 1.20.1]](https://i2.modland.net/i/66c5cbeb7e5ee/neoforge_modland.webp)
![Timeless and Classics Zero (TaCZ) [Minecraft 1.20.1, 1.19.2, 1.18.2]](https://i2.modland.net/i/669683678b42d/description_0ac47139-8e79-4b76-8a0c-d79bcb9039df_modland.webp)
![Armor Durability HUD [Minecraft 1.21.4, 1.21.3, 1.21.2, 1.21.1, 1.21]](https://i2.modland.net/i/674bc2c2c404b/190618141923060623_modland.webp)
![[1.5] THE DROPPER](https://li1.modland.net/minecraft/maps/thumbnail/th_ModLandNet_1.jpg)

![MrCrayfish’s Furniture [Minecraft 1.20.1 - 1.7.10]](https://i2.modland.net/i/666364596b874/screenshot3_modland.webp)
_modland.webp)