-lg_modland.jpg)
-lg_modland.jpg)

Creating your own Minecraft Java server is a great opportunity to play with friends in the same world, install mods, customize the rules and get full control over the gameplay.
Before starting the server you need to prepare your computer and download all the necessary files.
To begin with, you will need to open any browser and go to the search eangine. In the search bar you should enter the query “Minecraft server download Java”, and then among the results find a link to the official site of the game - minecraft.net. Do not use third-party sites, it can lead to the download of malicious programs.
There is a version for Java Edition and Bedrock. In our guide we consider the configuration of the minecraft server for Edition version. Therefore, we choose it.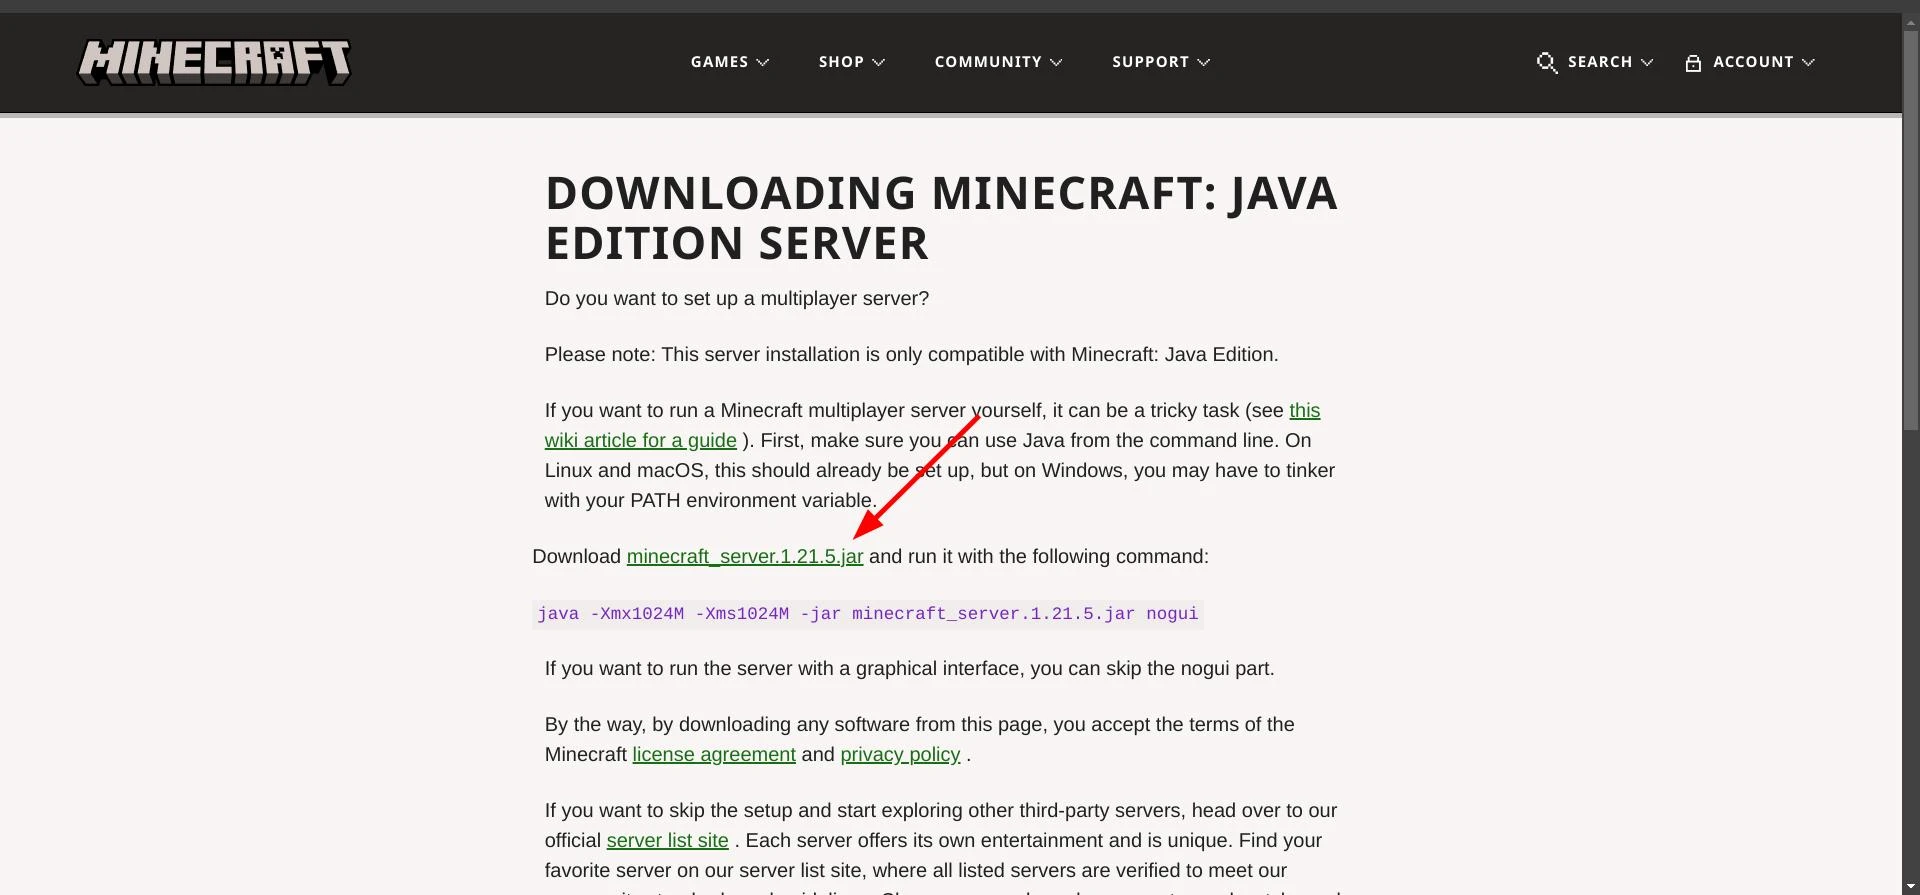
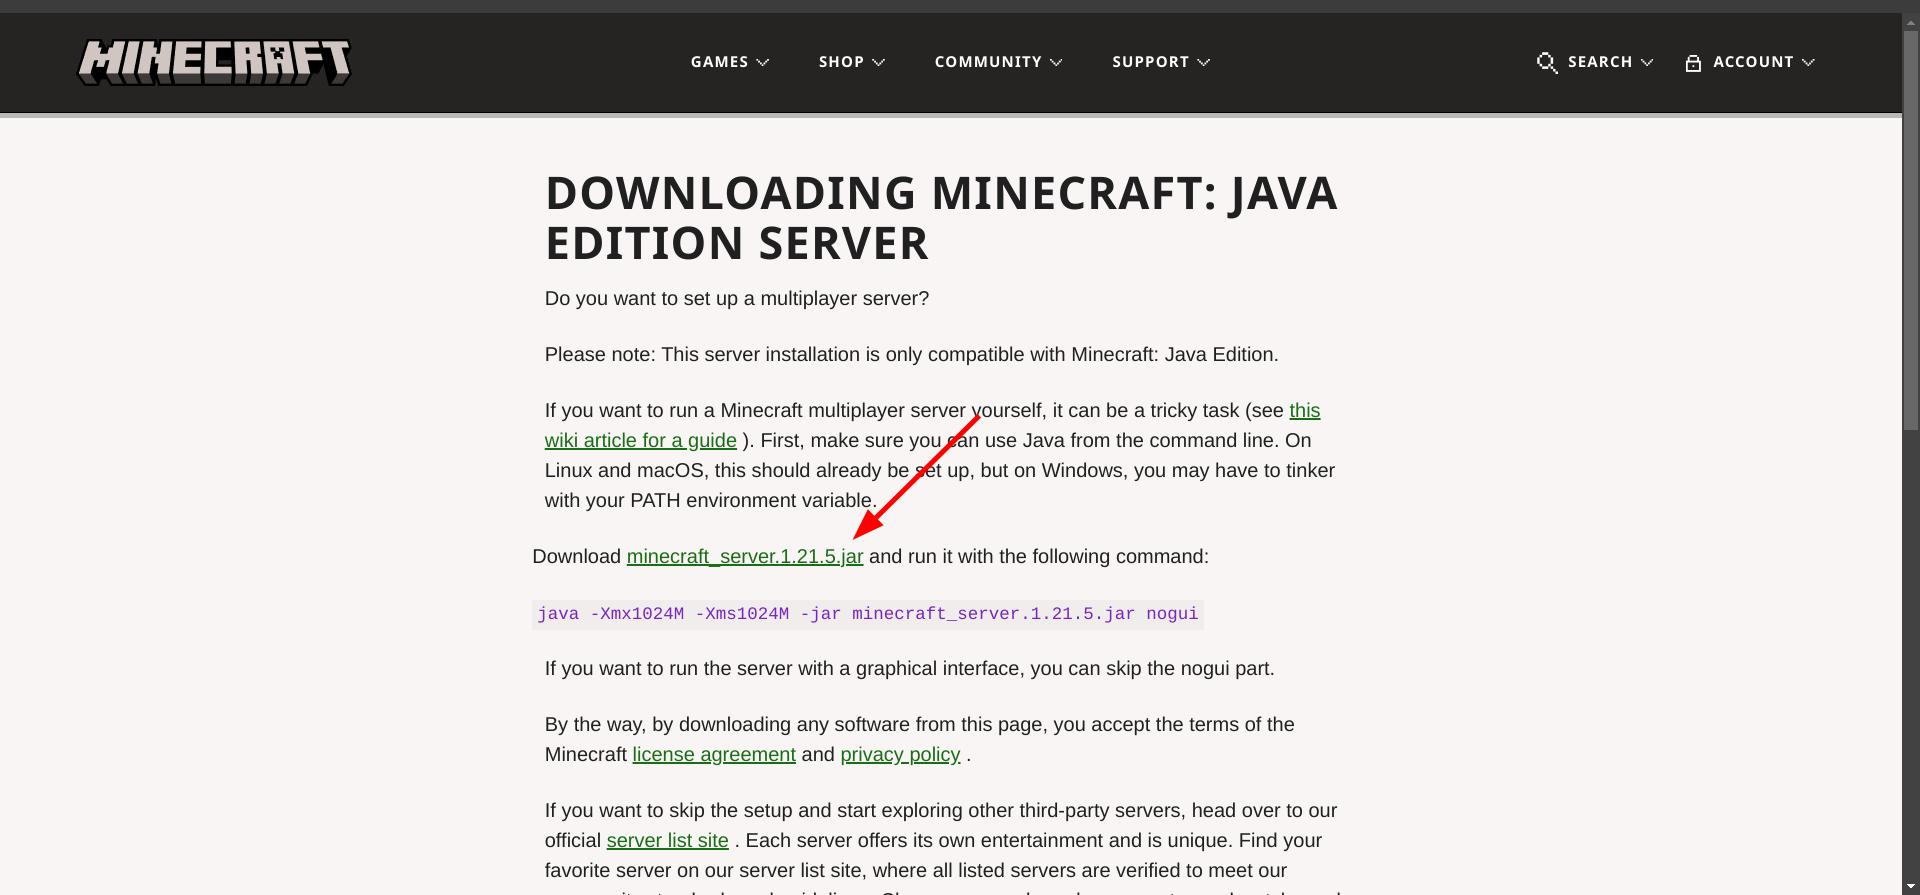
After going to the desired page, find the link named "minecraft_server.<version>.jar" and click on it. It will start downloading the server file, which will be required for further installation.
Creating a folder and preparing the server file
Once the server file is downloaded, it needs to be properly placed and the working environment needs to be organized.
Open the “Downloads” folder on your computer through Explorer and find a file with a name like server.jar or minecraft_server.1.xx.x.x.jar, where the current version of Minecraft is specified. To avoid confusion, it is recommended to move this file to the desktop.
Next, you need to create a separate folder in which all the server files will be placed. During the startup process, the server will create a lot of auxiliary documents. Therefore, it is better to organize everything in one directory. You can give it any name convenient for you.
Transfer the recently downloaded server file to the created folder.
Now all actions will take place inside this directory.
Installing Java and launching the server file
The server .jar file requires the Java platform installed on your computer. Without it, the file simply will not open.
To check if Java is installed, open the downloaded file by double-clicking it. If the system prompts you to select an application to run, it means the Java environment is not present on your computer and should be installed.
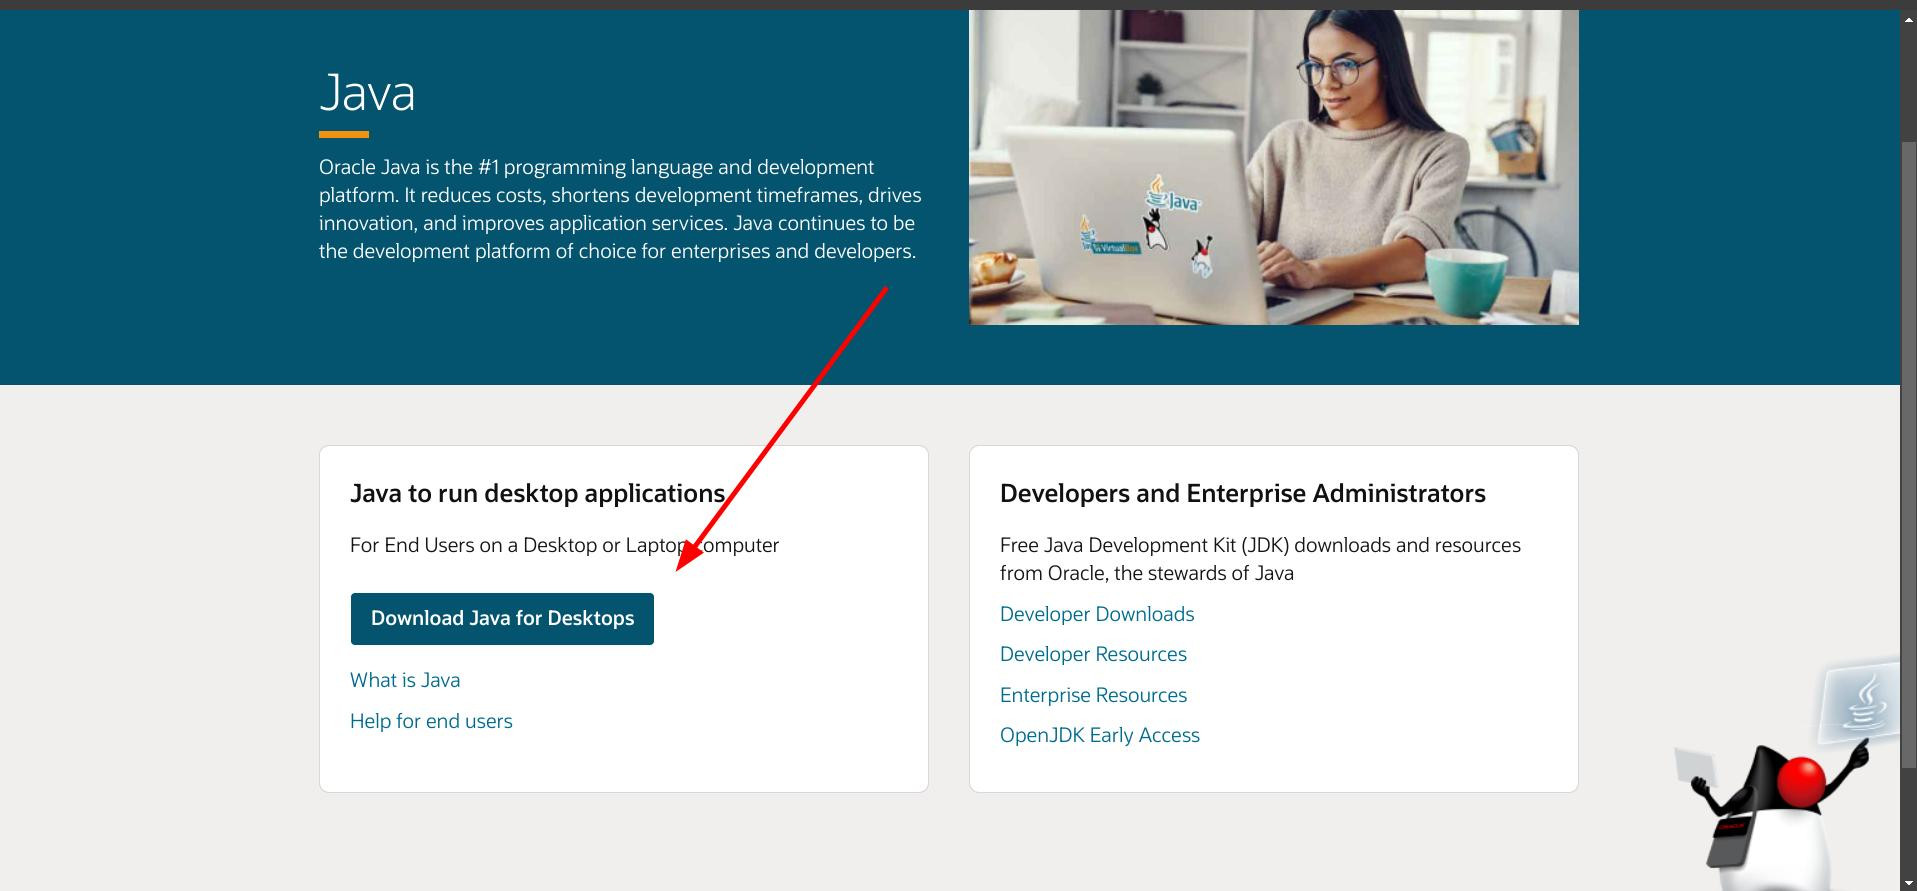
Go to the official website java.com and download the installation file. There will be a “Download Java” button available on the homepage, click on it to start downloading the installation file. Once the download is complete, run it and follow the installer's instructions.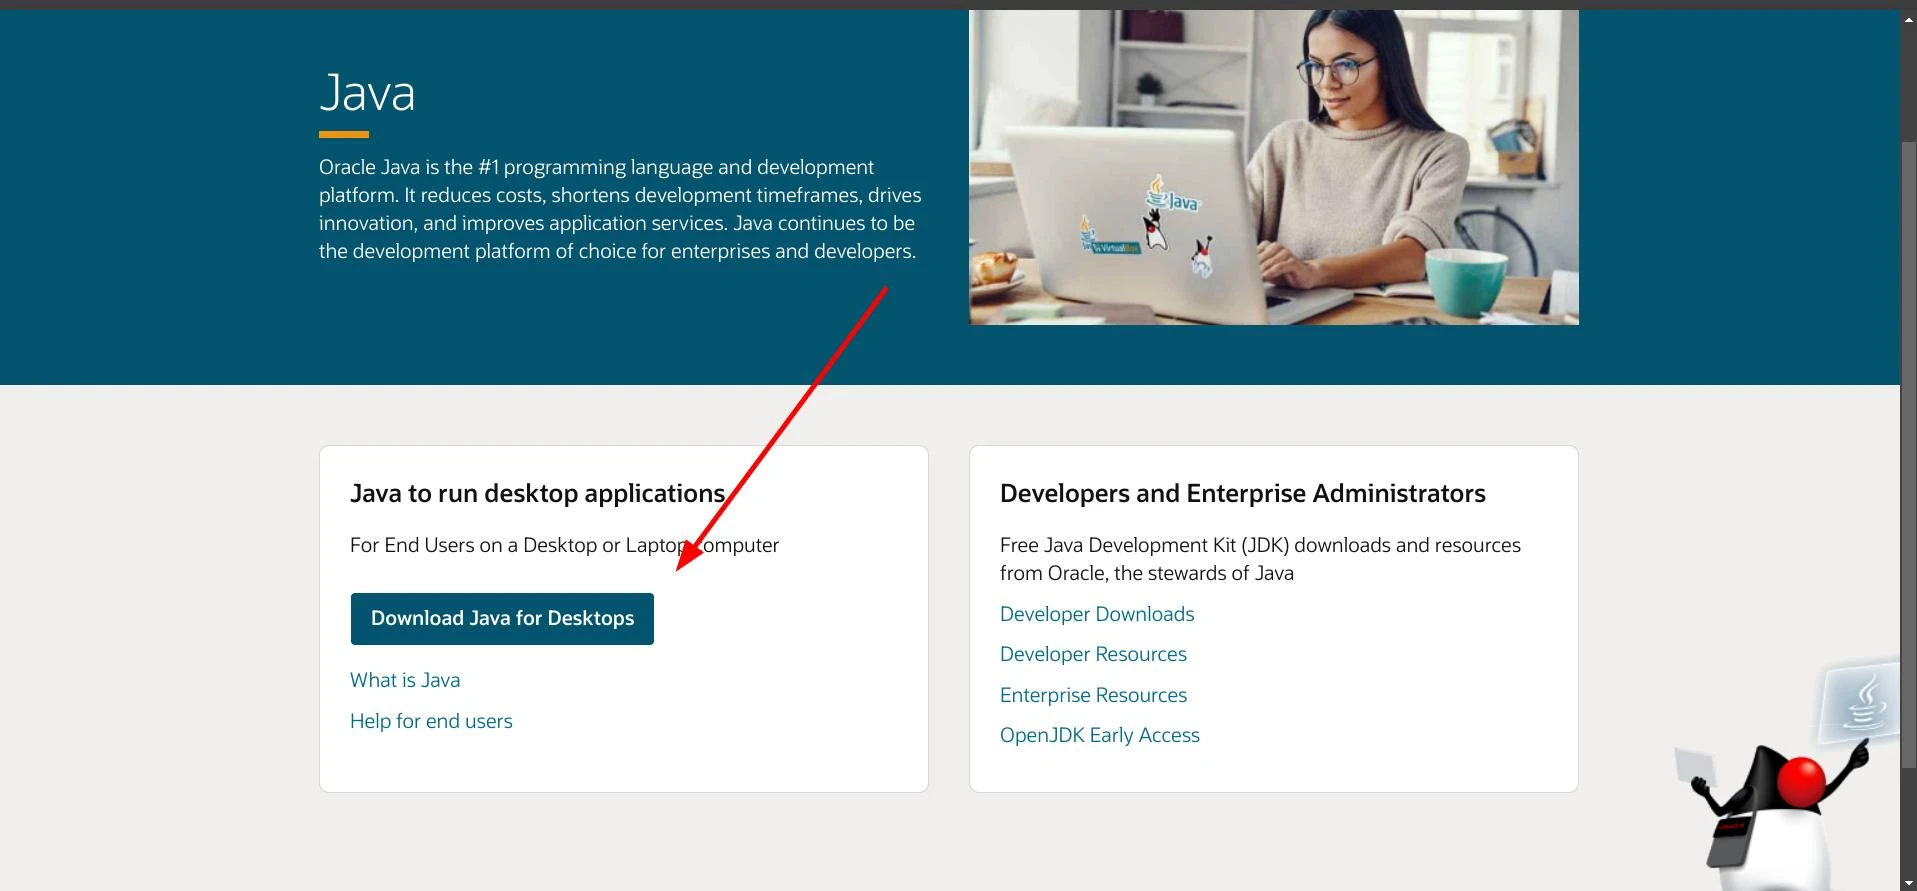
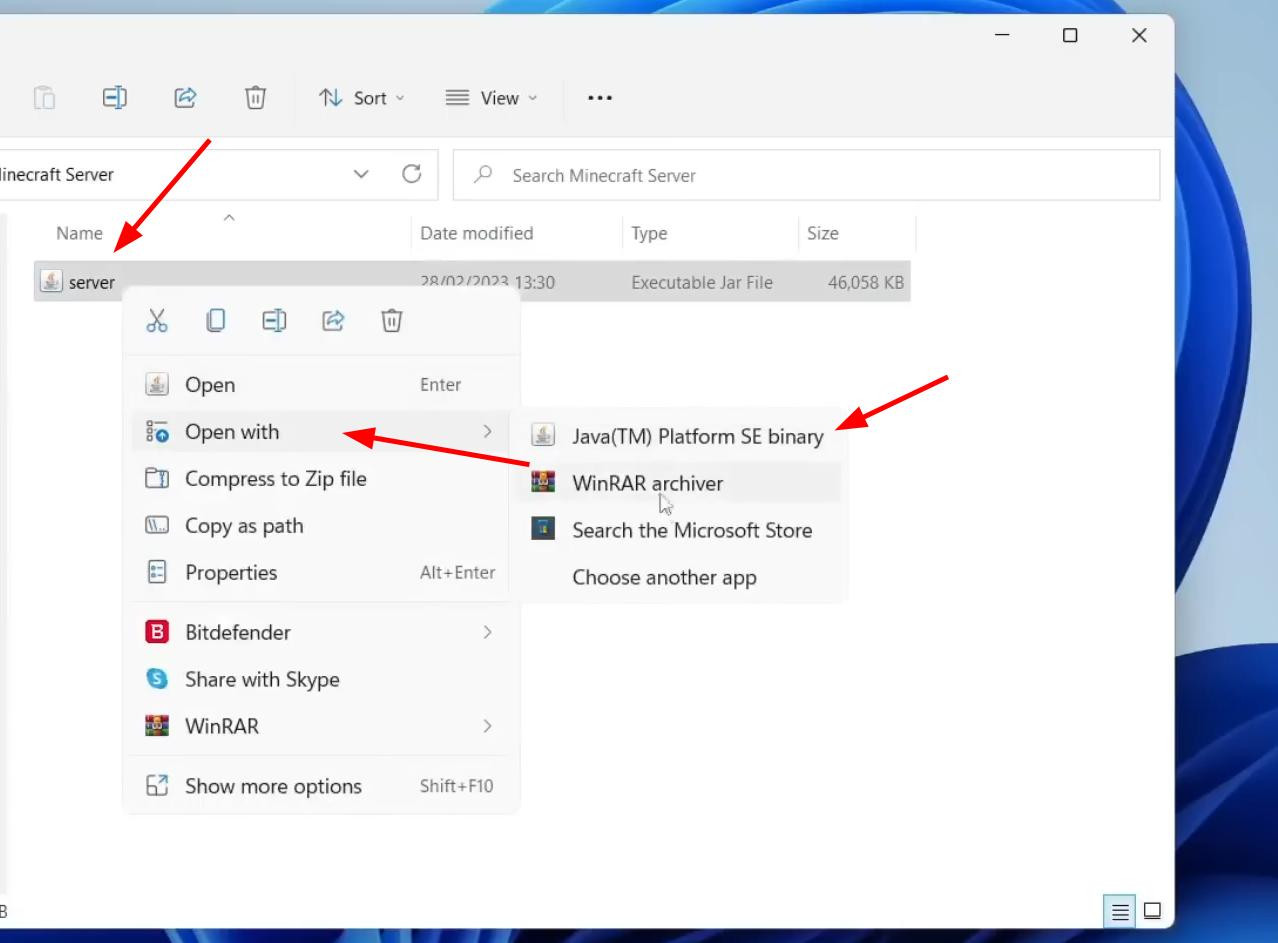
Restart your PC to make all the changes take effect. After that, go back to the server folder, right click on the .jar file and select “Open with”.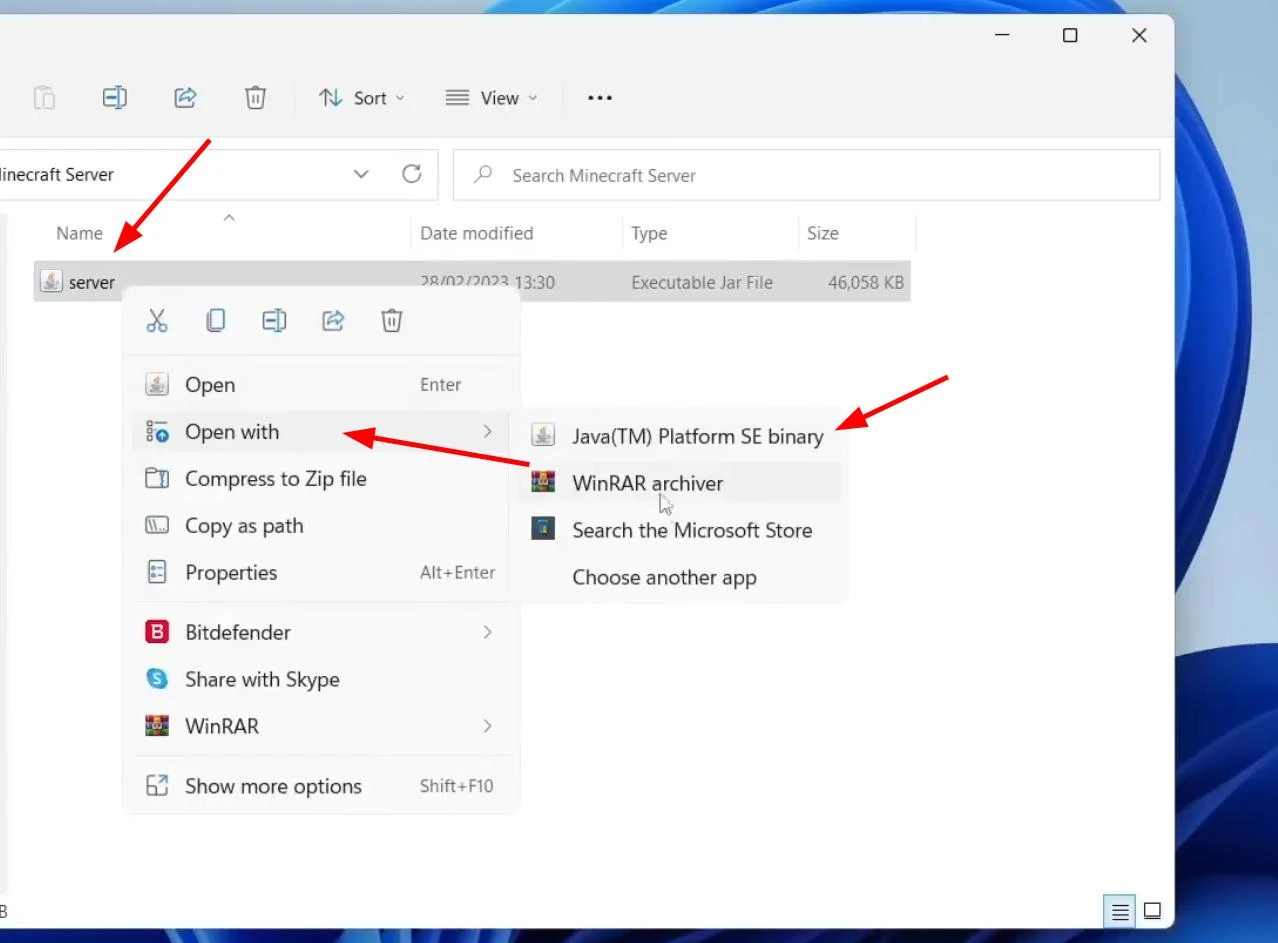
Then click on “Select another application” and specify Java(TM) Platform SE Binary. If this option is not in the list, you need to click “Advanced” or “Find in Microsoft Store”.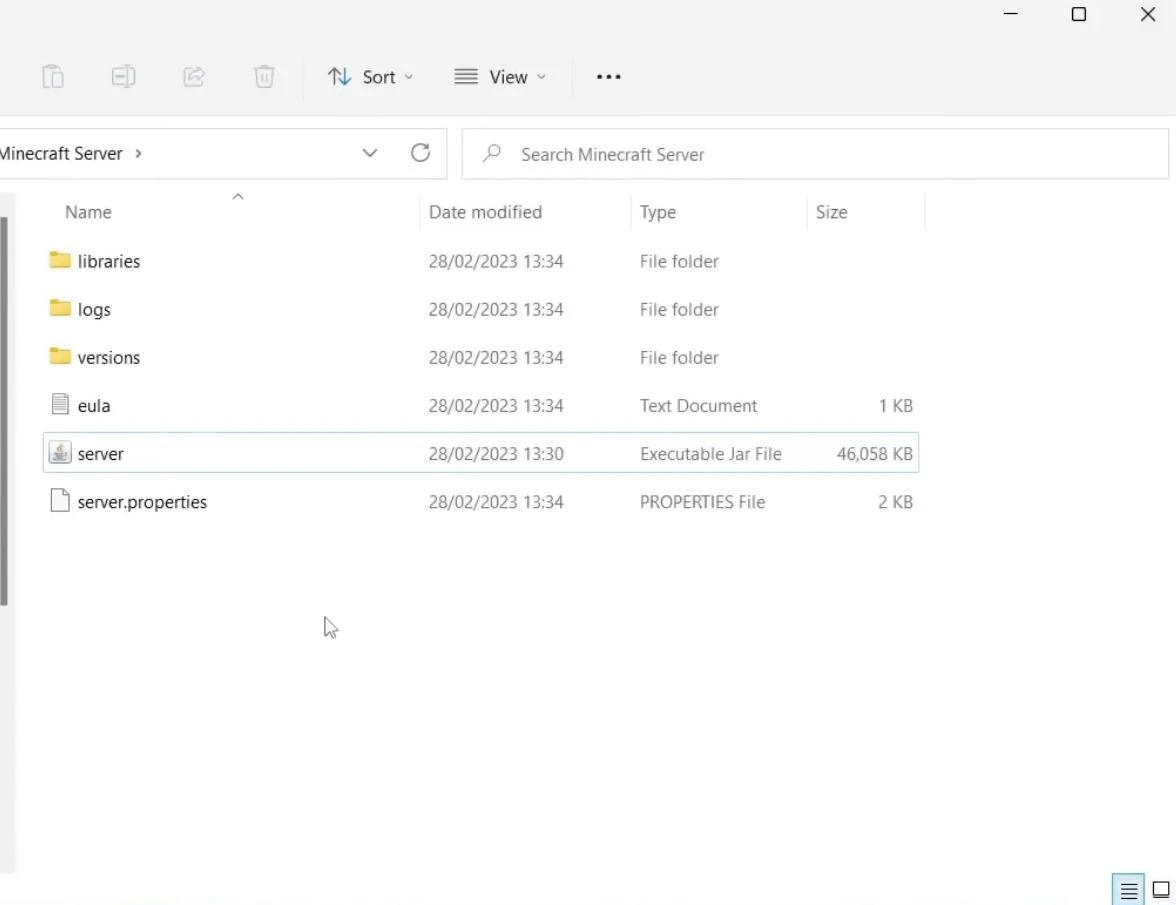
Once selected, the Java server file will start and create the necessary initial files.
Accepting the license agreement and restarting the server
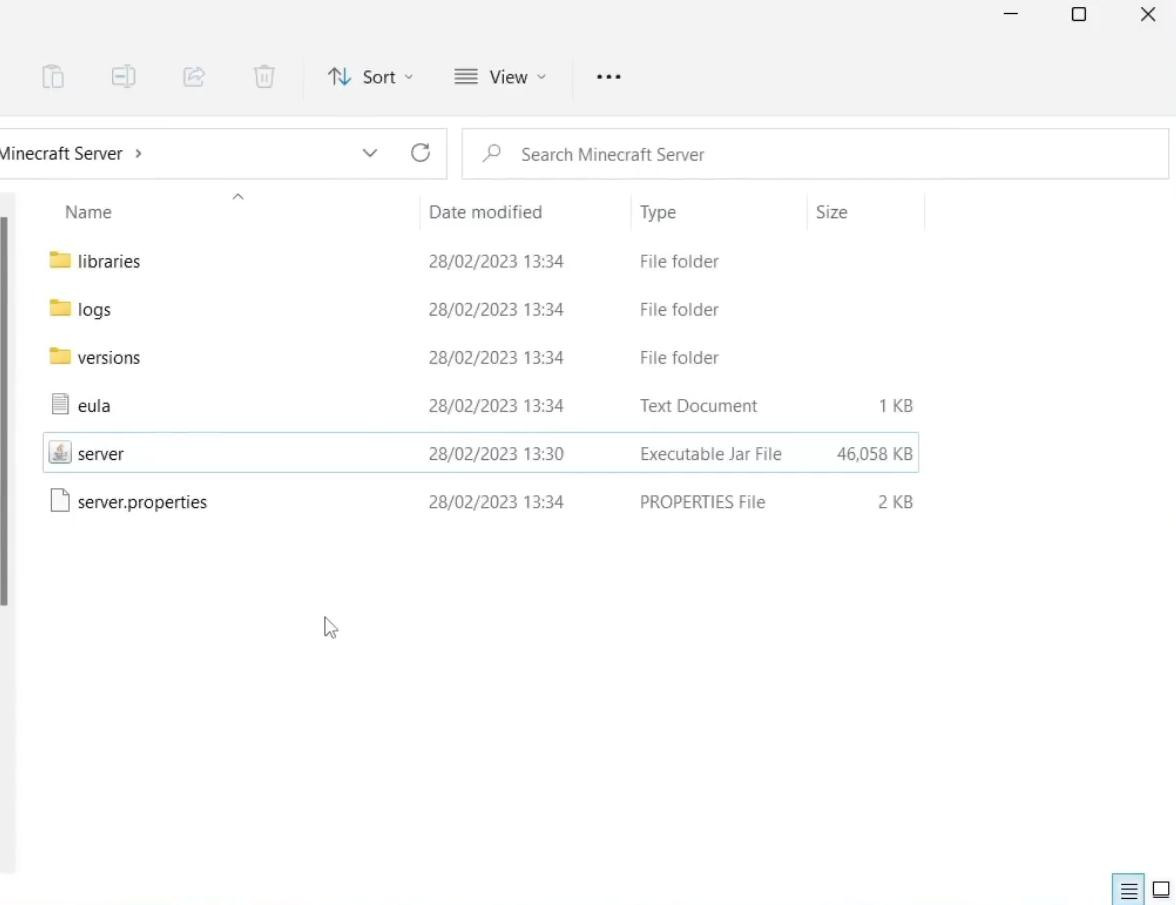
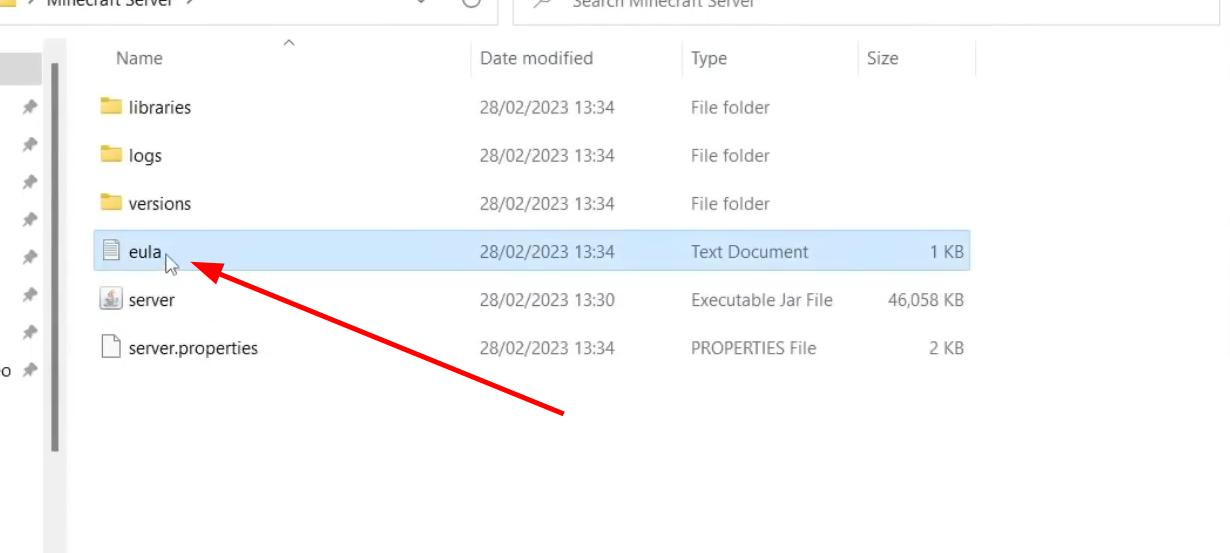
After the server file is run for the first time, several new documents will appear in the folder where it resides. One of them is a text file named eula.txt. This file contains the license agreement from Mojang, which you need to accept in order to continue using the server.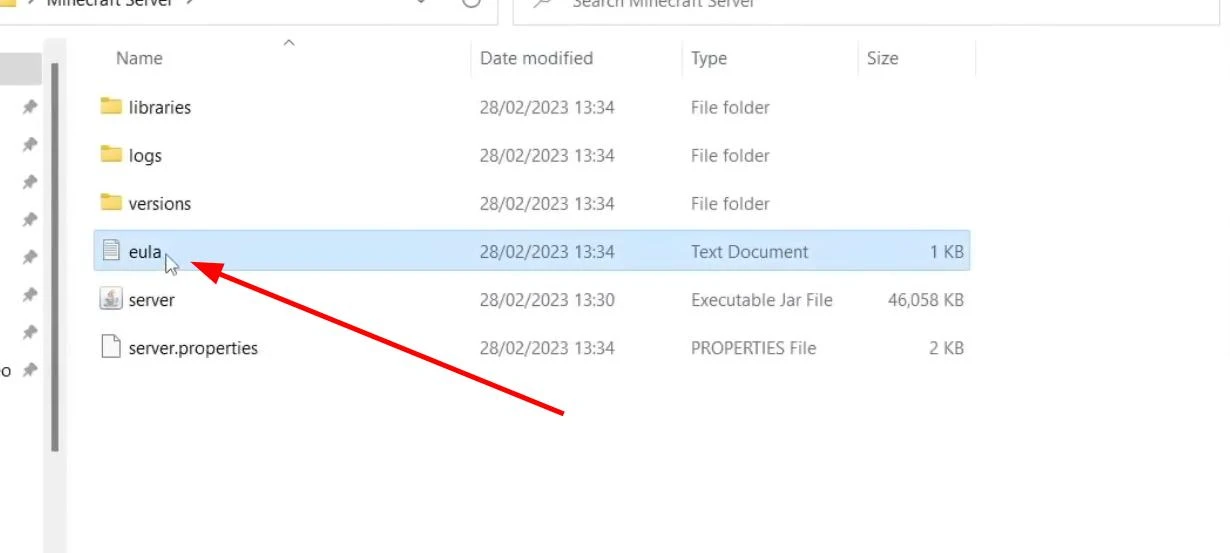
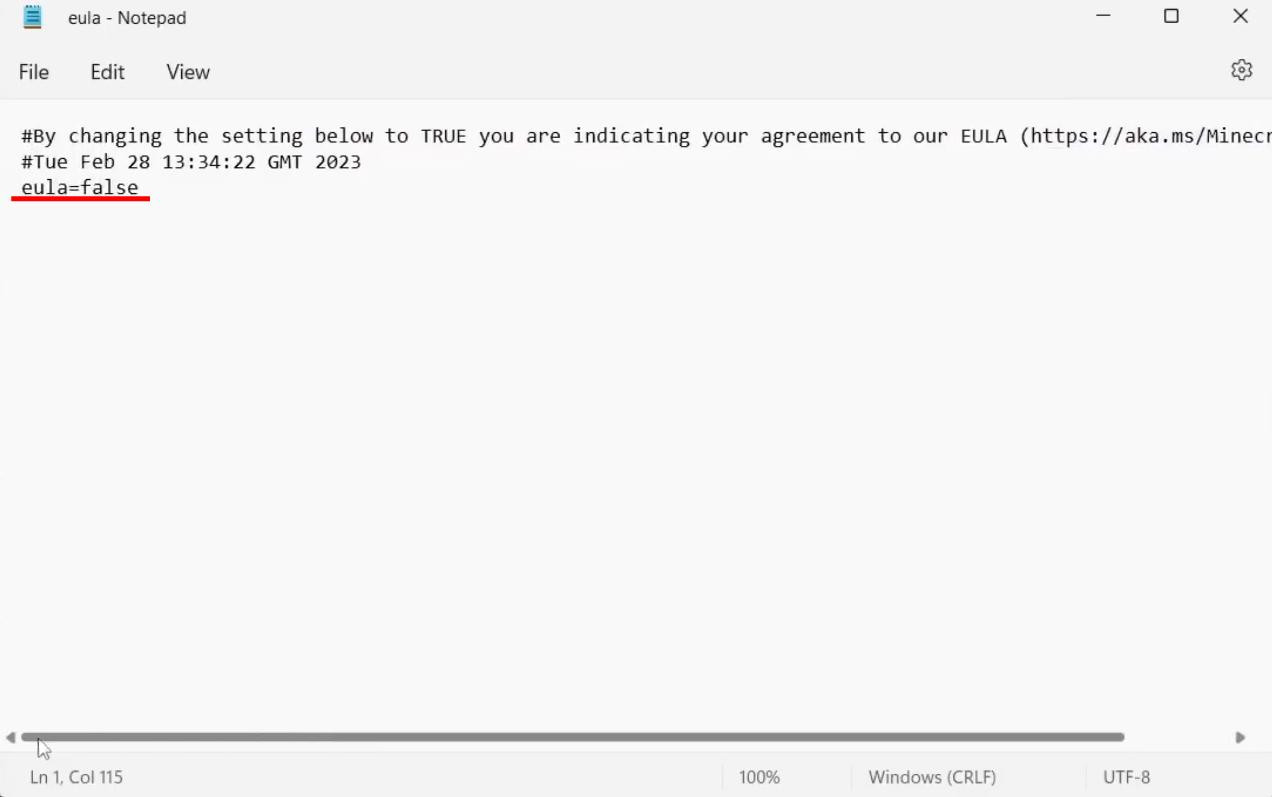
To do this, you need to open the eula.txt file by double-clicking it. It will open in a standard text editor such as Notepad. Inside will be the line eula=false, which means that the terms of the agreement have been waived.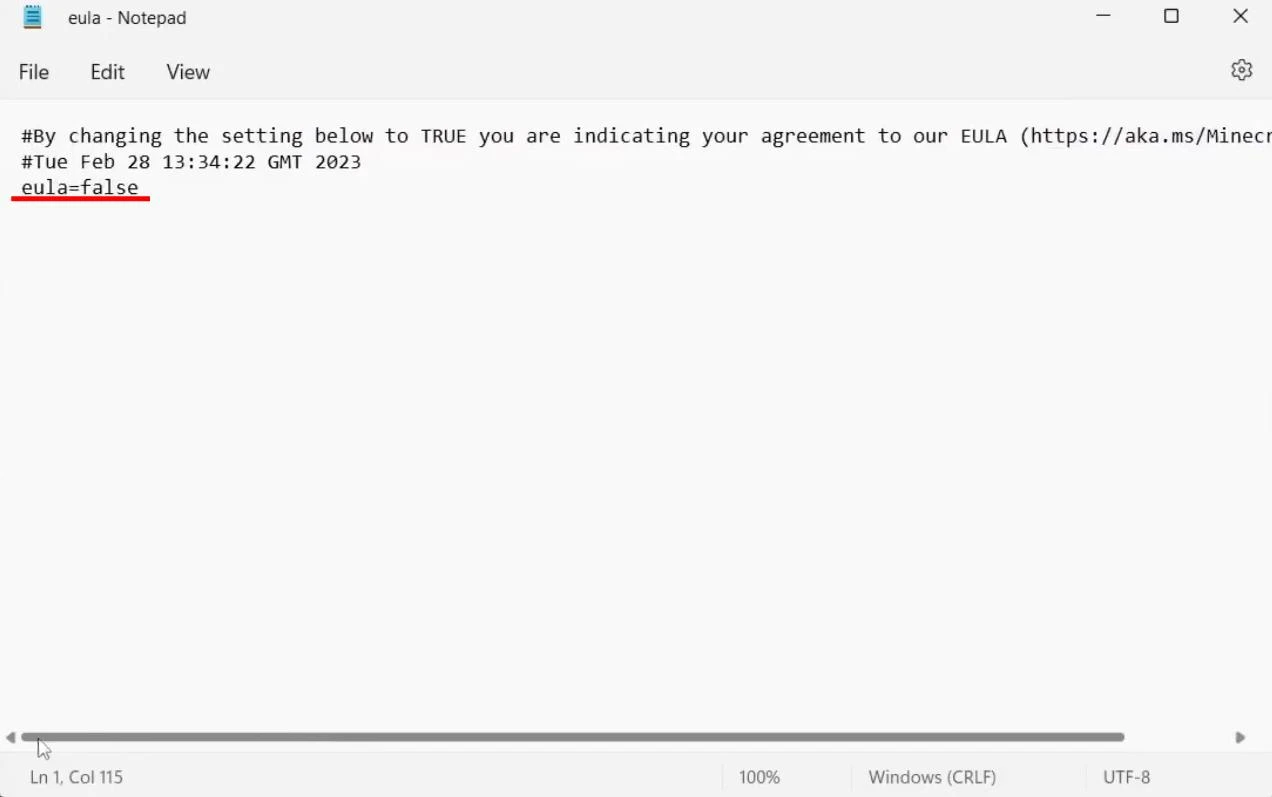
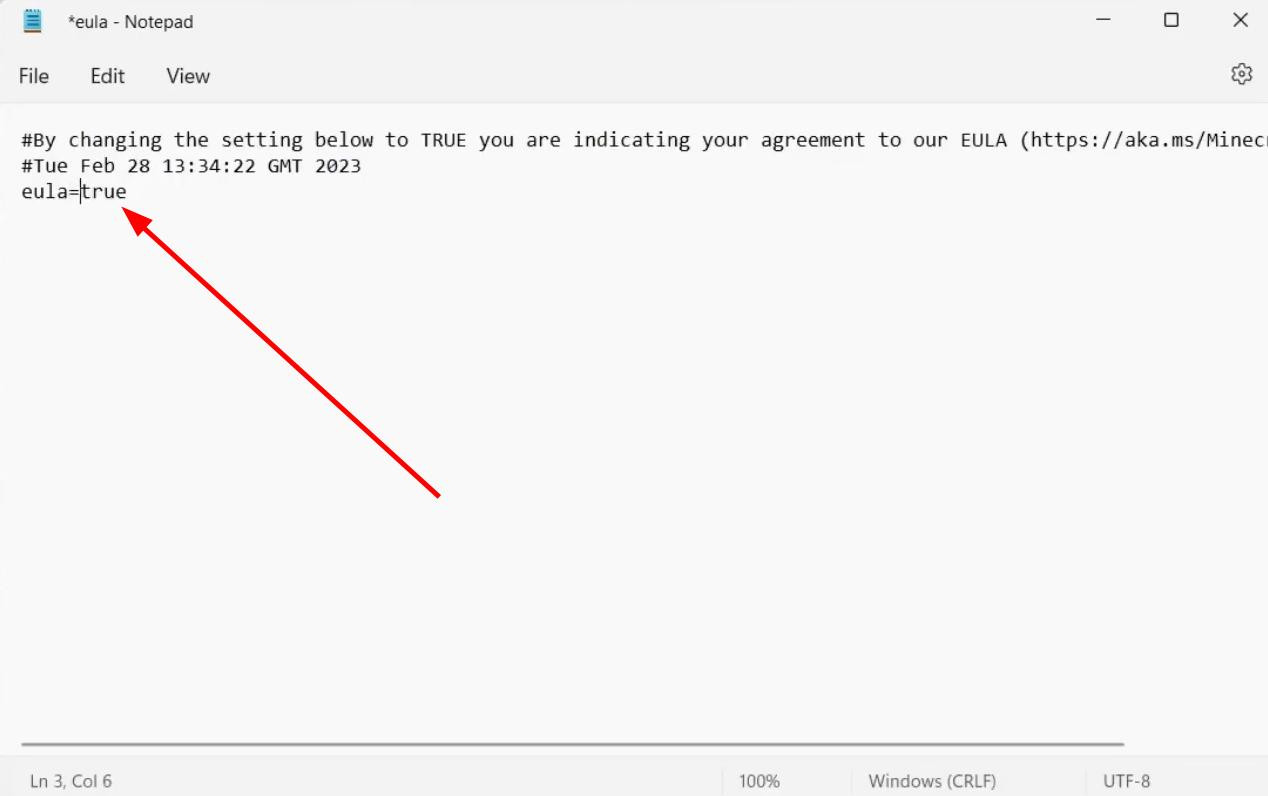
Replace false with true without changing any other characters in the string. Do not add any extra spaces or characters!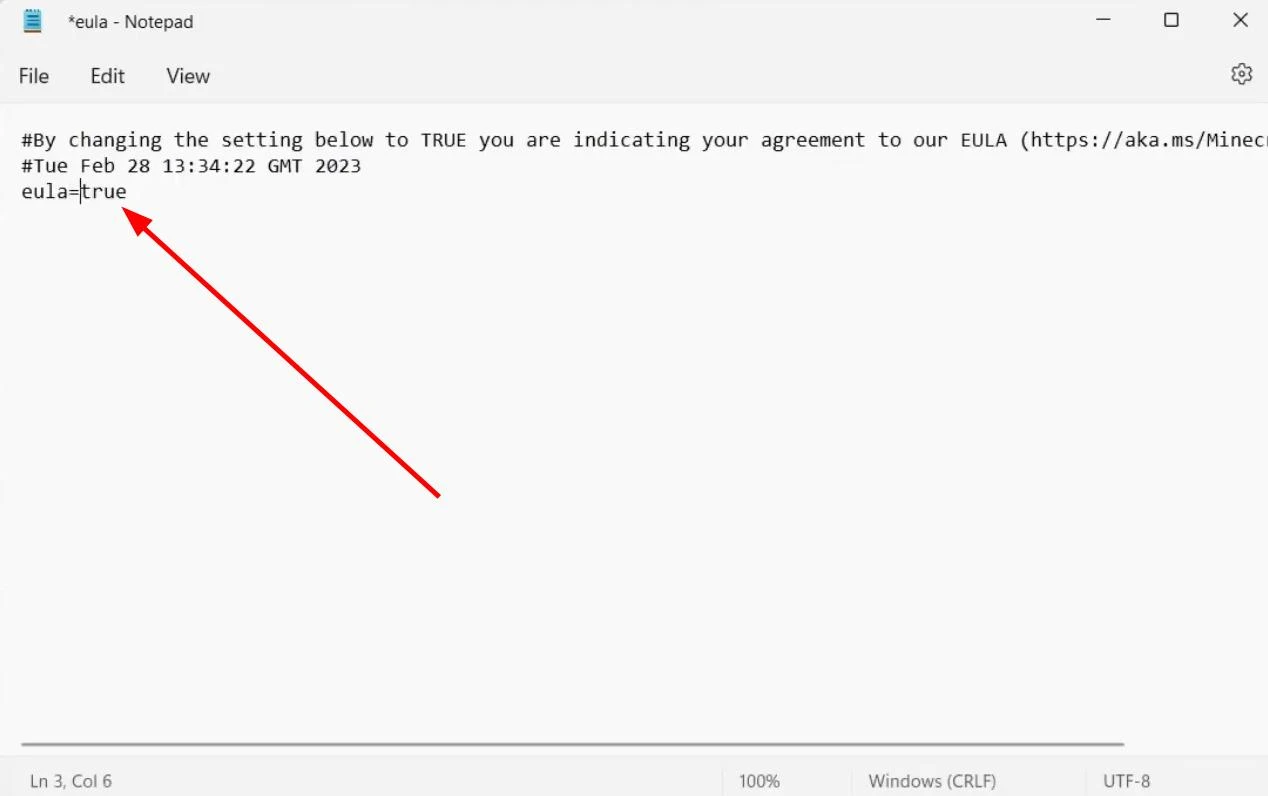
After editing, you need to click “File” in the top menu and select “Save”, then close the document.
Now the license agreement is accepted and you can run the server file again by double-clicking.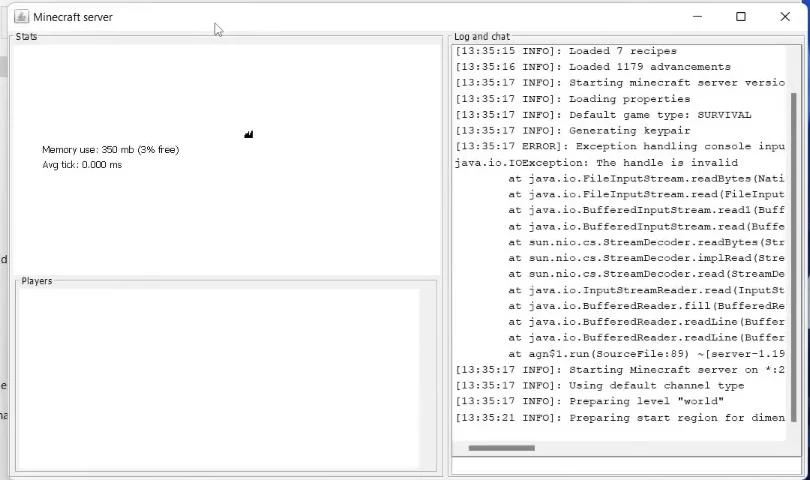
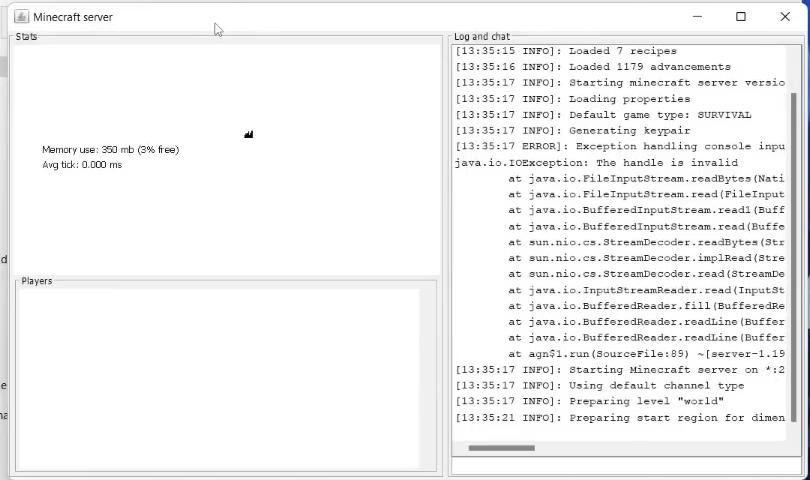
This time a command line window will open, in which the world generation process will start - the inscription “Preparing spawn area” will appear. This means that the server is working correctly and is creating a game world for connection.
Configuring server parameters via server.properties file
After successful server start and world creation, you can proceed to more fine-tuning of the game process. The server.properties file appears in the server folder. It contains all the basic parameters that affect the behavior of the server.
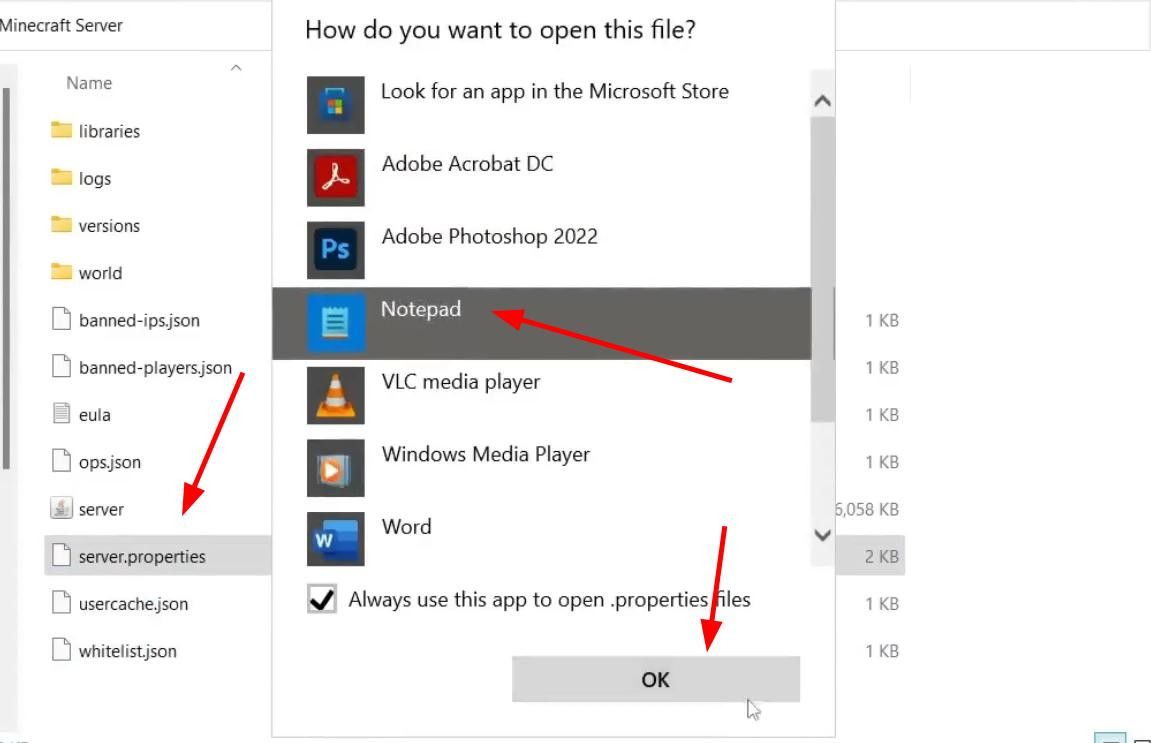
To make changes, right-click on the file and select “Open with”. 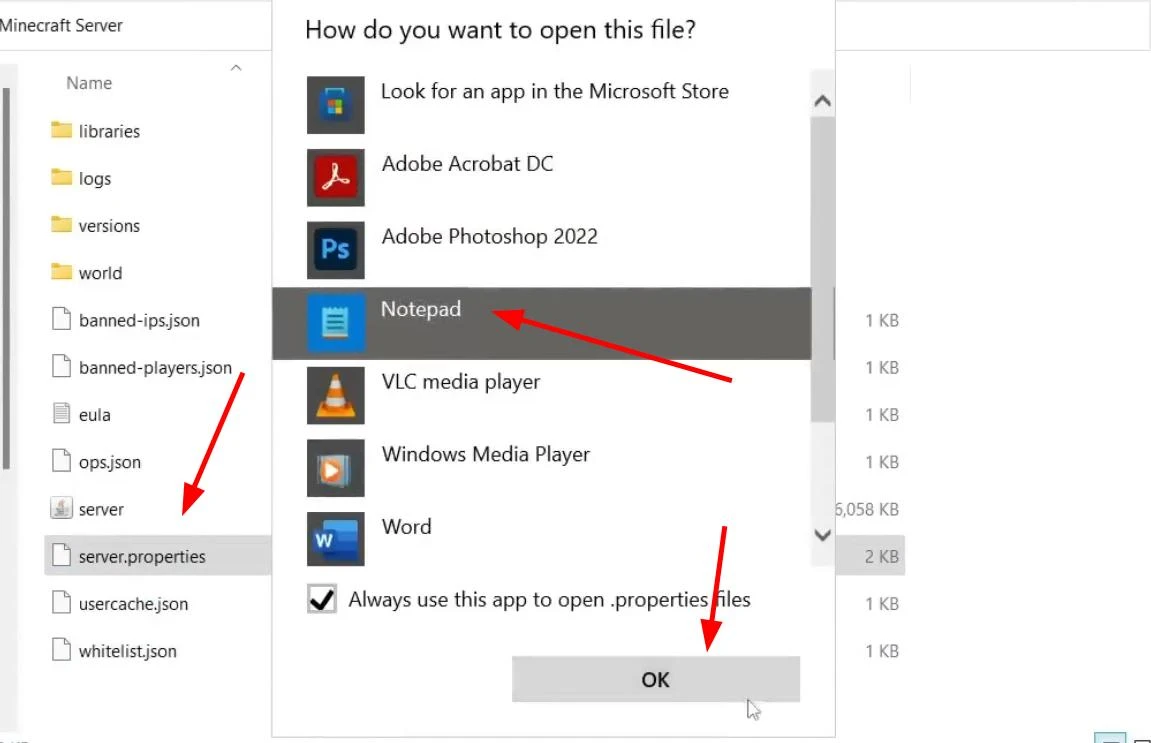
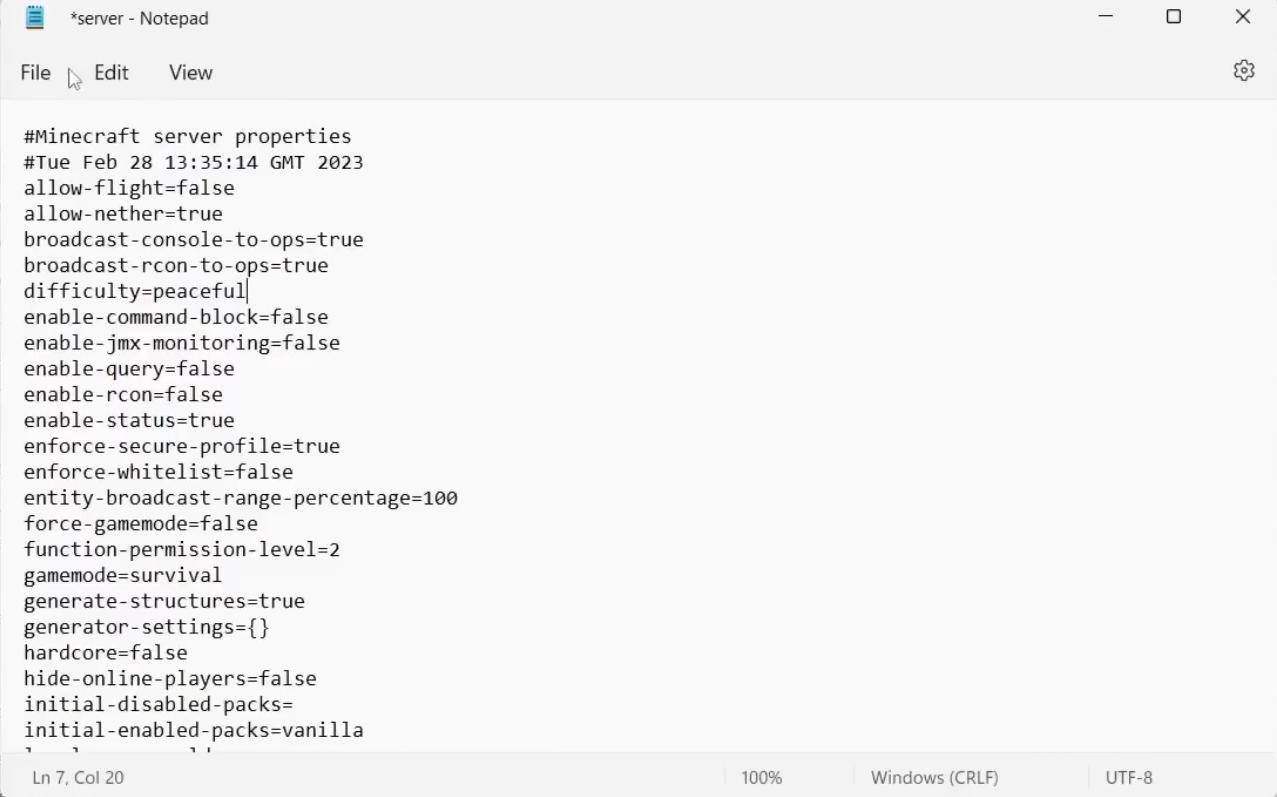
Then specify a standard editor, for example, Notepad. After opening the file, you will see a list of settings.
Here you can change the difficulty level, set the default game mode (e.g. creative or survival), set the maximum number of players, disable or enable PvP, and specify the world generation level.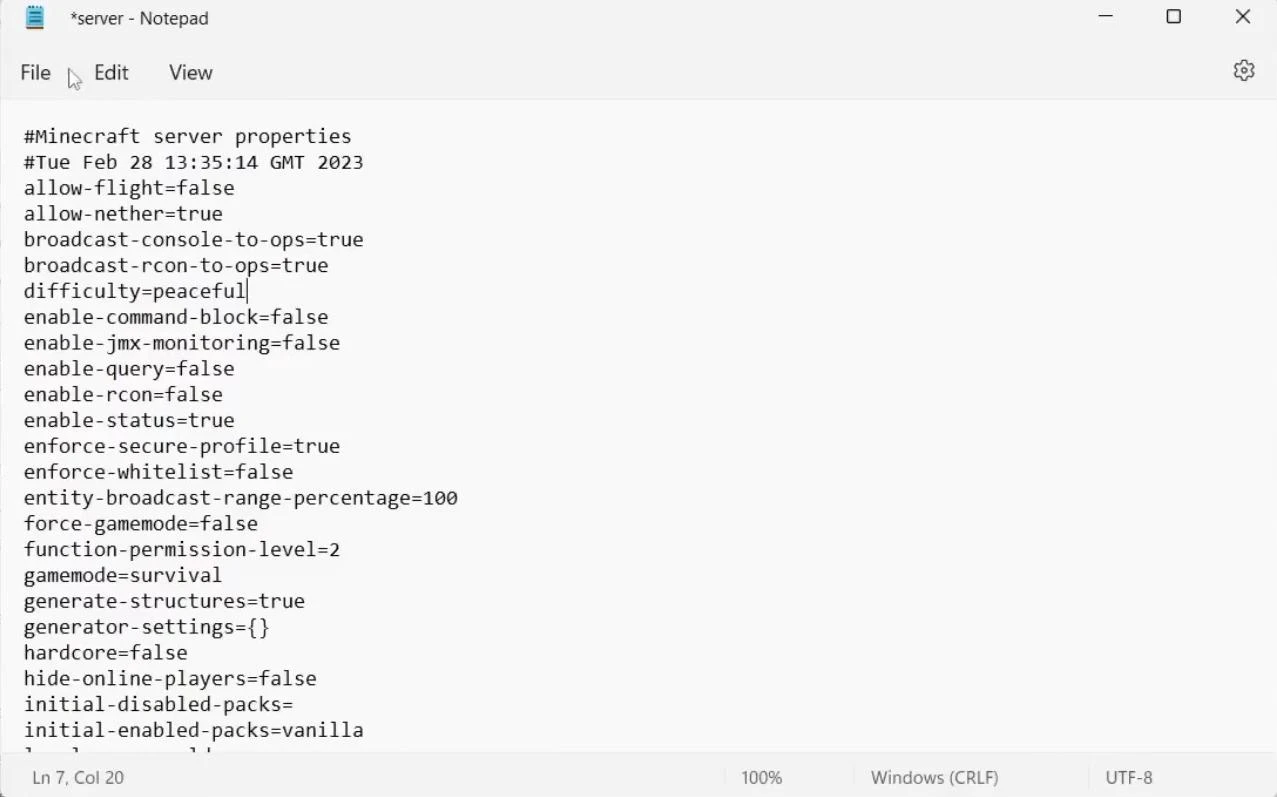
Some commands for changing server settings:
- Change the difficulty level:
To make the game more peaceful, replace the string
difficulty=easy
with
difficulty=peaceful.
- Changing the game mode:
To change to creative mode, replace the string
gamemode=survival
with
gamemode=creative.
- Saving changes:
From the menu, select File → Save.
Close the text editor.
- Applying the changes:
- Restart the server by double-clicking the .jar file.
Connecting to the server from a local computer
When the server is running and all the settings have been made, you can connect from the game itself.
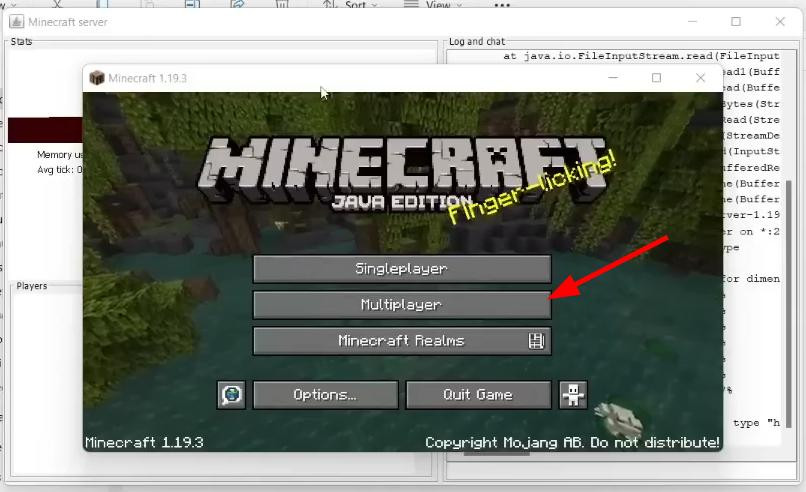
But first, make sure that the version of Minecraft installed on your computer matches the version of the server. If you're not sure which version you downloaded, go back to the server's download site and look at the specified version - for example, Minecraft server 1.19.3.
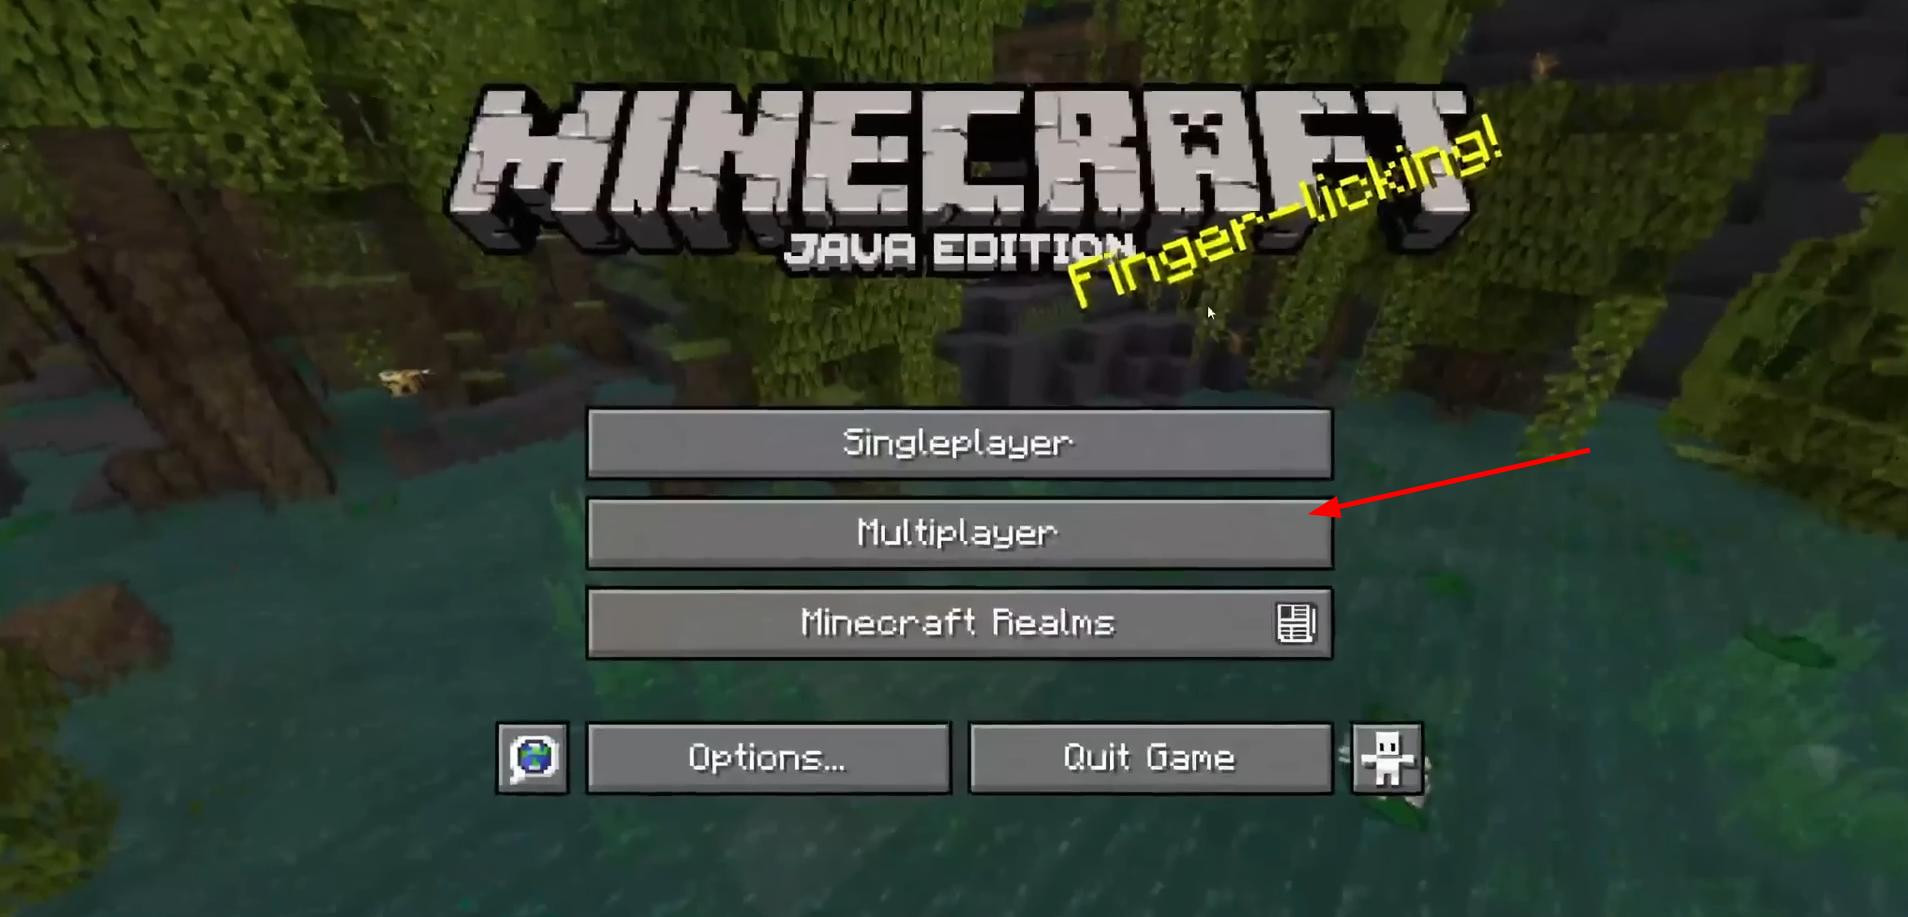
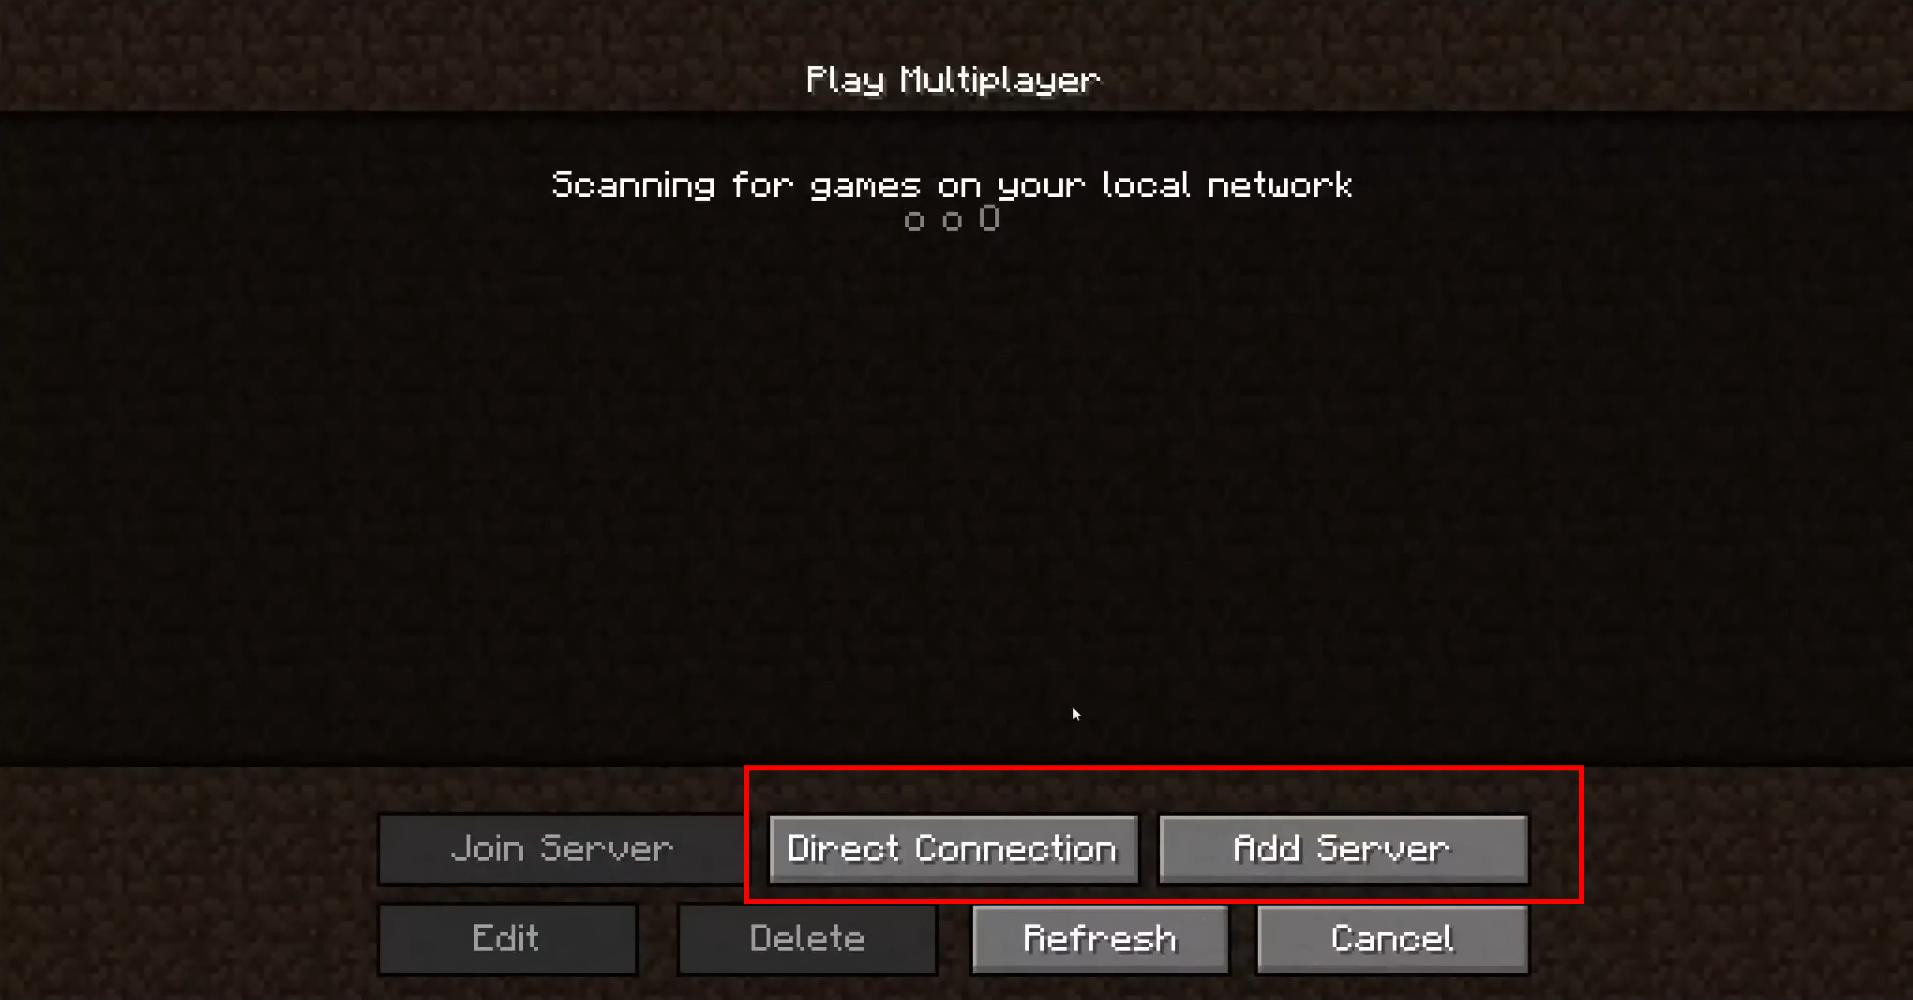
Now open Minecraft Java Edition and wait for the main menu to load. When the start screen is loaded, select Multiplayer and click on Direct Connect or Add Server if you plan to keep it in the list.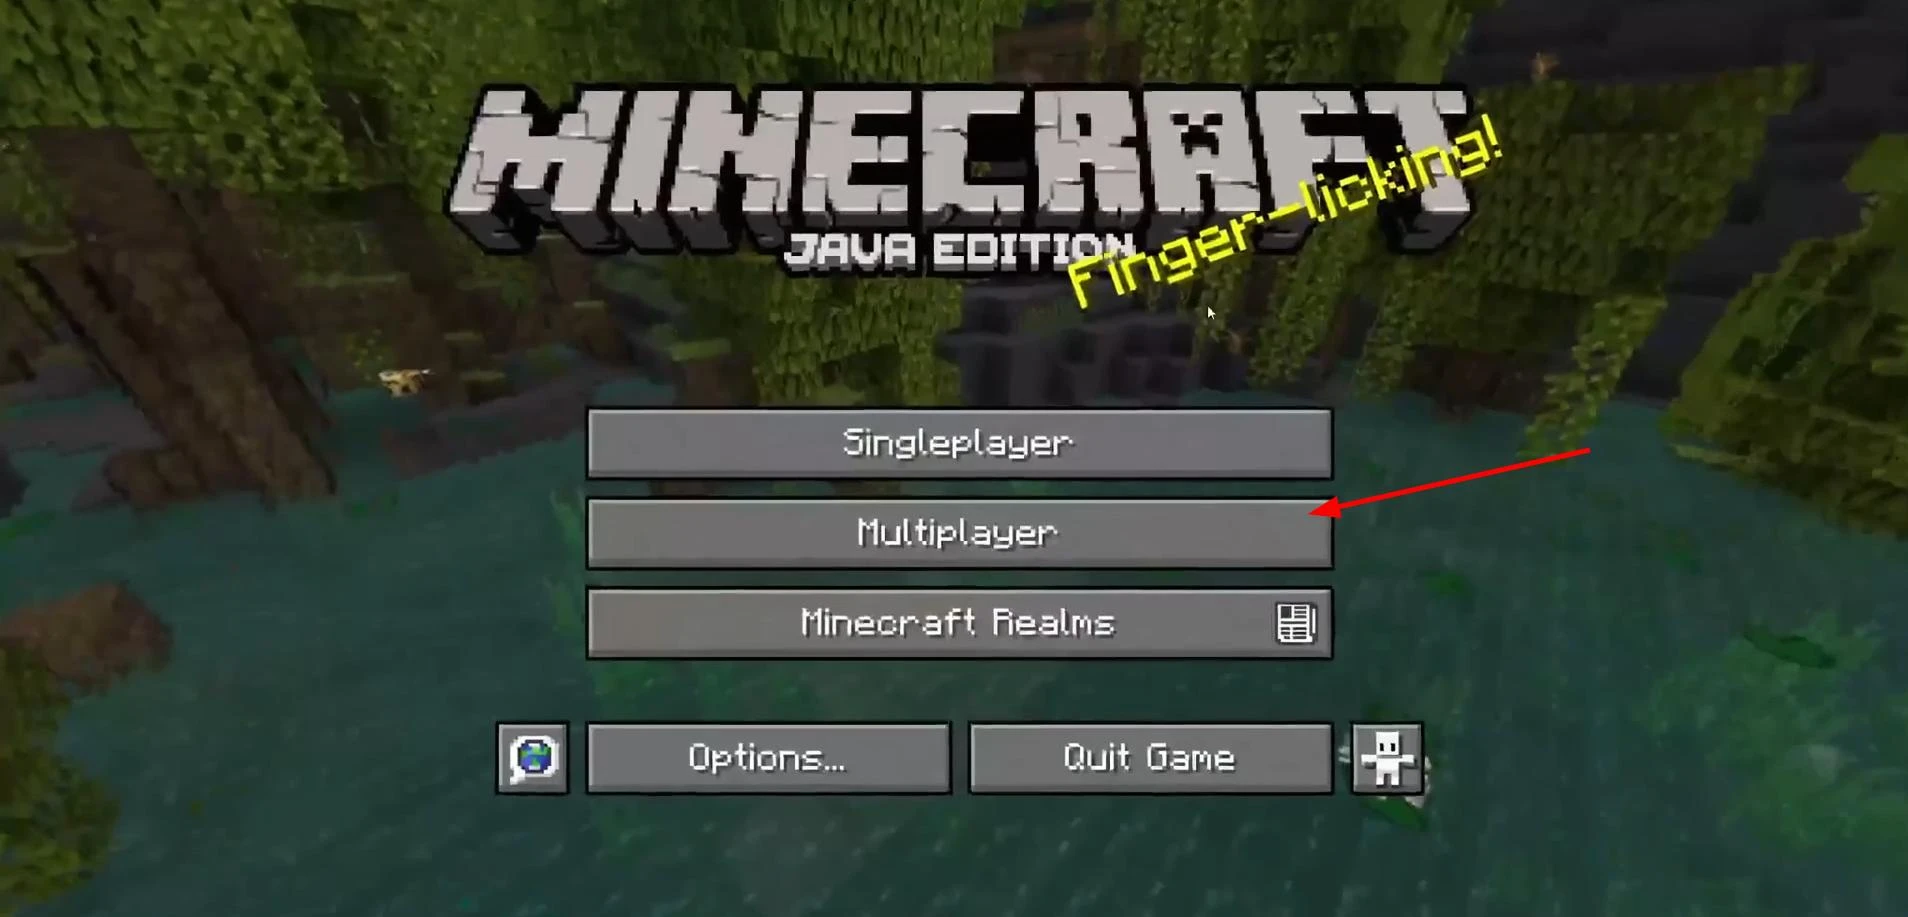
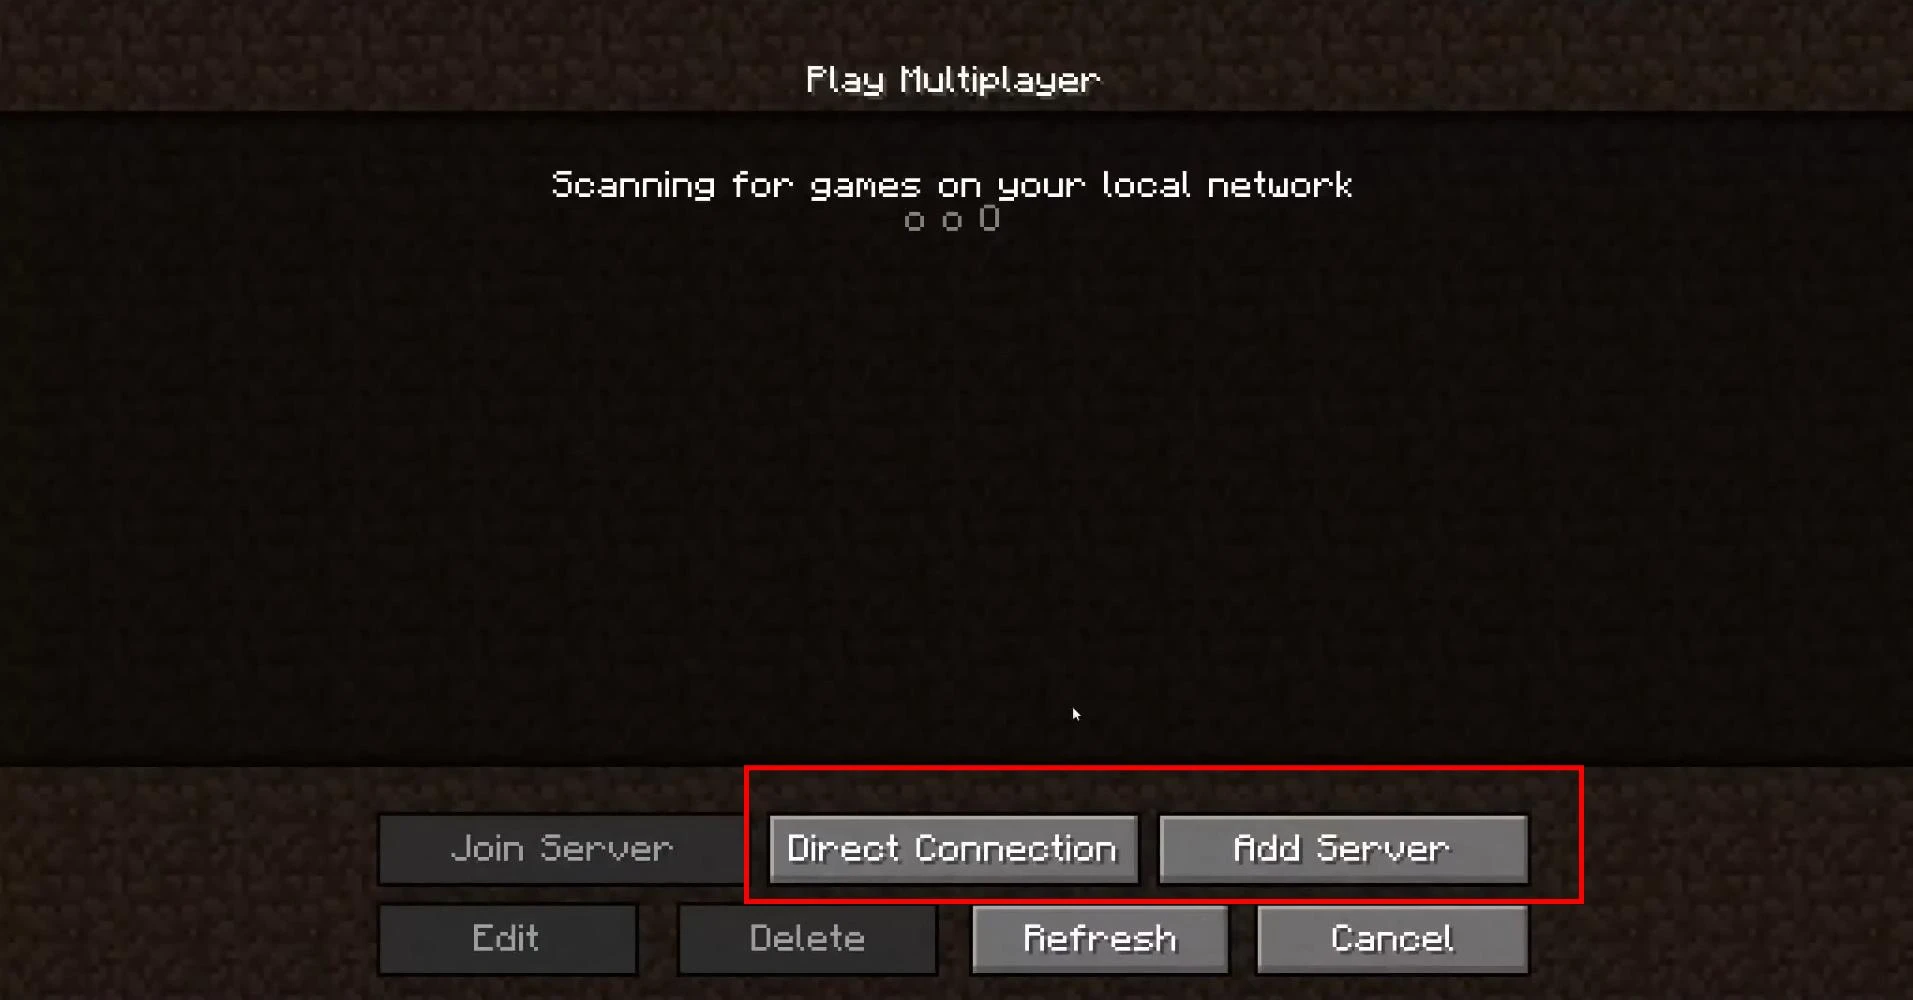
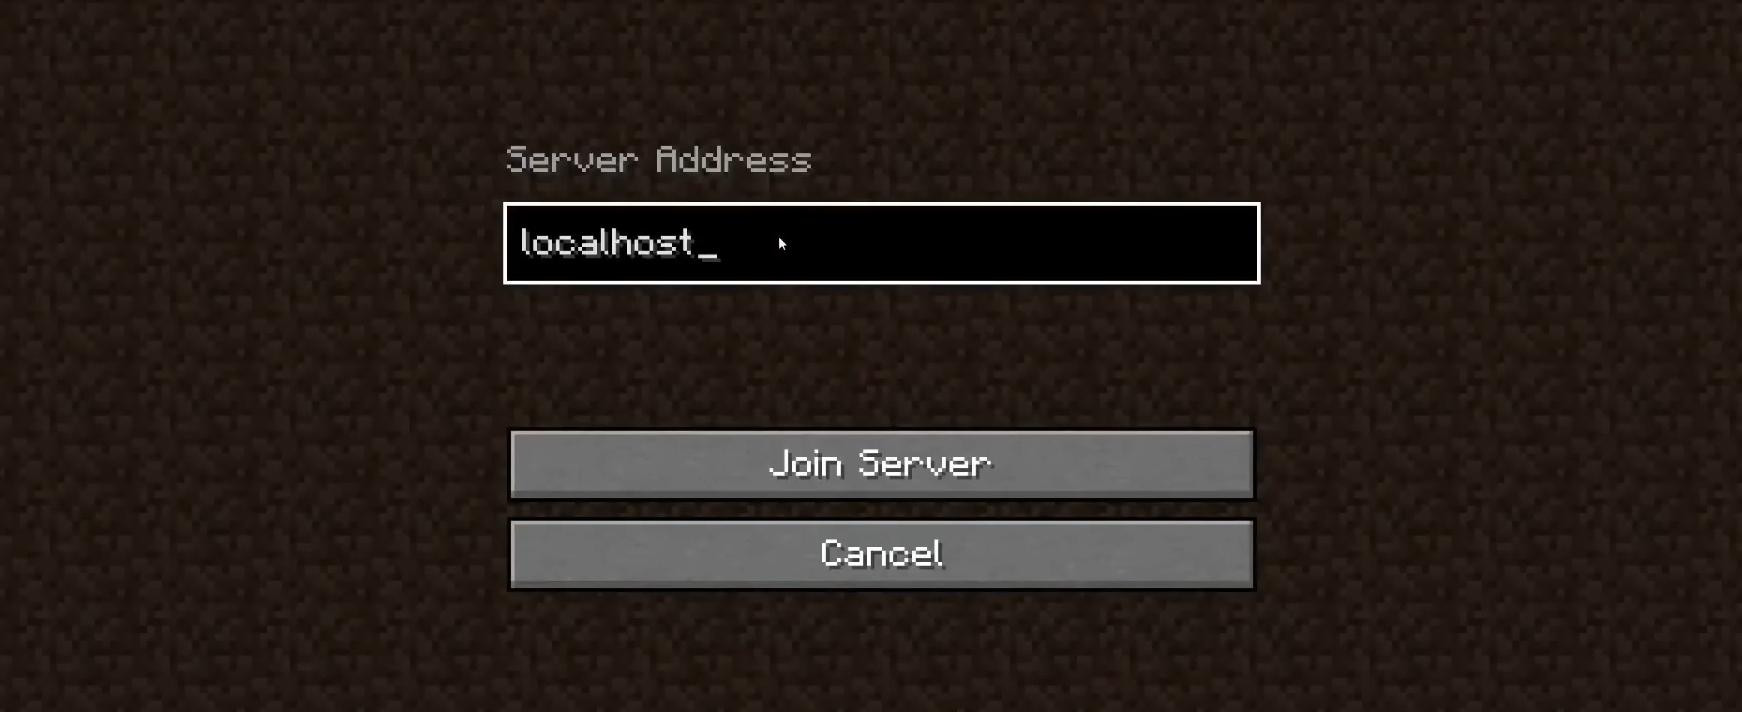
In the “Server Address” field you should enter localhost. This way you let the game know that you will run the server on a local machine, i.e. on your computer.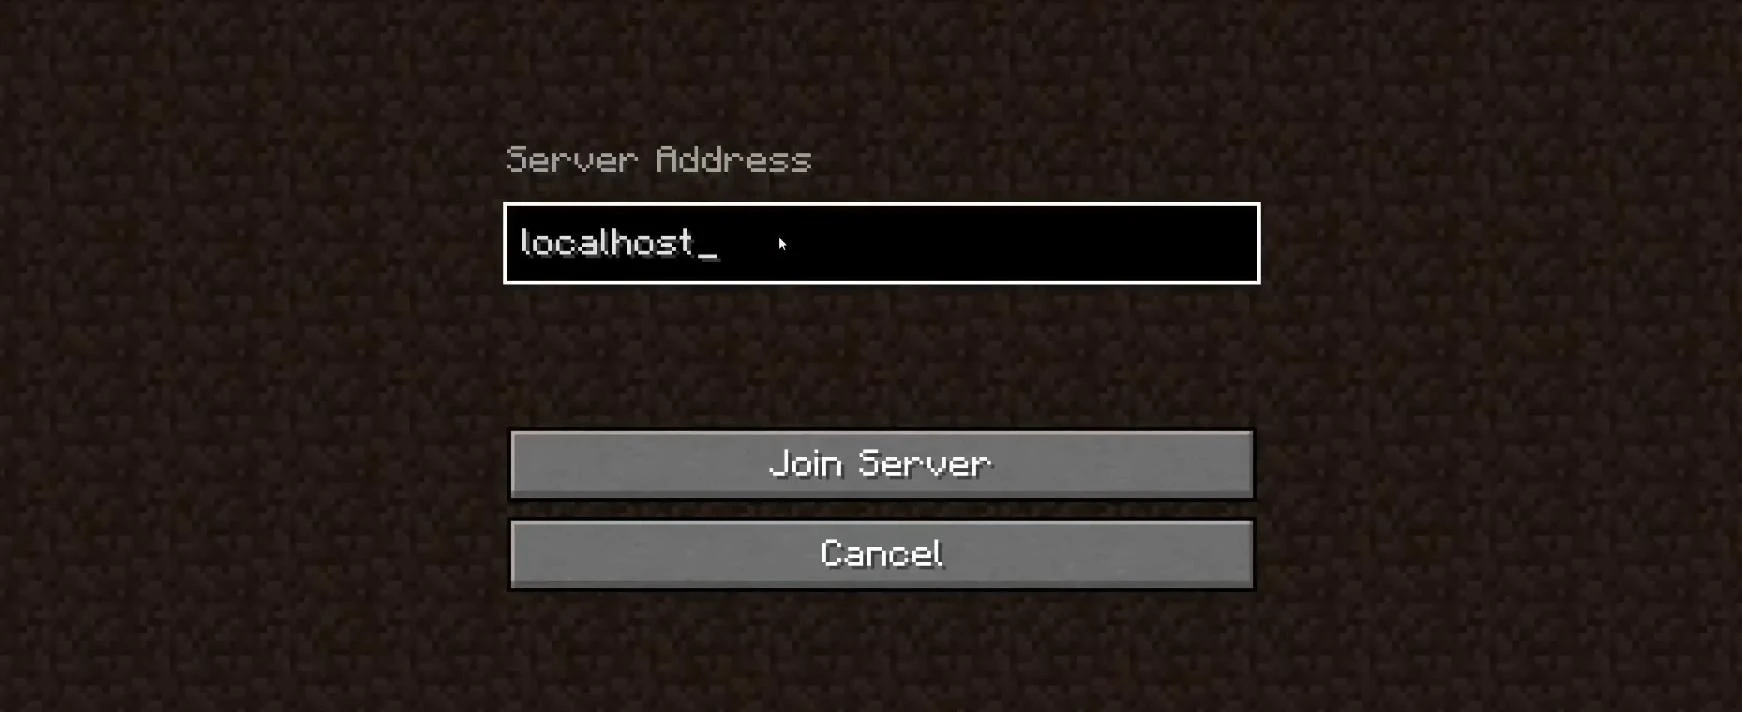
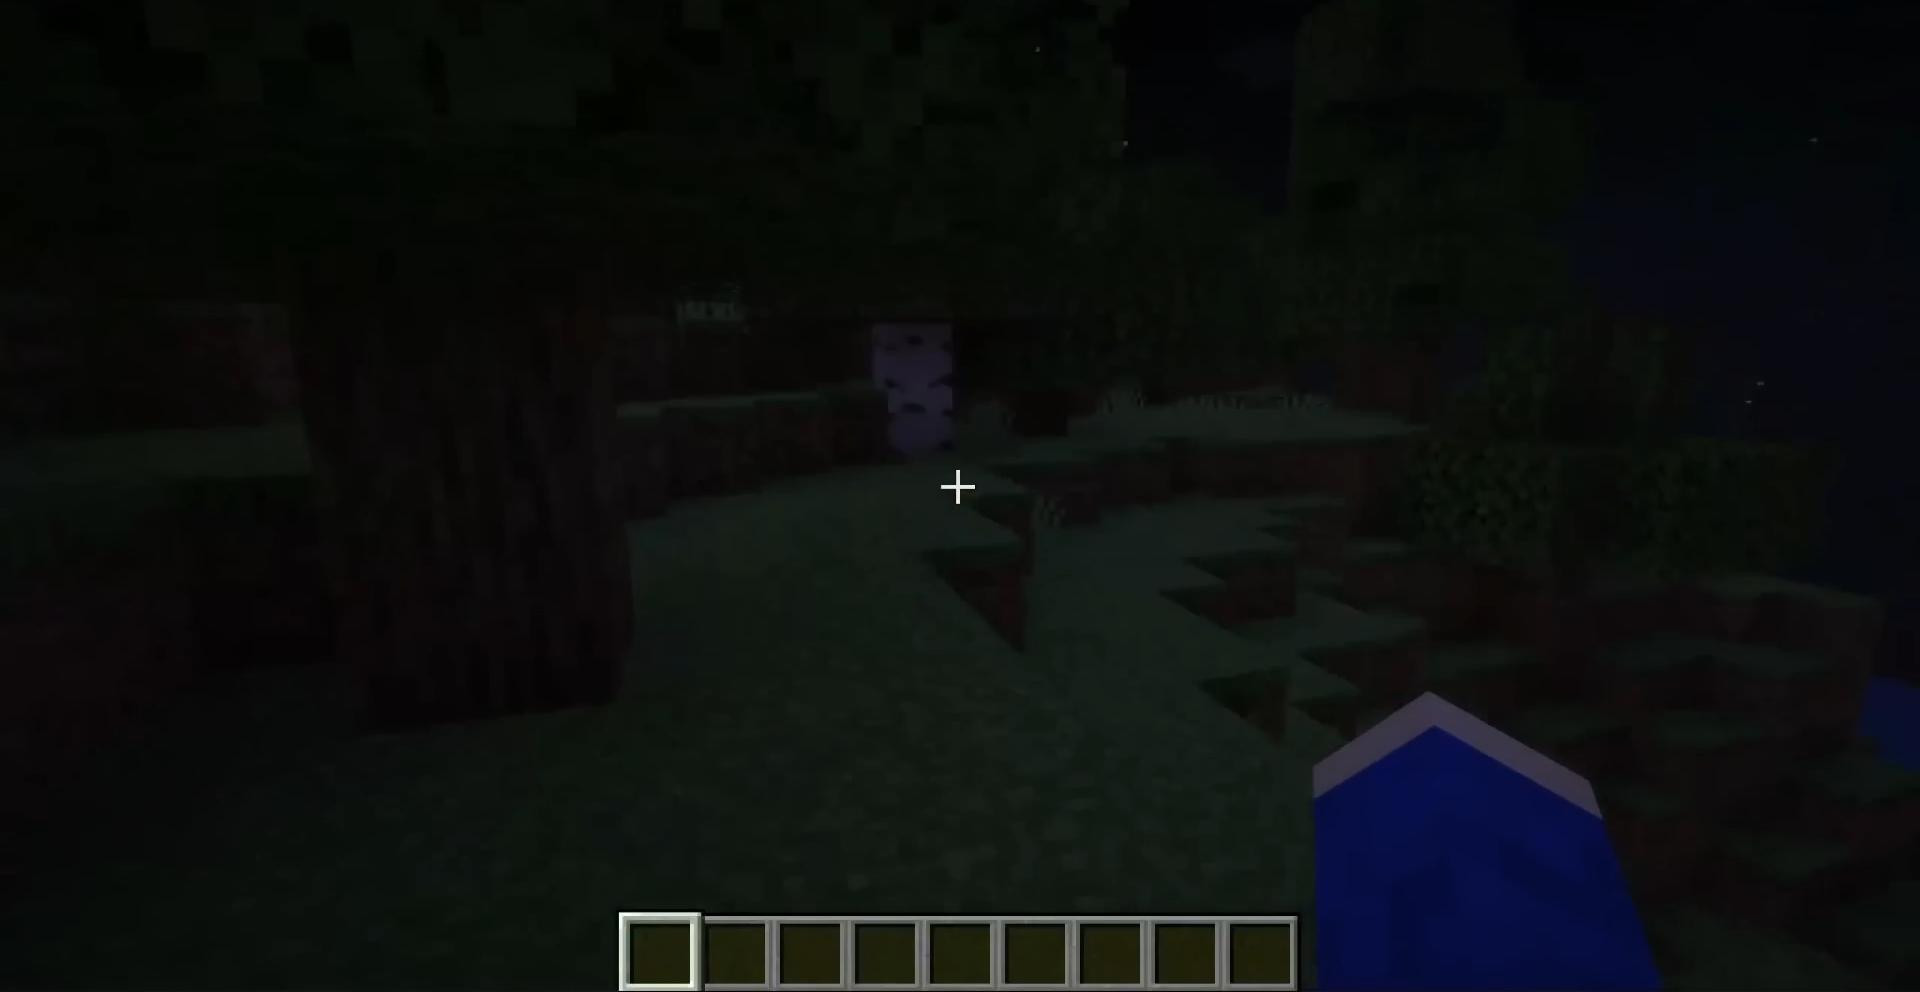
After clicking the “Connect” button, the game will start connecting to the server. Within a few seconds there will be a login to the world created by the server. If everything is correct, you will connect to the server.
You can freely explore the world, test settings and prepare to invite other players.
Getting admin rights and basic commands
After connecting to your own server in Minecraft, you may notice that you don't have access to admin commands. Despite the fact that the server is running locally, administrator rights are not automatically assigned by default - you need to assign them manually.
To do this, go back to the server window, where logs and player activity are displayed. There you will see that the user has connected to the server. To give yourself administrator rights, you need to enter a command directly into the server console. The format of the command is as follows: op <your_name_in_game>. For example, if the nickname of the player is Steve, the command will look like this: op Steve.
After entering the command and confirming with the Enter key in the console will appear a message that the player has been assigned the rights of the operator.
Now he can use all admin commands in the game, including /gamemode, /time set, /tp and others.
How to invite friends: port-forwarding basics
When the server is configured and works correctly on the local machine, a logical question arises - how to connect friends to it? By default, the server is available only within your local network, which means that no one outside of it can connect to it. To make the server public, you will need to configure the so-called port-forwarding on the router.
The essence of this procedure is to allow incoming connections from the outside to a specific port on your computer - by default, this is port 25565 used by the Minecraft server. First, you need to log into your router's settings by entering its IP address in your browser (e.g. 192.168.1.1 or 192.168.0.1). After authorization, you will need to find the section related to port forwarding - it may be called Port Forwarding, Virtual Server or NAT.
Inside this section you need to create a new rule: specify the external and internal port (both 25565), select the IP address of the computer where the server is running, and select the TCP protocol (and sometimes TCP/UDP). After saving the settings and rebooting the router, the server will be accessible by your public IP address.
Remember that a public IP is a unique address associated with your Internet connection, and sharing it with strangers can be a security risk. You should only share this address with trusted friends!
The server console window displays all player activity. This includes connections, disconnections, command usage and system messages. It is also recommended to make regular backups of the world folder, especially if the game is played in survival mode and significant progress has been made.
To avoid potential open access threats, you can set up a whitelist by activating it in the server.properties file or through the console with the /whitelist on command, and then manually add only those players you trust. This will restrict access to only approved users and increase server security.
Videos
Added by


![NeoForge Installer [Minecraft 1.21.1, 1.20.6 - 1.20.1]](https://i2.modland.net/i/66c5cbeb7e5ee/neoforge_modland.jpg)
![Timeless and Classics Zero (TaCZ) [Minecraft 1.20.1, 1.19.2, 1.18.2]](https://i2.modland.net/i/669683678b42d/description_0ac47139-8e79-4b76-8a0c-d79bcb9039df_modland.jpg)
![Armor Durability HUD [Minecraft 1.21.4, 1.21.3, 1.21.2, 1.21.1, 1.21]](https://i2.modland.net/i/674bc2c2c404b/190618141923060623_modland.jpg)
![[1.5] THE DROPPER](https://li1.modland.net/minecraft/maps/thumbnail/th_ModLandNet_1.jpg)

_modland.jpg)
_modland.jpg)